DIY Houseplant Soil Recipe
Houseplant Soil Mix Recipe Menu
Quickly navigate this page to find any topic without getting a sore finger
Why Make Your Own Soil Mix
Aside from the cost savings, creating your own houseplant soil mix has several advantages over using commercial premixed options. One major benefit is having control over the quality and cleanliness of the soil. Premixed commercial soils can sometimes contain pests, eggs or weed seeds, introducing potential issues to your plants.
Although buying premixed houseplant soil is tempting, by making your own soil mix, you can ensure that the substrate is sterile and free from these threats, thus providing a healthier environment for your houseplants.
Creating your own multipurpose houseplant soil mix also allows you to tailor the soil to meet the specific needs of your plants. This means you can customize the soil composition, ensuring the right balance of nutrients and moisture retention for optimal plant health. This approach not only guarantees higher quality but also results in significant cost savings, making it a practical and beneficial choice for plant enthusiasts.
DIY Houseplant Soil vs Commercial Soil Mixes
Commercial premixed soils can sometimes harbour live pests, dormant eggs or weed seeds, which can introduce unwanted problems to your plants. Pests can quickly spread across your whole houseplant collection, becoming a costly and time-consuming issue to resolve. By creating your own mix, you can ensure that the soil is sterile and free of these potential threats, providing a healthier environment for your houseplants.
Although it may seem expensive at first, crafting your own soil mix can be much more cost-effective in the long run. While the initial purchase of individual ingredients might seem higher, you can often make large batches of soil, and over time, this can lead to substantial savings. If you have a large collection of houseplants or plans to propagate and expand your collection, making your own soil can be the only cost-effective option. Another bonus when comparing DIY houseplant soil to shop bought soil is that you can tailor your mix. This allows you to get the ratio just right to meet individual species plant care needs, without the one-size-fits-all approach often seen with premixed store bought soils.
How To Sterilize Houseplant Soil To Kill Pests
Sterilizing houseplant soil mix ingredients can help prevent introducing pests and diseases to your plants, especially if you're not sure how trustworthy the source is. For this recipe, you can sterilize the worm castings, or the compost substitute.
How To Sterilize Houseplant Soil: To sterilize indoor soil mix ingredients, spread the substrate on a baking sheet and bake them in an oven at 180 °F (82 °C) for 30 minutes. This process effectively kills any harmful organisms without degrading the houseplant soil quality. Ensure the soil cools completely before using it to pot plants.
Soil Mix Ingredients Not Suitable For Sterilizing: When it comes to sterilizing houseplant soil ingredients, there are a few that you should avoid subjecting to heat treatment:
Perlite: This volcanic glass can expand and even release harmful particles if heated, which can be dangerous.
Coco Coir: While it's generally safe to use, it may dry out excessively when heated and lose some of its moisture-retaining properties.
Compost With Mixed Ingredients: Sterilizing organic matter such as compost is largely okay, but always ensure any soil component that shouldn't be heated, like perlite, is kept separate during the sterilization process. If using a commercial mix with other ingredients, remove them before sterilization.
Worm Castings: You can sterilize castings if you want, but heat will kill the beneficial organisms within the worm castings, which plants love. Part of why we use worm castings is because of the high microbial activity, sterilizing it kills the organisms and prevents the castings from providing those additional benefits to the plant.
Worm Castings vs Compost — Why Use Worm Castings
When it comes to creating a multipurpose houseplant soil mix, the choice of organic matter is crucial. While both worm castings and compost offer their own benefits, worm castings are often considered superior for a number of compelling reasons. At The Houseplant Shop, we always use worm castings, avoiding compost at all costs. Here's why:
Worm Castings Nutrient Content and Availability:
Worm castings are exceptionally rich in nutrients, containing higher concentrations of nitrogen, phosphorus, potassium, and trace minerals compared to traditional compost. These nutrients are also in a readily available form that plants can absorb immediately.
High Microbial Activity In Worm Castings:
Worm castings are teeming with beneficial microorganisms that aid in breaking down organic matter, suppressing soil-borne diseases, and releasing nutrients slowly over time. This not only enhances soil fertility but also improves soil structure and aeration. We don't recommend sterilizing worm castings as this can kill the microbial activity that plants love.
Worm Castings Have Better Moisture Retention:
Worm castings have a good capacity for retaining moisture whilst still providing good drainage. The humus content in worm castings helps soil hold moisture without becoming waterlogged, ensuring that plants receive an even supply of water without increasing the chances of root rot.
Worm Castings Superior Odour and Texture:
Worm castings have a finer texture and lack the strong odour that compost can sometimes have. Their smooth consistency allows them to integrate well with other soil components like coco coir and perlite.
Worm Castings Provide Enhanced Plant Growth:
Studies have shown that plants grown in soil enriched with worm castings often exhibit faster growth, increased yields, and greater resilience against pests and diseases compared to those grown in compost-amended soils. This makes worm castings a superior choice for ensuring your houseplants thrive.
Worm Castings Are More Environmentally Friendly Than Compost:
Worm castings are an eco-friendly alternative to compost due to the sustainable process and lower carbon footprint. Castings are produced through vermiculture, where worms process organic waste. Additionally, vermiculture can recycle kitchen scraps and agricultural waste, reducing landfill, using less energy and generating minimal greenhouse gases like methane.
In summary, while compost is a valuable addition to any houseplant soil recipe, worm castings offer distinct advantages. Occasionally, you may find a live worm, however, they don't hurt your plant roots and actually help the plant access nutrients by breaking down rotting organic matter within the soil. Overall, worm castings have a superior nutrient profile, higher microbial activity levels, better moisture retention, and more pleasant handling qualities.
The Best Soil Mix For Indoor Plants Without Tailoring It To Individual Species
Creating the perfect soil mix for your indoor plants can be a game-changer in ensuring their healthy growth and vitality. A balanced blend of coco coir, perlite, and worm castings stands out as one of the best all-purpose soil mixes suitable for a wide variety of houseplants. Here's why this combination works so well.
Soil Mix Ingredient Profile: Coco Coir
Coco coir is a sustainable and eco-friendly alternative to peat moss. It retains moisture exceptionally well, ensuring that your plants have access to water for longer periods. Additionally, coco coir provides excellent aeration, which is crucial for the roots to breathe and grow healthily. Its neutral pH also makes it suitable for most houseplants.
Soil Mix Ingredient Profile: Perlite
Perlite is a lightweight volcanic rock that significantly enhances soil aeration and drainage. By incorporating perlite into your soil mix, you can prevent waterlogging, which can lead to root rot—a common issue in indoor gardening. The improved drainage ensures that the roots remain healthy and oxygenated, promoting robust growth. We highly recommend using perlite in soil mixes, as studies have shown that perlite helps to prevent the anaerobic conditions that promote root rot. In our experience, plants potted up in perlite rich mixes have fewer incidences of root rot, even when overwatered, so we recommend using it in all soil mixes to promote good root health and soil aeration.
Soil Mix Ingredient Profile: Worm Castings
Worm castings are an organic powerhouse, rich in essential nutrients and beneficial microorganisms. They provide a slow-release source of nutrients, which helps in maintaining long-term soil fertility. Worm castings also enhance the soil structure, making it easier for roots to penetrate and absorb nutrients effectively.
The Best Houseplant Soil Mix Recipe
Our soil recipe is incredibly versatile and suitable for a wide range of houseplants. The combination offers a balanced environment that caters to the needs of different plant species, providing adequate moisture retention, excellent drainage, and rich nutrition. Check out our Aroid soil mix or our Cactus soil mix for more tailored soil recipes to more demanding species.
How To Make a Houseplant Soil Mix
Houseplant Soil Recipe Ingredients:
2 litres of coco coir
2 litres of perlite
1 litre of worm castings, or compost
Step-by-Step Instructions:
Gather Your Soil Mix Ingredients
Before you start mixing, make sure you have all the necessary ingredients on hand. If you don't trust the source of your soil components, you can sterilize the ingredients to ensure that there's no pest eggs or unwanted guests. Here's a brief overview of each component:
Coco Coir: A sustainable and eco-friendly alternative to peat moss, coco coir retains moisture while allowing for good aeration.
Worm Castings or Compost: Provides essential nutrients to the plants. Make sure to use high-quality ingredients.
Perlite: A lightweight volcanic rock that improves soil aeration and drainage.
Measure the Soil Mix Ingredients
Measure out 1 litre of each ingredient. If you need a larger batch, simply scale up the measurements accordingly (e.g., 2 litres of each ingredient for a larger batch).
Combine the Soil Mix Ingredients
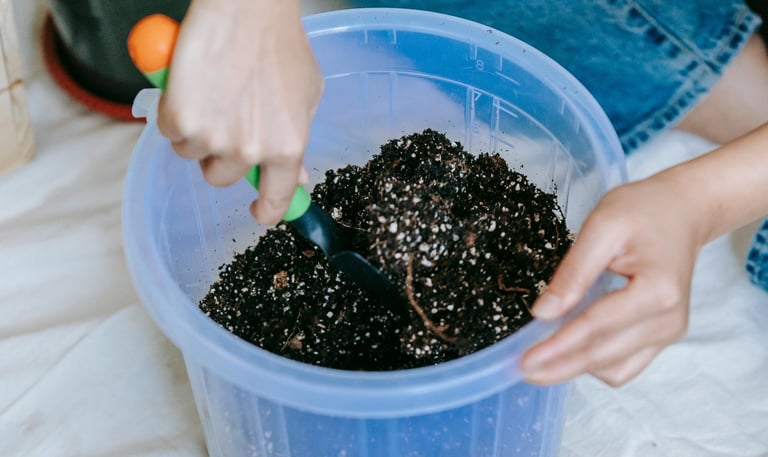
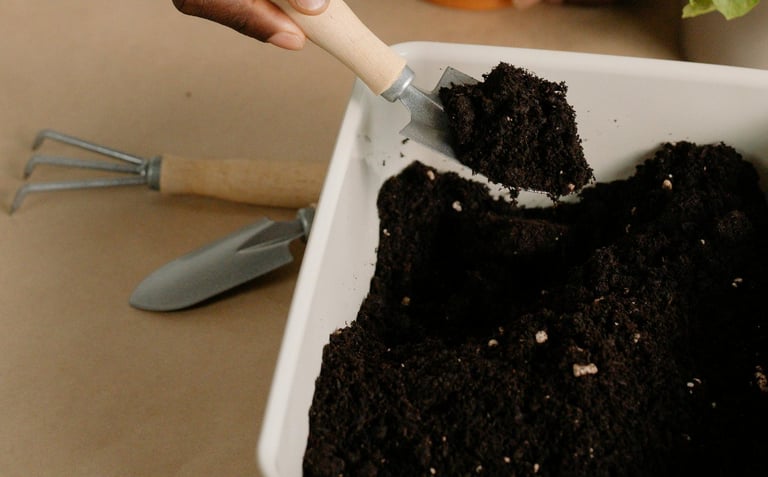
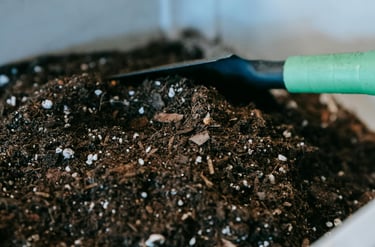
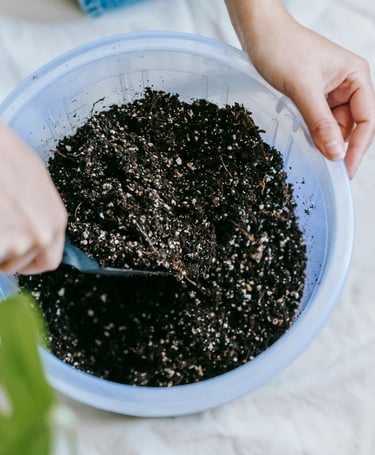
In a large container or mixing tub, combine the measured coco coir, compost, perlite, and orchid bark. Ensure you mix them thoroughly to create a uniform blend. It's important to achieve an even distribution of all components to ensure consistent soil quality.
Check and Adjust the pH Level
Houseplants generally prefer neutral soil with a pH of 7.0. If you've closely followed our recipe and your ingredients are from reputable sources, your pH should be perfect for most indoor plants, however, check our plant care pages for the pH for each species. If you're uncertain, use a pH meter to test your soil mix. Where adjustments are required, adjust the pH by adding agricultural lime to raise the pH or sulphur to lower it. Follow the manufacturer's instructions for the correct amounts of each pH amendment.
Moisten the Soil Mix
Lightly moisten the soil mix with water. The goal is to achieve a damp consistency without making the soil soggy. Proper moisture helps the components bond together and prepares the soil for planting. When repotting high value plants, we love to add a seaweed biofertilizer to help reduce transplant stress.
Store or Use the Mix
If you're not using the soil mix immediately, store it in a sealed container to keep it fresh and ready for future use. When you're ready to plant, fill your pots with the DIY houseplant soil mix, and plant as usual!
Additional Tips:
Sterilize Ingredients: To avoid introducing pests or pathogens, consider sterilizing your ingredients.
Use Perlite To Reduce The Chances Of Root Rot: Perlite helps to reduce the chances of root rot by increasing aeration and reducing waterlogging. We've found that plants potted up in soil mixes that include perlite have fewer incidents of disease, and plants have fewer chances of root rot, even when overwatered.
Customize for Species: You can adjust the proportions or add other components based on the specific needs of different houseplant species. For example, adding more orchid bark for epiphytic species like Monsteras or more coco coir for moisture-loving species like Philodendrons.
Monitor and Adjust: Keep an eye on your plants and the soil's performance over time. Make adjustments to the mix as needed to suit your specific growing conditions and plant responses. If your plant doesn't stay moist, add more coco coir. If your soil is staying too wet, try adding more perlite or orchid bark.

Tailoring Your Houseplant Soil Mix Recipe to Meet Different Plant Care Needs
Not all houseplants come from the same place in the wild, therefore, some have different soil mix requirements. Here are some individual indoor plant species and their specific soil needs that might differ from our DIY houseplant soil mix recipe:
Succulents and Cacti
Recipe Adjustment: Increase the amount of perlite or add coarse sand to the mix. See our cactus soil mix recipe for a few options.
Reason: Succulents and cacti require excellent drainage to prevent root rot. The addition of more perlite or coarse sand improves aeration and ensures the soil dries out quickly between watering.
Orchids
Recipe Adjustment: Add more orchid bark to the mix.
Reason: Orchids thrive in a highly aerated and well-draining medium. Adding more orchid bark caters to their epiphytic nature, providing the necessary support for their aerial roots.
Ferns
Recipe Adjustment: Increase the amount of coco coir and add a little sphagnum moss.
Reason: Ferns prefer consistently moist soil with good water retention. Coco coir and moss help maintain the necessary moisture levels for these humidity-loving plants without using peat.
Monstera and Philodendrons
Recipe Adjustment: Add more chunky airy components, like orchid bark and pumice. More organic matter, as they are feed heavy. See our Aroid soil mix recipe for a few options.
Reason: These tropical plants benefit from a chunky aerated soil which allows their root systems to thrive without root rot. They also need lots of food. This combination supports their robust growth and large, fenestrated leaves.
African Violets
Recipe Adjustment: Increase the proportion of coco coir and add vermiculite.
Reason: African Violets require a light and airy soil mix that retains moisture without becoming waterlogged. Vermiculite helps improve moisture retention while maintaining aeration.
Calatheas
Recipe Adjustment: Add more perlite and some charcoal.
Reason: Calatheas prefer well-draining soil that prevents soggy conditions. Charcoal helps to filter impurities and keeps the soil fresh, while perlite enhances drainage.
Spider Plants
Recipe Adjustment: Add more perlite and a small amount of orchid bark. For a more tailored soil recipe, check our Spider plant care guide.
Reason: Spider plants thrive in well-draining soil. Increasing the perlite and adding orchid bark ensures excellent drainage, preventing root rot and promoting healthy growth.
Pothos (Scindapsus or Epipremnum)
Recipe Adjustment: Incorporate extra coco coir and some orchid bark. See our Epipremnum and Scindapsus plant care guides for more detailed soil recipes.
Reason: Pothos prefer a soil mix that retains moisture yet drains well. Coco coir provides moisture retention, while orchid bark helps maintain soil aeration and drainage.
Snake Plants (Sansevieria, now reclassified as Dracaena)
Recipe Adjustment: Increase the amount of coarse sand and add a bit of cactus soil.
Reason: Snake plants require soil with exceptional drainage. Coarse sand and cactus soil create a gritty mix that allows water to drain quickly, preventing overwatering.
Peace Lilies
Recipe Adjustment: Add more coco coir, along with a small amount of orchid bark. For a more detailed soil recipe, check our Peace Lily plant care guide.
Reason: Peace lilies thrive in consistently moist soil. Coco coir retains moisture, while orchid bark ensures aeration, preventing the soil from becoming too compact.
Ficus & Fiddle Leaf Figs
Recipe Adjustment: Use more perlite and add some orchid bark.
Reason: Fiddle leaf figs need well-draining soil with good aeration. Perlite and bark fines provide the necessary drainage and prevent waterlogged roots.
Alocasias
Recipe Adjustment: Incorporate more orchid bark and a bit of sphagnum moss.
Reason: Alocasias prefer well-draining soil with high humidity. Orchid bark and sphagnum moss create an airy mix that retains moisture without becoming soggy.
How To Store Soil Mixes Long Term
Properly storing soil mixes long-term is essential to maintaining their quality and ensuring that they remain free from pests, pathogens, and nutrient loss. By following a few key practices, you can keep your soil mixes in optimal condition for future use.
Airtight plastic containers, heavy-duty plastic bags, or metal bins with tight-fitting lids are excellent choices. These containers prevent moisture from entering and keep pests, such as insects and rodents, from contaminating the soil. Ensure that the containers are clean and dry before storing any soil mixes to avoid introducing any potential contaminants.
The storage location is also crucial for maintaining the integrity of your soil mix. Store the containers in a cool, dry place away from direct sunlight. Excessive heat and light can degrade the soil's organic matter and reduce its effectiveness. A garage or garden shed with stable temperatures and low humidity levels is ideal. Avoid areas prone to temperature fluctuations or high humidity, as these conditions can lead to mould growth and nutrient leaching.
To further protect your stored soil from pests, consider adding a layer of diatomaceous earth to the top of the soil in the container. This natural substance helps deter insects without harming your plants. Additionally, periodically check the stored soil for any signs of pests or mould. If you notice any issues, address them promptly by removing the affected soil and re-evaluating your storage conditions.

Frequently Asked Questions About Houseplant Soil
Why is my soil mix not retaining enough moisture?
Solution: Ensure your mix includes adequate coco coir, which retains moisture well. If the issue persists, consider adding a small amount of peat moss to further enhance moisture retention.
My soil mix is retaining too much water and causing root rot. What should I do?
Solution: Increase the proportion of perlite or add coarse sand to improve drainage. Ensuring your pot has proper drainage holes can help prevent waterlogging. Use a size 4-6 wood bit to drill extra holes in plastic pots. Studies have shown that perlite's porous structure helps to improve drainage and aeration, which helps to prevent the anaerobic conditions that promote root rot. We've found that plants potted up in soil mixes that include perlite have fewer incidents of disease, and plants have fewer chances of root rot, even when overwatered.
How can I prevent pests in my DIY soil mix?
Solution: Sterilize your soil components before mixing. This will help eliminate any pest eggs or pathogens.
What should I do if my soil mix becomes compacted?
Solution: To alleviate compaction, increase the amount of perlite or add orchid bark to your mix. These components help maintain aeration and prevent the soil from becoming too dense.
How can I enhance the nutrient content of my DIY soil mix?
Solution: Incorporate high-quality worm castings, which are rich in essential nutrients and beneficial microorganisms. This will provide a steady supply of nutrients to your plants.
How often should I replace or refresh the soil in my houseplants?
Solution: Typically, you should refresh the soil mix every 1 to 2 years. This helps replenish nutrients and prevent the build-up of salts and other residues.
Can I use this soil mix for seedlings and young plants?
Solution: Yes, this multipurpose soil mix is suitable for seedlings and young plants. However, you may want to sift out larger particles for a finer texture that is gentler on delicate roots.
DIY Houseplant Soil Mix Recipe Summary
Creating your own houseplant soil mix is an essential step in ensuring the health and vitality of your indoor garden. By using a balanced blend of coco coir, perlite, and worm castings, you can provide a multipurpose growing medium that meets the needs of a variety of houseplants. Our DIY houseplant soil mix offers excellent moisture retention, drainage, and nutrient availability, making it suitable for everything from succulents and cacti to ferns and tropical plants, making it one of the best soil mixes for houseplants.
Tailoring your soil mix based on the specific requirements of different plant species can further enhance their growth. Whether you are adding more perlite for better drainage or incorporating sphagnum moss for improved moisture retention, customizing your soil can make a significant difference.
By choosing to make your own DIY soil mixes, you also gain control over the quality and cleanliness of your growing medium, reducing the risk of pests and diseases often seen in commercial soil mixes. Additionally, the use of worm castings over traditional compost provides superior nutrients and environmental benefits, supporting sustainable gardening practices.
The Science Behind Houseplant Soil
Creating a DIY houseplant soil mix involves understanding the physical and chemical properties of soil components to ensure they meet the needs of your houseplants. The goal is to create a growing medium that provides adequate drainage, aeration, moisture retention, and nutrient availability. Here's a summary of the scientific principles behind common soil mix ingredients and their functions:
Key Components and Their Roles
Base Materials:
Peat Moss: Peat moss is widely used for its excellent water retention properties. It helps maintain consistent moisture levels in the soil, ensuring that the plant roots have access to water. Additionally, peat moss is slightly acidic, which can help balance the pH of the soil mix.
Coconut Coir: An eco-friendly alternative to peat moss, coconut coir retains moisture while providing better aeration and drainage. It is also neutral in pH, making it suitable for a wide range of plants.
Aeration and Drainage Enhancers:
Perlite: This volcanic glass is heated to expand and create a lightweight, porous material that improves soil aeration and drainage. It prevents soil compaction and ensures that plant roots receive adequate oxygen.
Vermiculite: Vermiculite is a mineral that expands when heated, creating a lightweight, absorbent material. It helps retain moisture and nutrients in the soil while improving aeration.
Organic Matter:
Compost: Rich in nutrients, compost provides essential minerals and organic matter that support plant growth. It also enhances the soil's structure, improving its ability to retain moisture and nutrients.
Worm Castings: These are a natural fertilizer produced by earthworms. Worm castings are rich in nutrients and beneficial microorganisms that promote healthy plant growth. They improve soil fertility and help plants resist diseases.
Nutrient Additives:
Slow-Release Fertilizers: These fertilizers release nutrients gradually over time, providing a steady supply of essential elements like nitrogen, phosphorus, and potassium. This supports continuous plant growth and reduces the need for frequent fertilization.
Scientific Principles
Drainage and Aeration: Proper drainage and aeration are crucial for preventing root rot and ensuring healthy root development. Components like perlite and vermiculite create air pockets in the soil, allowing roots to breathe and access oxygen. This is essential for root respiration and nutrient uptake.
Moisture Retention: Maintaining adequate moisture levels in the soil is vital for plant health. Peat moss and coconut coir are excellent at retaining moisture without becoming waterlogged. This ensures that plants receive a consistent supply of water, reducing stress and promoting growth.
Nutrient Availability: The availability of nutrients in the soil is influenced by its composition and pH. Organic matter like compost and worm castings enrich the soil with essential nutrients and improve its structure. Slow-release fertilizers ensure that plants have access to a continuous supply of nutrients over time.
Soil pH: The pH level of the soil affects nutrient availability and microbial activity. Most houseplants prefer slightly acidic to neutral soil (pH 6-7). Adjusting the soil mix with appropriate components can help achieve the desired pH level, ensuring optimal nutrient uptake.
Microbial Activity: Beneficial microorganisms in the soil play a vital role in decomposing organic matter, cycling nutrients, and promoting plant health. Adding compost or worm castings introduces these beneficial microbes, enhancing the soil's biological activity and supporting plant growth.
Soil Texture and Structure
Soil Texture: The texture of the soil refers to the relative proportions of sand, silt, and clay particles. These particles influence the soil's ability to retain moisture and nutrients, as well as its drainage and aeration properties. For houseplants, a well-balanced texture ensures that the roots can access water and air efficiently.
Soil Structure: Soil structure describes the arrangement of soil particles into aggregates or clumps. Good soil structure enhances root penetration and water movement. Organic matter, such as compost, improves soil structure by binding soil particles together, creating a porous medium that promotes healthy root growth.
Cation Exchange Capacity (CEC)
Cation Exchange Capacity (CEC) is a measure of the soil's ability to hold and exchange positively charged ions (cations), such as potassium (K+), calcium (Ca2+), and magnesium (Mg2+). A higher CEC indicates that the soil can retain more nutrients and make them available to plants. Organic matter, such as compost and worm castings, can increase the soil's CEC, enhancing nutrient availability.
Rhizosphere and Root Exudates
Rhizosphere: The rhizosphere is the narrow region of soil directly influenced by root secretions and associated soil microorganisms. This zone is a hotbed of biological activity where roots interact with beneficial microbes, such as mycorrhizal fungi and nitrogen-fixing bacteria, which enhance nutrient uptake and plant health.
Root Exudates: Roots secrete a variety of organic compounds, known as root exudates, which include sugars, amino acids, and organic acids. These exudates attract beneficial microbes and stimulate their activity, promoting nutrient cycling and disease suppression. Incorporating organic matter into the soil encourages the production of root exudates and supports a healthy rhizosphere.
Microbial Diversity
A diverse microbial community in the soil is essential for maintaining soil health and fertility. Beneficial bacteria, fungi, and other microorganisms decompose organic matter, release nutrients, and protect plants from pathogens. Adding compost, biochar, or other organic amendments can boost microbial diversity, creating a more resilient soil ecosystem.
Soil pH and Nutrient Availability
Soil pH affects the availability of nutrients to plants. Most houseplants prefer a slightly acidic to neutral pH (6-7), which is optimal for nutrient uptake. Adjusting the soil pH with lime (to raise pH) or sulphur (to lower pH) can ensure that plants receive the nutrients they need. Regularly testing soil pH and making necessary adjustments can prevent nutrient deficiencies and promote healthy growth.
Use of Biochar
Biochar: Biochar is a form of charcoal that is produced by heating organic matter in the absence of oxygen (pyrolysis). It has a porous structure that enhances soil aeration and water retention. Biochar also improves soil fertility by increasing CEC and providing a habitat for beneficial microbes. Incorporating biochar into houseplant soil mixes can boost soil health and support sustainable plant growth.
Soil Amendments and Fertilizers
Organic Amendments: Adding organic amendments, such as compost, worm castings, and aged manure, enriches the soil with nutrients and organic matter. These amendments improve soil structure, enhance microbial activity, and provide a slow-release source of nutrients.
Biochar: Biochar is a carbon-rich product obtained from the pyrolysis of organic materials. It improves soil structure, water retention, and nutrient-holding capacity. Biochar also supports beneficial microbial activity, promoting overall soil health.
Gypsum: Gypsum (calcium sulfate) can improve soil structure and drainage by reducing soil compaction. It also supplies calcium and sulphur, essential nutrients for plant growth.
Soil pH and Nutrient Availability
Soil pH: The pH of the soil affects the availability of nutrients to plants. Most houseplants thrive in slightly acidic to neutral soil (pH 6-7). Adjusting the soil pH can help optimize nutrient uptake:
Acidic Soil (Low pH): Increases the availability of nutrients like iron, manganese, and boron but can limit the availability of phosphorus and molybdenum.
Alkaline Soil (High pH): Enhances the availability of calcium and magnesium but can lead to deficiencies in iron, manganese, and zinc.
By understanding the science behind DIY houseplant soil mixes, gardeners can create customized growing media that cater to the specific needs of their plants. This ensures that houseplants receive the right balance of moisture, nutrients, and aeration, promoting healthy and vigorous growth.
Edited & Fact Checked By: The Houseplant Shop
Article Published: 28th November 2024

About The Houseplant Shop:
Independent Houseplant Nursery
Horticultural Specialists
Managing Over 250 Houseplant Species Onsite
Over 15 Years Of Experience With Horticulture
As head of horticulture, Sarah manages the care and propagation of over 250 plant species at a commercial houseplant nursery. With over 15 years of experience in horticulture, specializing in houseplants, Sarah has extensive expertise in plant biology, soil science, and integrated pest management. She continually reviews and integrates the latest research into her plant care guides. Dedicated to educating others, Sarah has spent years diagnosing houseplant care issues and sharing her real-world experience. Her commitment to scientific accuracy and helping people diagnose plant health issues has established her as a trusted authority and expert in the field.
The Houseplant Shop is a dedicated houseplant nursery, growing all of their own stock from their botanical library of over 250 houseplant species. The nursery staff are horticultural experts who have dedicated their lives to cultivating and nurturing over 250 different species of houseplants, focusing on Aroids, tropical plants, and NOID collectables. All their plants are grown in house in Britain to be more environmentally friendly. The nursery is proud to have been featured by the Royal Horticultural Society (RHS) as a 100% peat free nursery.
Recommended Further Reading:
People also looked at: Cactus Soil Recipe, Aroid Soil Recipe, Species Specific Plant Care With Tailored Soil Recipes, Watering, and Fertilizer.
How We Reviewed This Article:
Our horticultural experts continually monitor the houseplant space, and we update our articles when new information becomes available. We are committed to providing current and reliable information. If you have some information that you think would be helpful in this article, we'd love to hear from you. Our team works hard to revise articles for factual accuracy, and we regularly update our pages with new information, techniques, tips, images, trade secrets, and real world experience from the team here at the houseplant nursery. You can find a list of the article updates below.
Written By: Sarah Brooks, Head of Horticulture
Article Received: 26th November 2024
Copyright: The Houseplant Shop (https://thehouseplant.shop)
The use, distribution, or reproduction is permitted, provided the original copyright owner is credited and that the original publication on this website is cited with a direct link to the article, only with these terms. Any other use is not permitted.
List of Article Updates:
20th December 2024: Minor UI updates
22nd December 2024: Formatting
Author Bio:
Author: Sarah Brooks
Head of Horticulture at The Houseplant Shop

