The Ultimate Guide: Self Watering Moss Poles
DIY Moss Pole For Plants Menu
Quickly navigate this page to find any topic without getting a sore finger
Why Use a Self Watering Moss Pole
Self-watering moss poles are a game-changer for climbing plants, ensuring they reach maturity without constant attention. If you're fed up with trying to keep your moss pole moist, a self watering moss pole may be the perfect solution!
What makes self-watering moss poles special is their ability to mimic the natural environment of climbing plants, providing consistent moisture, nutrition, and support at the active growth nodes, much like the natural snags found on tree trunks in the wild. This allows plants to grow taller and sturdier, encouraging the development of mature, fenestrated leaves by allowing aerial roots to establish within the moist moss pole, just as they would in their natural habitat.
Here’s the catch – imagine your indoor jungle flourishing effortlessly with minimal maintenance. No more constant checking and watering; self-watering moss poles take care of that, giving you more time to enjoy the beauty of your plants. Intrigued? Let's delve into how these innovative supports can transform your plant care routine.
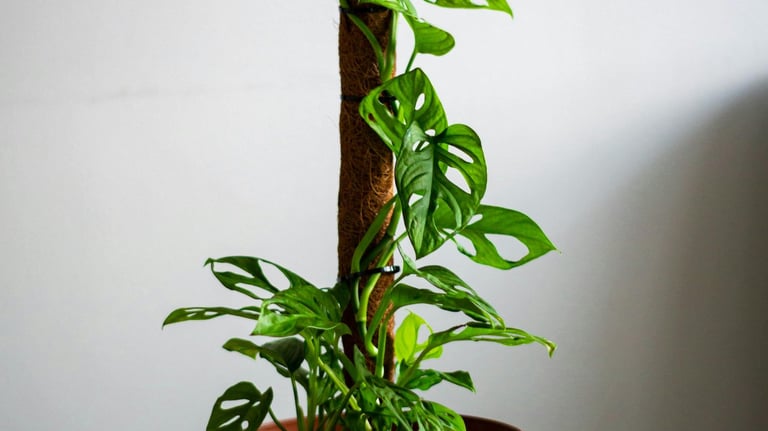
Scindapsus Silvery Ann climbing a self watering moss pole
How Often To Water a Self Watering Moss Pole
Unlike traditional moss poles, these innovative tools minimize the need for frequent watering. The built-in water reservoir ensures a consistent supply of moisture, drastically reducing the maintenance required. But how often should you refill that reservoir to keep your plants thriving?
Typically, you’ll need to check and top up the water reservoir every 5 days to two weeks, depending on your reservoir size. This interval can vary based on the humidity levels in your home, the maturity of your plant, and the specific care needs of your plant species. The goal is to maintain a steady supply of moisture, ensuring that the pole stays damp enough to provide hydration through the aerial roots.
The consistent moisture helps activate growth nodes and allows aerial roots to absorb essential nutrients and water. This promotes the development of mature, fenestrated leaves and a robust secondary root system within the moist environment of the self watering pole.
By reducing the need for constant watering, these poles offer a perfect solution for keeping a moss pole moist. Intrigued? Dive into the world of self-watering moss poles and see the difference for yourself!
Sphagnum Moss being moistened
DIY Self Watering Moss Pole Guide With Pictures
How To Make a DIY Self Watering Moss Pole
Creating your own self-watering moss pole is not only cost-effective but allows for a custom fit, tailoring the height and width to your home’s space and your plants needs. At The Houseplant Shop, we have an impressive 1.5ft (ca. 46 cm) wide and 8ft (2.44 m) tall self watering moss pole for our prized highly variegated Golden Pothos, crafted from the exact materials listed below. DIY projects are typically cheaper than shop bought options and offer a personal touch. Imagine having a custom-fit, self-watering moss pole that not only supports your plants but also simplifies your care routine. By following this how-to-guide, you can create a low-maintenance self watering moss pole which stays moist and allows your plants to thrive.

Step 20: Testing the Weight: Place your moss pole into the pot and see if it stands up on its own. If it doesn't, it may be too heavy due to being waterlogged. In that case, leave the moss pole out for 3–7 days to allow the moss to dry out a little. When moistening the moss, it's easy to over-wet it, causing it to become waterlogged and heavy. We've found that it's best to let heavy poles dry out to reduce the weight. Once the moss has dried, insert the pole into the pot and check if it stands up with no issues. If your moss pole is still too heavy, give it more time to dry out before continuing. This process ensures your moss pole is stable and ready for use without causing any issues for your plants.
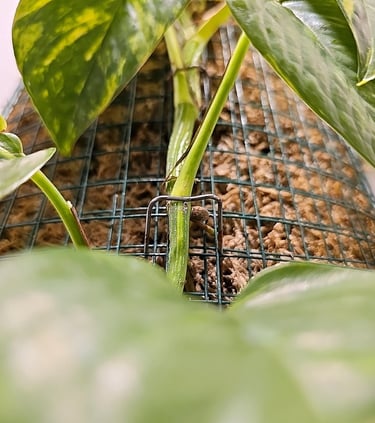
Step 21: Attaching The Plant: Fix your plant to the moss pole using moss pins, Velcro plant ties or string, ensuring it has good contact with the moss for aerial root growth. See the photo for more reference. Once the plant is attached, fill the self watering moss pole reservoir with water. When moistening your moss pole, use dechlorinated water that's been allowed to rise to room temperature, and fertilizer, as it helps to provide food to the roots closer to the active growth points, encouraging faster and more mature growth. This is a great tip to help get fenestrated plants to produce those iconic splits and holes. For more information on how to encourage mature growth in houseplants, check out our comprehensive fenestration guide.
DIY Self Watering Moss Pole Troubleshooting:
Self Watering Moss Pole Wire Has Torn: Sometimes DIY self watering moss poles can suffer from holes and broken bits of wire when there's too much pressure on the joins. Try removing some moss from the pole to reduce the strain on the chicken wire.
Self Watering Moss Pole Is Too Heavy To Stand Up: We've found that after making our poles, we sometimes have to wait up to a week to allow the moss to dry out enough that the weight doesn't cause issues with the pole failing to stand up. This is because when the sphagnum moss is moistened, sometimes, it can take up too much water, increasing the weight of the moss too much and causing the pole to list over when placed in plant pots. In our experience, when this happens, it's best to wait a week for the moss to dry out before trying to get it into a plant pot. Although you just could lean the pole up against a wall, it may still fall over whilst you aren't present, causing your plant to snap and causing lots of damage to foliage. No one wants to come in to soil all over their floor, and their prized climbing plant destroyed. For the safety of your plant, we recommend leaving it to dry out before use if the pole can't stand up without support. If you find that your pole won't stand up even when dry, you may need to try a bigger pot. For the pole we made in this guide, we used a 7.5 litre pot filled with heavy stones to provide some stability.
Self Watering Moss Pole Bends Over: There may not be enough moss in your pole. Try adding more moss to create more of a solid structure, however, be careful not to overfill the moss pole as this can weaken the wire and cause breakages along the joints. For larger moss poles, like our 8ft (2.44 m) one, we use a wooden stake attached to the back of the pole to help give it more structure.
Self Watering Moss Pole Won't Stay Moist: If you have increased how often you fill up your self watering moss pole reservoir, and you still can't keep your moss pole moist, try changing your jar for a slightly larger one, or making a bigger moss pole. Really mature plants with established aerial roots within the moss pole typically require lots of extra water. Think of your self watering moss pole as an extension of your plant's root ball — like plants that have become root bound, the moss pole may need extra water when it's too full of roots. If your moss pole won't stay moist, it may be time to make a bigger one to upgrade your aerial roots to a new home with more space. The additional sphagnum moss in the larger pole will help to hold more moisture, and you can design a pole with a larger or longer jar to reduce how often you have to fill up the water reservoir. In our experience, it's normal for some mature plants to require their jars to be refilled 1–3 times per week. Whilst you don't have to keep the moss pole constantly moist, in our experience, we've found that it will help to promote faster growth and plants will mature faster when provided with consistent moss pole hydration.
White Substance All Over Moss: This is a harmless natural effect of using plant food to fill the jar within your self watering moss pole. This is a collection of minerals and salts which build up when the water dries and can be removed by gently wiping it off with a damp cloth. Other than appearances, the white marks are nothing to worry about and can be left on the moss pole if they don't bother you.
Mould Growing On Self Watering Moss Pole: This can be a sign that your pole is too wet, and the plant isn't using that moisture yet. Try cutting back how regularly you fill the self watering moss pole water reservoir until the plant's roots have established into the moss. Don't forget to keep watering the root ball itself.
The Plant Pot Won't Stay Stable When The Moss Pole Is Inserted: This could be because the weight of the pole is too much for the weight of the pot to stabilise. For the 36-inch moss pole that we made in this guide, we used a 7.5 litre plant pot partially filled with heavy stones to provide stability. In our experience, it's always best to add some weight to the plant pots to help the moss pole stand up. This technique also has the added bonus of providing less soil space, allowing you to pot up plants into larger pots without worrying so much about root rot. The stones help to take up some empty soil space, giving plants fewer chances of root rot.
Step-By-Step Guide To Make Your Own Self Watering Moss Pole:
Step 1: Prepare: Choose a clean, dry area that can get wet—this process can be messy. Use a waterproof plastic sheet if necessary. We've made ours on a concrete floor that's easy to clean afterwards, as when working with sphagnum moss, it gets really messy really quickly! You will need a large area to make your own moss pole, so it can be helpful to do it on the floor so that you have enough space to work in, especially with larger self watering moss poles! Grab all the materials from the list above, and put them to one side of your workspace.
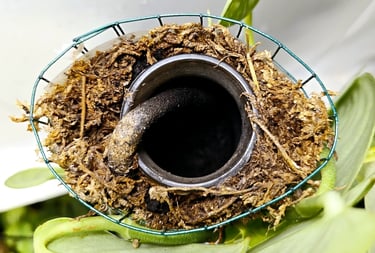

Materials You Will Need:
Sphagnum moss - (optional sterilization)
Sharp scissors or wire cutters
Waterproof sheet or flooring
Dechlorinated room temperature water with added plant food
60ml — 300ml glass jar, smaller than the diameter of your pole. We use herb or pesto jars for small poles, and pasta sauce jars for large poles.
Natural cotton rope
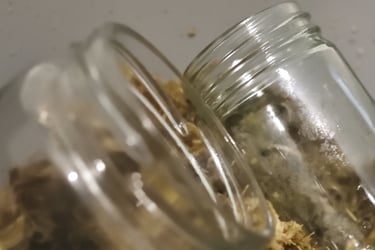

Step 7: Accessories: Roll the wire back out on the floor, ready to fill it up. Grab the moss, wooden stake, glass jar, rope, and scissors ready for the next steps.
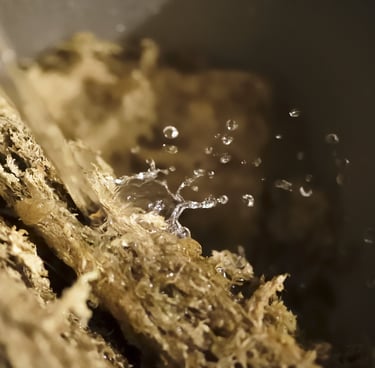
Step 2: Moisten The Moss: Soak sphagnum moss in water for 30 minutes, or until fully saturated. Drain and wring out excess moisture thoroughly.

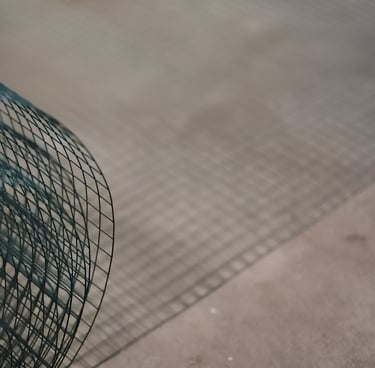

Step 3: Measure The Wire: Roll the chicken wire out on a flat surface and measure it with a tape measure. Go bigger than your current plant to allow for growth.
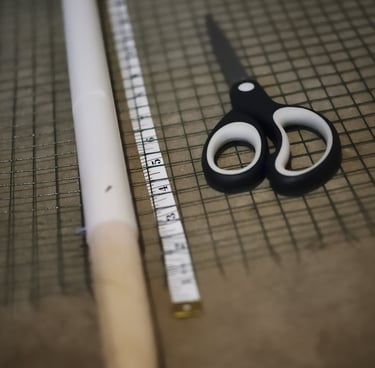

Step 8: Add Half The Moss: Add half the moss, then position the stake and the jar in the middle to help hide it when the pole is rolled up and finished.
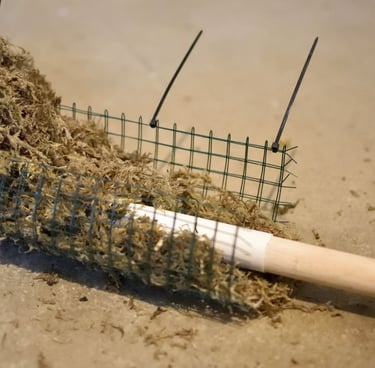

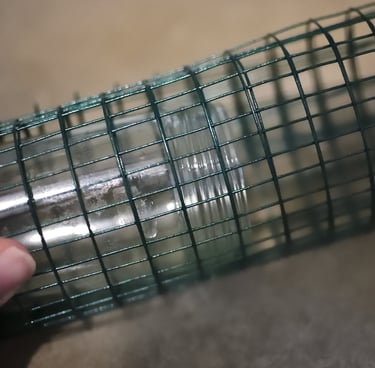

Step 6: Roll The Wire: Use the glass jar or a rolling pin to shape the chicken wire, don't worry if it's smaller than you want, this helps to give it structure & stability.
Step 9: Cut The Rope: Put the end of the rope into the bottom of the jar and then run it halfway down the pole and cut to size. Attach with cable ties if needed.
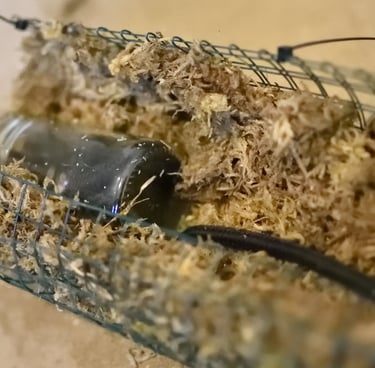

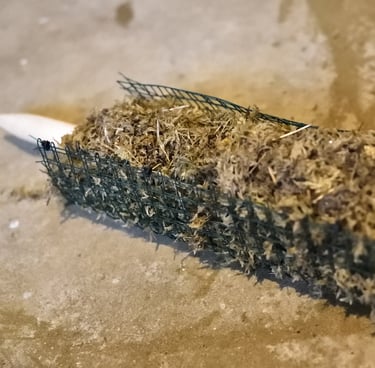

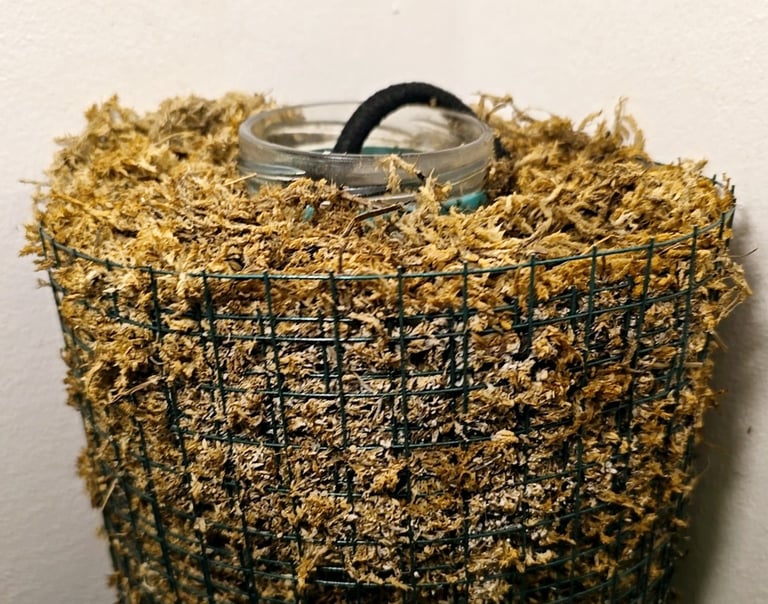
Step 10: Fill With Moss: Add the rest of the moss, making sure to bury the jar and the stake so that it isn't visible when rolled up.
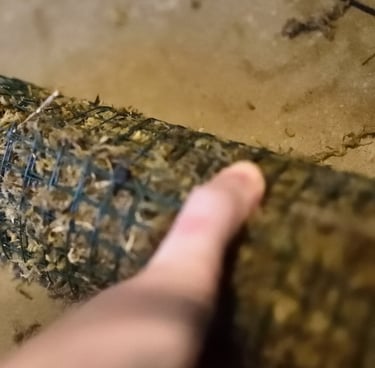

Step 11: Check Structural Integrity: Stand the moss pole up to check fill density, and add more moss as required to make it straight.
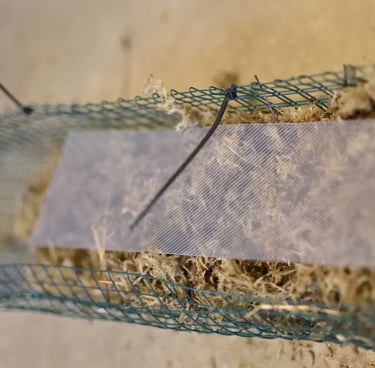

Step 12: Cut Acetate To Size: Cut the acetate sheets to at least half the width of the pole and enough to cover the whole length of the moss pole.


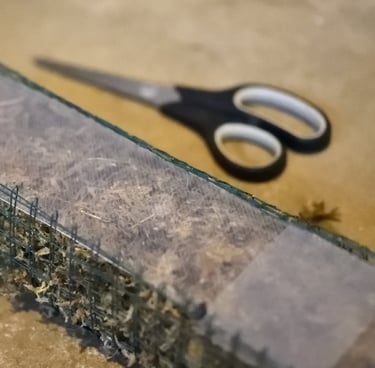

Step 13: Add Acetate: Place the sheets on the top of the sphagnum moss under where the chicken wire joint will be created. Make sure they overlap.
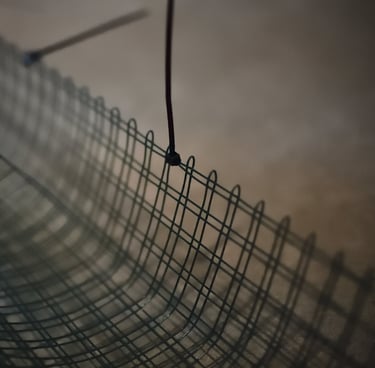

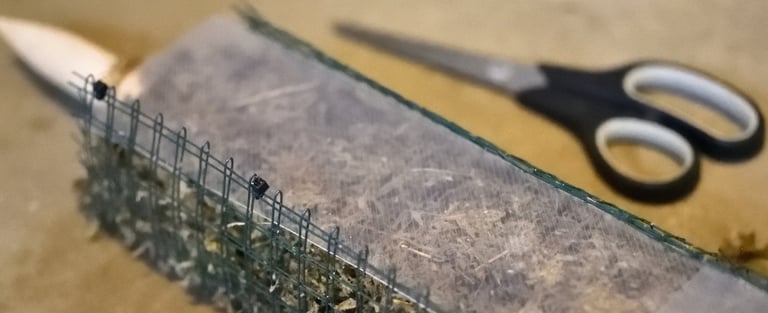
Step 5: Optional Fold: To add extra strength for larger poles, you can fold the chicken wire and cable tie every 3–5 inches along the folds for strength.
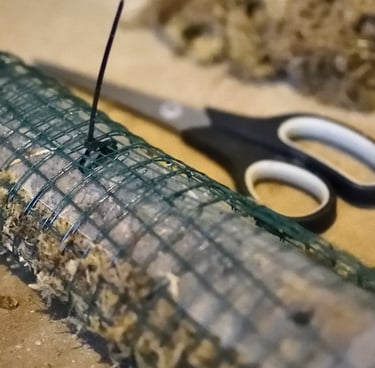

Step 14: Close The Wire: Use cable ties to pull the wire shut every 3–5 inches. Don't over tighten, & ensure structural stability when upright by testing regularly.
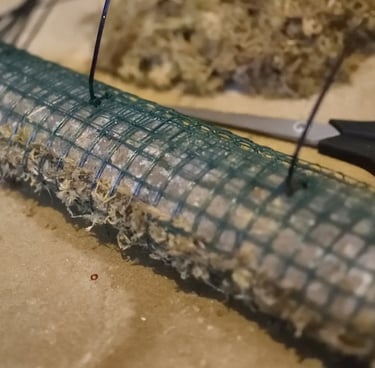

Step 15: Secure The Length: Finish zipping up the wire down the whole length of the self watering moss pole, then tighten them all once finished.
Step 16: Cut Cable Tie Ends: Remove the tails of the cable ties, being careful not to cut off the heads as this is what secures them.
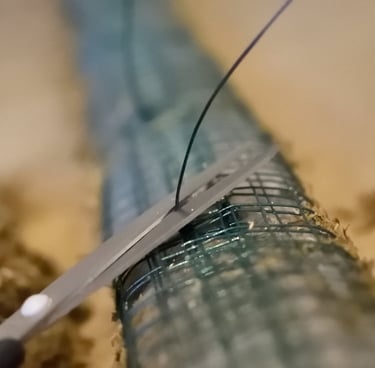

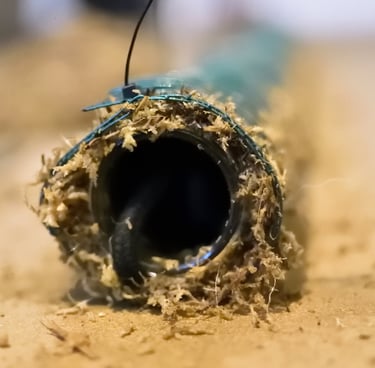

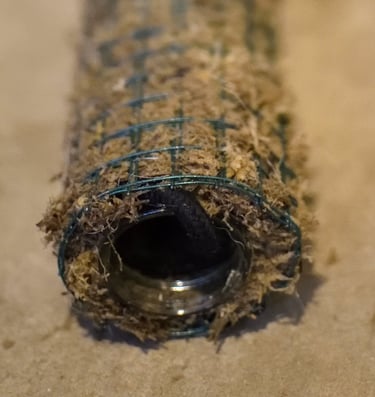
Step 17: Tidy The Top: Push the moss into the top of the pole, adding more where needed to cover the jar. Tidy it up by removing hanging bits and trimming.
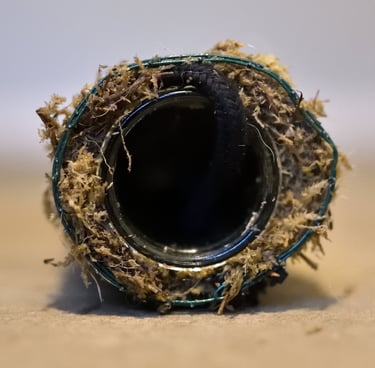

Step 18: Trim The Rope: Check for excess rope in the jar and trim so it still touches the bottom. This allows as much room for water as possible.
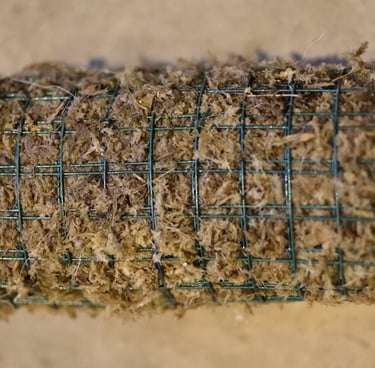

Step 19: Trim The Front: Check for any moss sticking out on the front and trim as needed. Check the shape of the pole and correct warped bits of wire.


Step 4: Cut The Wire: Use scissors to trim the wire. Cut along the straight edge. Trim off sharp bits of metal to avoid injuries when assembling it.
How To Extend Your Self Watering Moss Pole In The Future: If you want to extend your moss pole in the future, make a new section of pole that's 5 mm (0.2 inch) smaller than the original and remove roughly 6 inches (ca. 15 cm) of sphagnum from the top of your old pole. Next, tie a new bit of rope to the old rope to extend your self watering wick, then relocate the jar to the top of the new pole. Wiggle the new pole into the empty gap in your old pole and attach using cable ties.
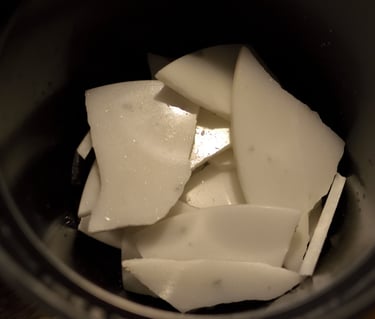

Moss Pole Size Guide: The pole we're making in this guide is 36 inches (0.91 m) long, with a circumference of 2.75 Inch (7 cm), however, you can make whatever size pole you like as long as your plant pot can support the weight. We've found that when making larger poles, we do sometimes have to pot up plants to support the weight of the pole, as plant pots can tip over when there's too much weight up top. We've found that our 36-inch-long poles need to be in a 7.5 litre pot to support the weight. It's important to note here that when we make larger moss poles, we fill the bottom 1/3rd of the plant pot up with heavy rocks as shown in the image to illustrate, as the weight gives the pot stability. We highly recommend that you add extra weight when making larger poles.
Central Support Poles For Extra Large Poles: We've found that adding a central support pole can help to give structure to larger poles, like our 8ft one. When designing our 8ft pole, we added a thick wooden stake down the back of it to help it stand up, and we added several layers of acetate to help give it strength. No one wants to come in to their prized climbing houseplant on the floor, surrounded by soil and broken stems!
Replicating the Wild With Self Watering Moss Poles
Self-watering moss poles more effectively mimic the natural environment of climbing plants compared to standard moss poles. In the wild, climbing plants rely on the consistent moisture and support provided by tree trunks. Self-watering moss poles replicate this by ensuring a constant supply of water, creating an ideal habitat for growth nodes and aerial roots. This continuous hydration promotes healthier, more vigorous plants, helping them develop a secondary root system within the pole, just as they would naturally on a tree trunk.

Self watering moss pole being assembled
How a Self Watering Moss Pole Works
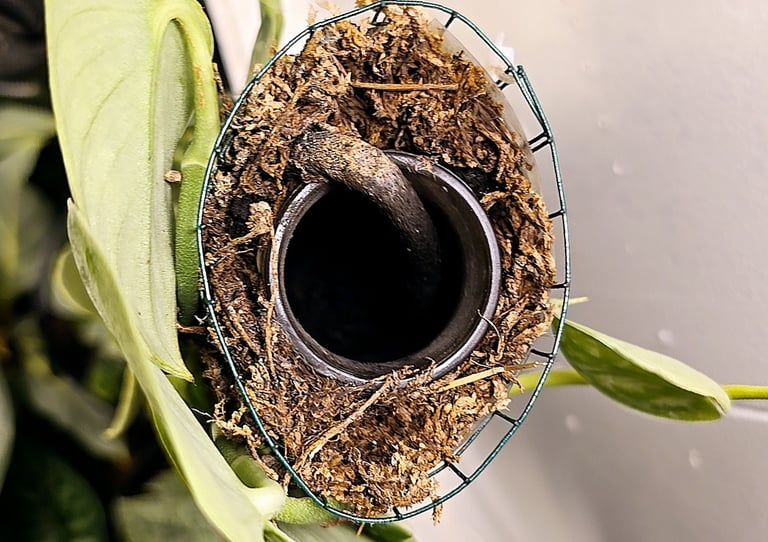
Gravity plays a crucial role in the functionality of self-watering moss poles. The principle is simple yet effective: water is drawn down a rope from the reservoir at the top of the pole, utilizing the force of gravity. The science behind the self watering moss pole is straightforward. As gravity pulls the water downward, it is gradually wicked through the rope, which then disperses the moisture evenly into the moss surrounding the pole. This process creates an optimal environment for climbing plants, as their aerial roots can directly access water and essential nutrients at the active growth points.
Our self watering moss pole design prevents overwatering issues, as the rope only extends halfway down the pole, stopping halfway down to the base of the pot. This clever self watering setup ensures that the bottom of the pot doesn't become waterlogged, thus avoiding root rot and other related problems. The remaining bottom of the pole is moistened by gravity without flooding the root ball with water, which is a common issue with most self watering moss poles.
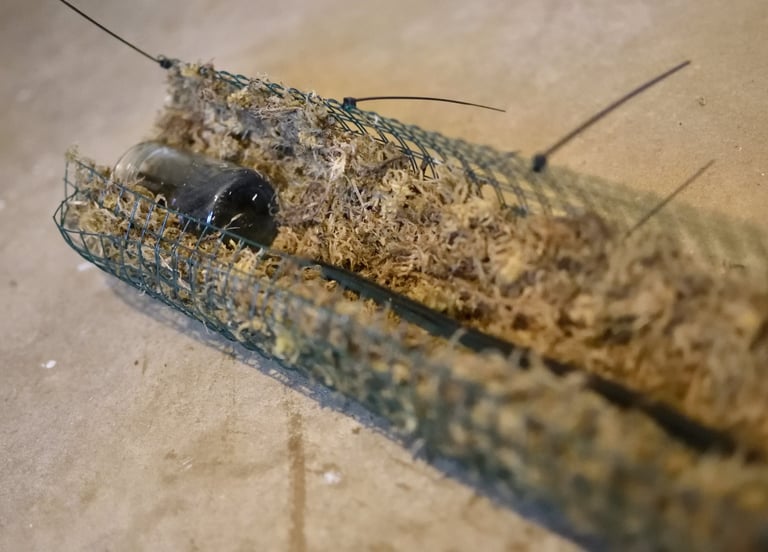

Illustration of how a self watering jar works with rope and gravity
How To Sterilize Sphagnum Moss
If you're uncertain about the quality of your sphagnum moss, you can sterilize it at home to ensure it's free from harmful elements. Pasteurization is a straightforward method that kills fungi, bacteria, pests, nematodes, and weed seeds, while preserving the moss's beneficial properties. This is crucial for maintaining the effectiveness of your self-watering moss poles.
How To Sterilize Sphagnum Moss:
Sterilizing Sphagnum Moss in the Oven: Heat the sphagnum moss to approximately 82 °C (180 °F) for around 30 minutes in a covered, oven-proof container. This process can be easily done in most household ovens, effectively eliminating most bacteria, fungi, and pests.
Sterilizing Sphagnum Moss on the Hob: Fill a large pan with enough water to cover the sphagnum moss and bring it to a simmer. Add the moss and simmer for 30 minutes, ensuring it doesn't boil or float. We recommend using an oven safe container to line the bottom of your pan to keep the moss from direct heat.
These methods ensure your sphagnum moss remains clean and safe for use in self-watering moss poles, while retaining its superior moisture-retaining properties. We've written a more detailed guide to sterilization with many alternative methods if you don't wish to use oven or hob treatments.

Why Use Sphagnum Moss For Self Watering Moss Poles
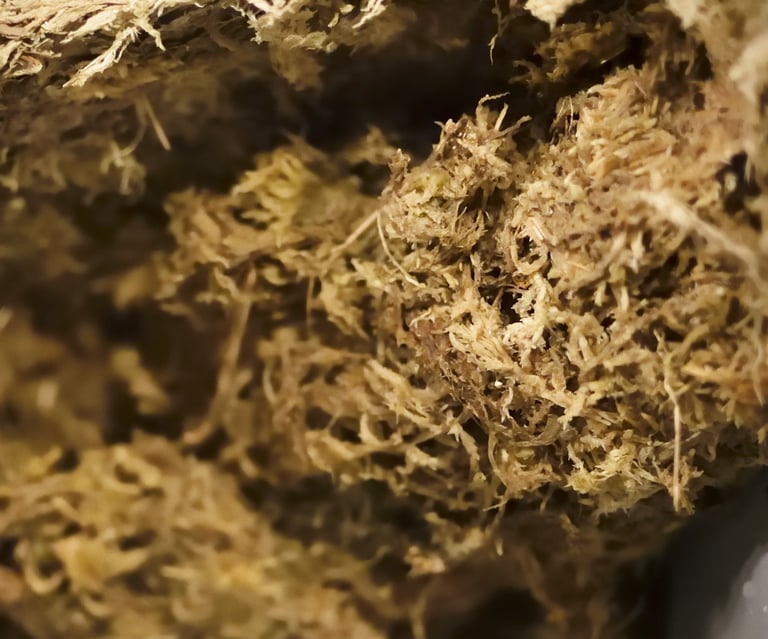
Sphagnum moss is our top pick for a DIY self watering moss pole, as the moss helps to keep your plants thriving by retaining moisture and promoting aerial root growth. Say goodbye to constant watering and hello to healthier, happier plants.
Sphagnum moss is readily available online, just make sure to source it from reputable suppliers to avoid any unwanted surprises like bark or pest eggs, or sterilize your moss. Our DIY self-watering moss pole keeps the sphagnum moist, ensuring your plants have consistent access to water and nutrients. This mimics their natural climbing habitat more effectively than standard poles, providing an ideal environment for growth.

Moss pole
How To Keep a Self Watering Moss Pole Moist
DIY self watering moss poles reduce the frequency of watering, and allow you to water without using spray bottles. Check the water reservoir every 5–14 days, depending on the size of your moss pole and the glass jar. Add water as required, topping up when the moss starts to visibly change colour from a dark brown to a pale sandy brown.
We recommend adding plant fertilizer, and using dechlorinated water that has been allowed to rise to room temperature to avoid shocking the aerial roots in the moss pole. This allows the plant to absorb nutrients near the active growth points, allowing the plant to use the moss pole as a secondary root system, and effectively extending your root ball.
Once the plant's aerial roots establish within the moss pole, you may need to increase how often you fill up the water reservoir in your self watering moss pole. Like the root ball in the plant's pot, the moss pole roots can become root bound when plants mature. When your moss pole is full of roots, either water more frequently or make a larger pole to keep it moist for longer.
Extra large 8ft self watering moss pole
Self Watering Moss Poles Help Aerial Roots To Develop
Self-watering moss poles are a game-changer for climbing plants, enabling aerial roots to develop into a secondary root system. This setup acts as an extension of your plant's roots, allowing them to absorb water and nutrients closer to the active growth points. Consistently moist environments, like those provided by self-watering moss poles, encourage aerial roots to thrive, leading to more robust and vigorous growth.
Aerial roots are vital for climbing plants, helping them anchor to supports and absorb moisture from their surroundings. When these roots encounter the constant hydration of a self-watering moss pole, they grow extensively into the moss, forming a secondary root system. This efficient nutrient uptake promotes larger leaves and the development of fenestrations, the characteristic splits and holes that many plant enthusiasts admire.
By giving your plants direct access to essential resources, self-watering moss poles create an optimal environment for growth. This results in healthier, more impressive plants that mimic natural habitat conditions.
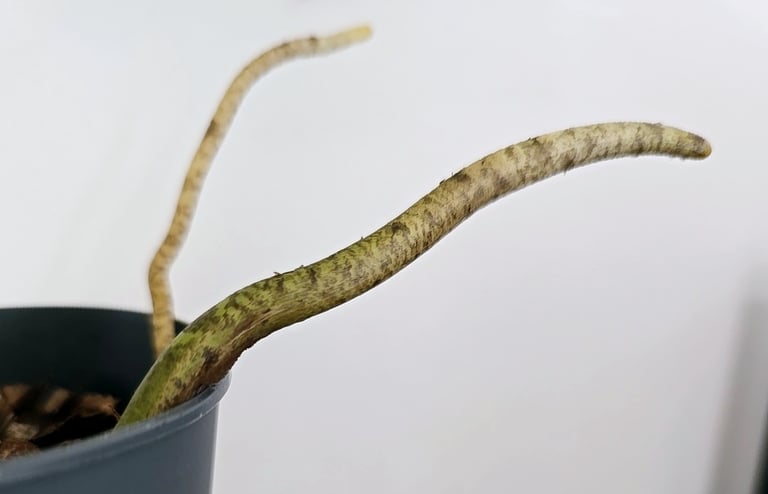
Monstera aerial roots sticking out of the top of a plant pot
How To Pin New Growth To a Self Watering Moss Pole With Pictures
Moss poles are indispensable for guiding new growth in your climbing plants, however, they often need a little help to be effective:
Secure New Growth
Use soft plant ties, moss pins, or garden twine to gently secure new growth to the pole. Be cautious not to damage the stems. Regularly check and adjust them to avoid causing permanent damage or scarring, especially with metal pins.
Regular Adjustments
As your plant continues to grow, it's important to adjust and add new ties to guide it up the pole. Aim to pin nodes as close to the pole as possible to encourage aerial roots to grow into the moss rather than down the outside.
Supporting Aerial Root Growth
If any aerial roots can't be pinned into the pole, you can direct them down the outside of the pole and back into the pot.
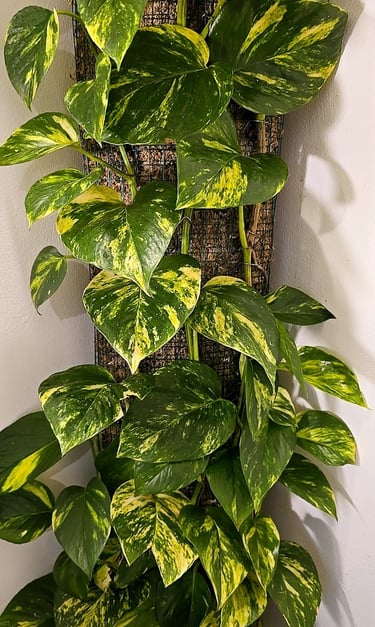
Epipremnum aureum climbing a self watering moss pole
What To Do When Your Plant Reaches The Top of a Self Watering Moss Pole
As climbing plants thrive, they'll eventually outgrow their self-watering moss poles. This is a common scenario with most climbing houseplants, and knowing how to manage it can ensure continued healthy growth. Here's what to do when your plant reaches the top of the moss pole:
Extend the Pole
One straightforward option is to add another homemade moss pole on top of the existing one. We've covered how to extend your moss pole in our DIY guide. This gives your plant additional vertical space to climb, continuing its upward journey.
Pruning for Control
Alternatively, you can prune the top of the plant to manage its height. Use the cuttings for propagation, allowing you to grow new plants that can add density to your pot and enhance the overall foliage.
Redirect Growth
Training your plant to grow horizontally is another effective strategy. Tie the new growth to another support structure or guide it back down the pole. This method can be tricky with mature plants, as their stems may be more rigid and prone to snapping. In such cases, pruning might be the safer option. Plants will always try to right themselves, so if you pin them down, they'll grow back up again. The professional trick to get around this is to leave the stem to grow for the whole length of the moss pole. Once the plant is long enough, direct it down the pole and then pin the end with the active growth point upwards, to allow it to grow back up the pole again.
Epipremnum aureum climbing a self watering moss pole
Summary of Homemade Self Watering Moss Poles
Creating your own DIY self watering moss pole is an effective, cost-efficient way to support the growth of your climbing plants. By using sterilized sphagnum moss, which excels at retaining moisture, you can ensure consistent hydration for your plants, promoting robust root development and healthier foliage.
Self-watering moss poles simplify your plant care routine by reducing the frequency of watering, thanks to their built-in reservoirs. They also provide various options for managing overgrown plants, whether through extending the pole, pruning, or redirecting growth. This practical and engaging method not only enhances the health and appearance of your plants but also brings a touch of nature into your home with minimal effort.
Ready to transform your indoor garden into a thriving, low-maintenance oasis? Dive into the world of self-watering moss poles and see the difference for yourself!
The Science Behind Self-Watering Moss Poles for Houseplants
Self-watering moss poles are an innovative tool designed to provide consistent moisture and support for climbing houseplants. These poles incorporate a water reservoir system that automatically supplies water to the moss, ensuring that plants receive a steady supply of nutrients and hydration. Let's explore the scientific principles behind self-watering moss poles and their benefits for houseplants.
Consistent Moisture Supply
Capillary Action: Self-watering moss poles use capillary action to deliver water from a reservoir to the moss. Capillary action occurs when water moves through narrow spaces due to the adhesive forces between water molecules and the solid surfaces of the moss. This natural process ensures that the moss remains consistently moist, providing a reliable source of hydration for the plant's aerial roots.
Hydration Efficiency: By maintaining consistent moisture levels, self-watering moss poles reduce the risk of under-watering or over-watering. This is particularly beneficial for houseplants in dry indoor environments, where humidity levels can fluctuate. The steady moisture supply helps prevent plant stress and supports healthy growth.
Nutrient Absorption
Nutrient-Rich Environment: The moss on self-watering poles can be infused with nutrients, creating a nutrient-rich environment for the plant. As the aerial roots come into contact with the moss, they absorb essential nutrients directly from the pole. This continuous nutrient supply supports the plant's overall health and promotes vigorous growth.
Enhanced Root Development: The constant availability of moisture and nutrients encourages the development of robust root systems. Aerial roots that attach to the moss pole can grow more efficiently, increasing the plant's ability to absorb water and nutrients. This results in healthier, more resilient plants.
Support and Stability
Vertical Growth: Self-watering moss poles provide essential support for climbing and trailing plants, encouraging vertical growth. This vertical orientation allows more leaves to receive light, enhancing photosynthesis and overall plant health. The added stability also helps prevent damage from drooping or bending stems.
Structural Integrity: The water reservoir within the pole adds weight and stability, ensuring that the pole remains upright and securely in place. This structural integrity is crucial for supporting larger plants and preventing toppling.
Eco-Friendly Benefits
Water Conservation: Self-watering systems are designed to optimize water usage by delivering only the amount needed by the plant. This reduces water waste and promotes sustainable gardening practices. The reservoir system also minimizes the frequency of watering, making it a convenient and efficient solution for indoor gardening.
Reduced Risk of Root Rot: By providing controlled moisture levels, self-watering moss poles help prevent the soil from becoming waterlogged, which can lead to root rot. This is particularly important for houseplants that are sensitive to excess moisture.
Scientific Studies on Self-Watering Systems
Research on self-watering systems has demonstrated their effectiveness in maintaining consistent moisture levels and promoting healthy plant growth. Studies have shown that self-watering systems can significantly improve plant biomass and reduce the risk of water-related stress. These findings highlight the benefits of integrating self-watering technology into houseplant care.
By understanding the science behind self-watering moss poles, indoor gardeners can optimize their plant care routines and ensure that their houseplants receive the necessary hydration and support. This innovative tool combines the principles of capillary action, nutrient absorption, and sustainable water management to create an ideal growing environment for climbing plants.
Freshly made self watering moss pole
Edited & Fact Checked By: The Houseplant Shop
Article Published: 28th November 2024

About The Houseplant Shop:
Independent Houseplant Nursery
Horticultural Specialists
Managing Over 250 Houseplant Species Onsite
Over 15 Years Of Experience With Horticulture
As head of horticulture, Sarah manages the care and propagation of over 250 plant species at a commercial houseplant nursery. With over 15 years of experience in horticulture, specializing in houseplants, Sarah has extensive expertise in plant biology, soil science, and integrated pest management. She continually reviews and integrates the latest research into her plant care guides. Dedicated to educating others, Sarah has spent years diagnosing houseplant care issues and sharing her real-world experience. Her commitment to scientific accuracy and helping people diagnose plant health issues has established her as a trusted authority and expert in the field.
The Houseplant Shop is a dedicated houseplant nursery, growing all of their own stock from their botanical library of over 250 houseplant species. The nursery staff are horticultural experts who have dedicated their lives to cultivating and nurturing over 250 different species of houseplants, focusing on Aroids, tropical plants, and NOID collectables. All their plants are grown in house in Britain to be more environmentally friendly. The nursery is proud to have been featured by the Royal Horticultural Society (RHS) as a 100% peat free nursery.
Recommended Further Reading:
People also looked at: Moss Poles For Indoor Plants, Artificial Lighting, Watering, Fertilizer, and Pruning.
How We Reviewed This Article:
Our horticultural experts continually monitor the houseplant space, and we update our articles when new information becomes available. We are committed to providing current and reliable information. If you have some information that you think would be helpful in this article, we'd love to hear from you. Our team works hard to revise articles for factual accuracy, and we regularly update our pages with new information, techniques, tips, images, trade secrets, and real world experience from the team here at the houseplant nursery. You can find a list of the article updates below.
Written By: Sarah Brooks, Head of Horticulture
Article Received: 22nd November 2024
Copyright: The Houseplant Shop (https://thehouseplant.shop)
The use, distribution, or reproduction is permitted, provided the original copyright owner is credited and that the original publication on this website is cited with a direct link to the article, only with these terms. Any other use is not permitted.
List of Article Updates:
20th December 2024: Minor UI updates
22nd December: Formatting
17th January 2025: Added new how-to images to the self watering moss pole guide
23rd January 2025: Added a new step in the how-to guide about checking the weight of the finished moss pole. Added weight issues to the troubleshooting guide, along with how to manage plant pots that fall over when the moss pole is inserted.
Author Bio:
Author: Sarah Brooks
Head of Horticulture at The Houseplant Shop

