The Ultimate Guide: Moss Poles
DIY Moss Pole For Plants Menu
Quickly navigate this page to find any topic without getting a sore finger
Why Use a Moss Pole for Climbing Plants
Climbing plants often need extra support to grow to their full potential. When plants start falling over, or leaves are not sizing up or getting fenestrated, a moss pole is the perfect solution. Moss poles for climbing plants provide stable plant support, helping them to grow larger, and their develop mature leaves.
Moss poles mimic the natural environment of plants that climb trees in the wild, using the natural snags in the trunks as support. This is a natural defence mechanism to keep them attached to the trees they climb in the wild.
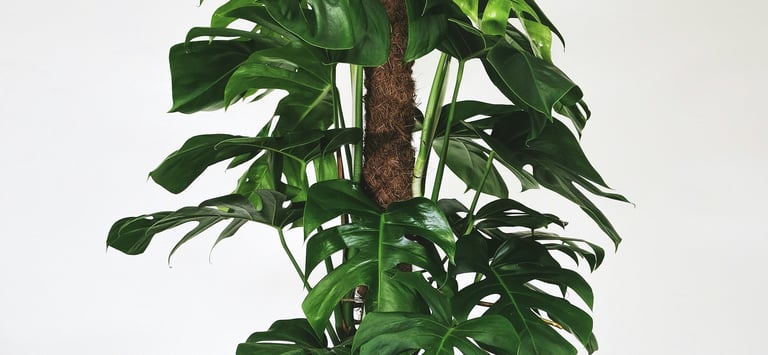
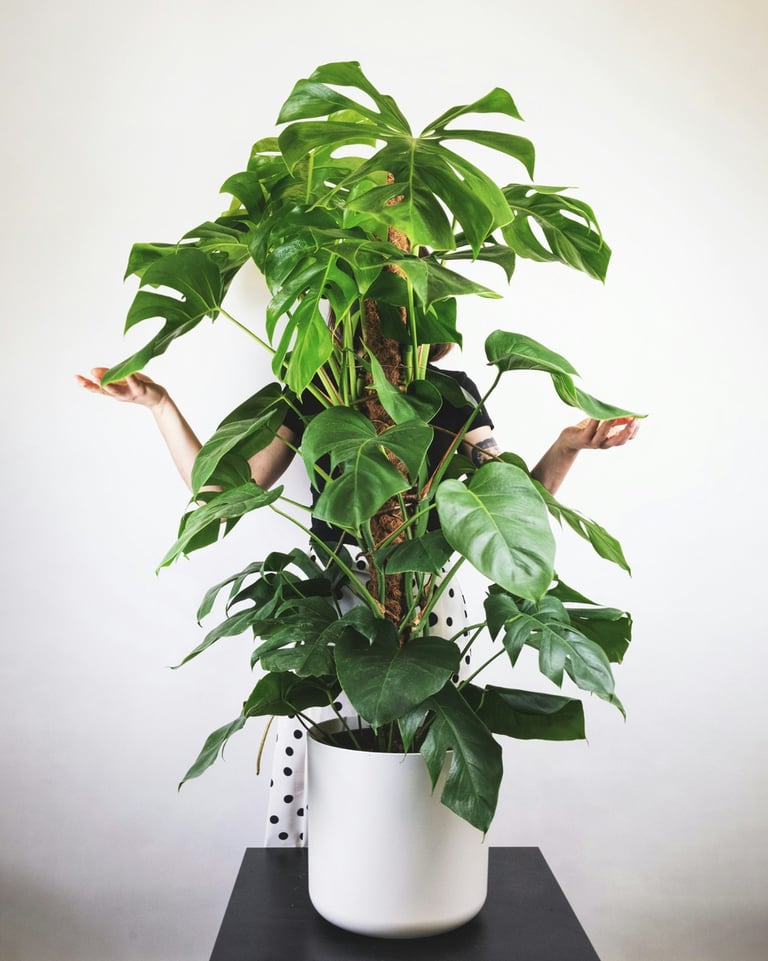
Monstera deliciosa climbing a coco coir moss pole
How to Choose a Moss Pole
When selecting a moss pole, look for one that is sturdy and of adequate height for your mature plant's size. When a climbing plant is given a moss pole, they often have a growth spurt, so we always suggest making a larger pole than your current plant. To see how tall your plant is likely to get, check our species specific plant care guides.
We recommend choosing a moss pole with good moisture retention. Here at The Houseplant Shop, we exclusively use sphagnum moss poles for our climbing plants. We feel sphagnum moss poles have the best moisture retention out of all the different types of moss poles for plants. We prefer to use self watering moss poles, as they allow plants to grow bigger leaves faster, and to mature quicker.
Your moss pole should promote aerial root growth, as this is what tricks your plant into thinking that it's found a tree trunk to climb. To support aerial root growth, we recommend using a substrate roots can dig into, like sphagnum or coir.
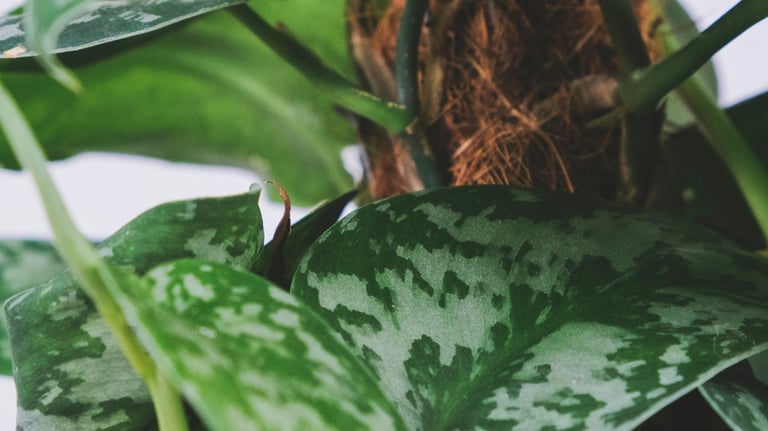
Philodendron brandtianum climbing a coir moss pole
Shop Moss Pole vs DIY Moss Pole
We always recommend making a DIY moss pole because it's much cheaper than buying one from a shop. Our internal experiments have shown that plants grown in sphagnum moss outperform all other types of moss poles. We've found that coco coir poles, or any other type of moss pole, don't allow plants to get aerial roots into the poles, which slows down growth and results in smaller, less mature leaves. While shop-bought moss poles are convenient, they don't allow plants to thrive as well as sphagnum moss. Additionally, self-watering moss poles encourage faster maturation compared to standard sphagnum moss poles. Therefore, if you can, we recommend using a self-watering pole. Additionally, making your own moss pole gives you full customisation for your plant. When making your own moss pole, you can choose the height, width, and the material inside it. We have an Epipremnum aureum growing up a 8ft (2.44 m) tall pole which is 1.5ft (ca. 46 cm) wide.
Replicating the Wild With Moss Poles
Climbing plants in the wild usually climb tree trunks or similar structures. You can see an example of a Monstera plant climbing a tree trunk in this photo. As you can see, the leaves drastically change when allowed to climb, additionally, the plant becomes denser and grows more upright. This is what we are trying to replicate at home by attaching our plants to moss poles. There are several moss pole alternatives, but we would always recommend a moss based pole to allow the aerial roots to take hold as they do up tree trunks in the wild.
Monstera 'Deliciosa' climbing a tree trunk
Sphagnum Moss Poles
The most moisture retentive moss poles are made from sphagnum moss, which is our favourite type of moss pole at The Houseplant Shop. Sphagnum moss is ideal for promoting aerial root growth into the moss pole to providing a natural climbing surface. We love to add glass jars to our moss poles to make DIY self watering poles, which we will go into more detail about in the DIY section below.
Sphagnum is readily available online to purchase in small or large quantities. If you're making a large moss pole, we recommend buying a larger amount, as it can work out much cheaper. Be careful not to buy from unknown sources, which may include bark, seeds or pest eggs in your moss.
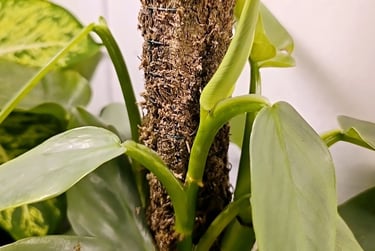

Philodendron Silver Sword climbing a sphagnum moss pole
How To Sterilize Sphagnum Moss
If you aren't sure of the quality of your sphagnum moss, you can sterilize it at home. Pasteurization involves heating the moss to a temperature that kills harmful fungus, bacteria, pests, nematodes, and weed seeds without completely destroying the beneficial properties of the moss.
How To Sterilize Sphagnum Moss:
Sterilizing Sphagnum Moss in the Oven: By heating the sphagnum moss to around 82 °C (180 °F) for about 30 minutes in a covered oven-proof container, you can effectively kill most bacteria, fungi, and pests. You can do this in most household ovens.
Sterilizing Sphagnum Moss on the Hob: Fill a large pan with enough water to cover the sphagnum moss and bring it to a simmer. Add the moss and simmer for 30 minutes, being careful not to let it boil, float or touch the bottom of the pan. We use an oven safe glass dish to keep the moss away from the heat source.
This method ensures that the moss is clean and safe to use in your moss pole, while still retaining its moisture-retaining properties. For a guide on every method of soil sterilization, check our guide for more information.


Philodendron White Wizard climbing a homemade sphagnum moss pole
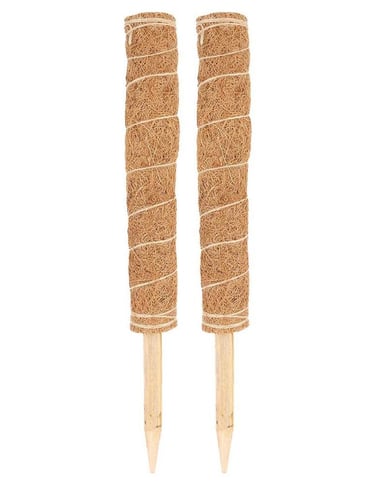
Coco Coir Moss Pole Overview
Coco coir poles are an excellent alternative to traditional moss poles, crafted using eco-friendly and sustainable materials. Here’s a brief overview of the process:
Raw Materials: Coco coir poles are primarily made from coconut husks, a by-product of the coconut industry. This makes them a sustainable choice as they utilize waste materials.
Preparation: The coconut husks are cleaned and processed to remove any residual organic matter, ensuring a clean and effective medium for plant support.
Mixing: The processed coconut coir is combined to form a fibrous, supportive material that can easily be shaped and utilized as a climbing aid for plants.
Shaping: This coir mixture is then shaped around a sturdy core, typically made from natural materials, to create the pole. This design ensures that the pole is both supportive and durable.
Curing: The poles are cured to guarantee sturdiness and longevity, making them perfect for supporting climbing plants over extended periods.
Coco coir poles are biodegradable and environmentally friendly, providing excellent support for climbing plants while contributing to sustainability. Although they don't retain moisture as effectively as sphagnum moss, coco coir poles offer a reliable structure for aerial roots to attach and grow. This helps plants to climb and maintain their upward growth.
While coir poles do not provide moisture for developing a secondary root system, they still offer a robust, eco-friendly support option for plant enthusiasts looking to promote healthy plant growth in an environmentally conscious way.

Biodegradable Kratiste Pole Overview
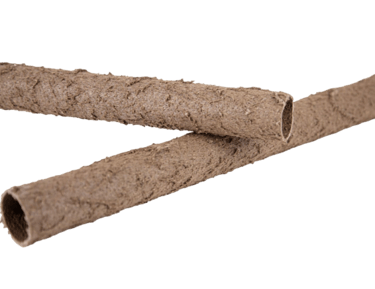
Kratiste moss poles are crafted using sustainable materials such as potato peel residues and elephant grass. Here’s a brief overview of the process:
Raw Materials: The primary components are leftover potato peels and elephant grass, both of which are by-products of agricultural processes.
Preparation: The potato peels are cleaned and processed to remove any remaining organic matter.
Mixing: The cleaned potato peels and elephant grass are mixed together to form a fibrous, supportive material.
Shaping: The mixture is then shaped around a sturdy core, typically made from natural materials, to create the moss pole.
Curing: The poles are cured to ensure they are sturdy and durable for supporting climbing plants.
These poles are biodegradable and eco-friendly, making them a great alternative to traditional moss poles that often use sphagnum moss or coconut coir. They provide excellent support for climbing plants while being kind to the environment.
Plant roots do burrow into Kratiste poles, but they do not provide moisture or allow the plant to develop a secondary root system like sphagnum moss does.

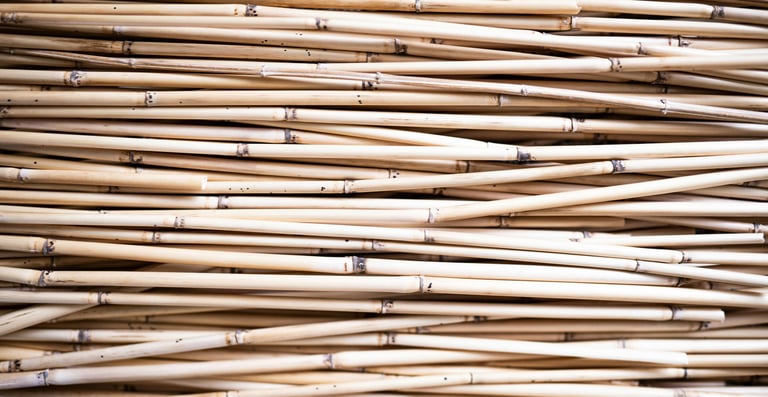
Bamboo Cane Support Poles
Bamboo canes are a cost-effective and eco-friendly option as they're fully biodegradable. Canes provide sturdy support but do not retain moisture at all, so they may not promote aerial root growth like moss or coir poles. In an emergency, they can be the difference between your plant falling over or staying up, so if all you have to hand is a bamboo cane, don't be afraid to use them as a temporary measure. We always recommend switching to a moss pole that supports a secondary root system to develop within it, as it aids the growth of the plant and causes leaves to size up. If your plant's aerial roots don't find moisture, your plant will take substantially longer to level up and produce mature leaves, if it ever manages it at all.

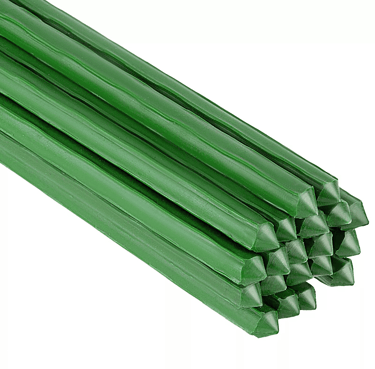
Metal Plant Support Poles
Metal stakes are very strong and long-lasting. However, they don’t provide the same natural climbing surface or moisture retention as moss or coir poles. They are better suited for structural support rather than promoting natural climbing behaviour. Like bamboo canes, if you don't have an alternative to hand and your plant keeps falling over, they're better than nothing at all. We do however recommend switching to a moss or coir based pole as soon as possible, as these do not provide a secondary root support system. With metal poles, the aerial roots will trail around behind the plant looking for support, and often, it isn't until these aerial roots find moisture that leaves start to size up. If you want your climbing plant to level up to its mature form, you need a moist area for your roots to establish within, otherwise it may never mature to its full potential.

DIY Moss Pole Guide
How To Make a DIY Moss Pole
Creating your own moss pole is not only cost-effective but allows for a custom fit, tailoring the height and width to your home’s space and your plants needs. DIY projects are typically cheaper than shop bought options and offer a personal touch. Imagine having a custom-fit moss pole that not only supports your plants but also simplifies your care routine. By following this how-to-guide, you can create a low-maintenance moss pole which stays moist and allows your plants to thrive.
Materials You Will Need:
Sharp scissors or wire cutters
Waterproof sheet or flooring
Dechlorinated room temperature water with added plant food
60ml — 300ml glass jar, smaller than the diameter of your pole. We use herb or pesto jars for small poles, and pasta sauce jars for large poles.
Natural cotton rope
DIY Moss Pole Method:
Prepare Your Workspace: Choose a clean, dry area that can get wet—this process can be messy. Use a waterproof plastic sheet if necessary.
Moisten the Moss: Soak sphagnum moss in water for 30 minutes, or until fully saturated. Drain and wring out excess moisture.
Measure the Wire: Roll out the chicken wire to the desired size of your pole. Cut along the nearest edge of the square.
Add the Wooden Stake: Attach a wooden stake at the bottom to anchor the pole in your plant pot.
Add Half of the Sphagnum Moss: Measure out the sphagnum moss and put it in the moss pole.
Fill and Roll the Pole: Add the remaining sphagnum moss and roll the wire into shape to check fill density. Avoid overfilling to prevent stress on the joints, which could cause snapping. Regularly stand the pole up to test its structural integrity.
Insert Acetate Sheets: Cut acetate sheets to half the pole’s width and insert them at the back, under the join where you will zip it up with cable ties. This helps with the stability and structure of the pole. If you have any weak spots where the pole is bending, add extra layers of acetate to give it more structure.
Secure with Cable Ties: Pull the wire together over the acetate and secure tightly with cable ties every square or two.
Cut Excess Cable Tie Tails: Trim the excess ends of the ties, being careful not to cut the heads off, as they hold the ties in place.
Clean Down The Moss Pole: Brush down the pole to remove any excess moss.
Fix Your Plant To The Moss Pole: Attach your plant to the pole using moss pins, Velcro plant ties or string, ensuring it has good contact with the moss for aerial root growth. You've finished all the steps to create your own DIY moss pole. Congratulations, your plant just got a massive care upgrade!
How To Extend Your Moss Pole In The Future: If you want to extend your moss pole in the future, make a new section of pole that's 5 mm (0.2 inch) smaller than the original and remove roughly 6 inches (ca. 15 cm) of sphagnum from the top of your old pole. Wiggle the new pole into the empty gap in your old pole and attach using cable ties.
DIY Moss Pole Troubleshooting:
Moss Pole Wire Has Torn: Sometimes DIY moss poles can suffer from holes and broken bits of wire when there's too much pressure on the joins. Try removing some moss from the pole to reduce the strain on the chicken wire.
Moss Pole Bends Over Or Flexes When Upright: There may not be enough moss in your pole. Try adding more moss to create more of a solid structure, however, be careful not to overfill the moss pole as this can weaken the wire and cause breakages along the joints. For larger moss poles, we recommend a wooden stake attached to the back of the pole to help give it more structure.
Moss Pole Won't Stay Moist: If you can't keep your moss pole moist, try making a bigger moss pole. Really mature plants with established aerial roots within the moss pole typically require lots of extra water. Think of your moss pole as an extension of your plant's root ball — like plants that have become root bound, the moss pole may need extra water when it's too full of roots. If your moss pole won't stay moist, it may be time to make a bigger one to upgrade your aerial roots to a new home with more space. The additional sphagnum moss in the larger pole will help to hold more moisture and to keep your moss pole moist.
White Substance All Over Moss: This is a harmless natural effect of using plant food when watering moss pole. This is a collection of minerals and salts which build up when the water dries and can be removed by gently wiping it off with a damp cloth. Other than appearances, the white marks are nothing to worry about and can be left on the moss pole if they don't bother you.
Mould Growing On Moss Pole: This can be a sign that your pole is too wet, and the plant isn't using that moisture yet. Try cutting back how regularly you water the moss pole until the plant's roots have established into the moss. Don't forget to keep watering the root ball itself.
Plant Has Outgrown Moss Pole: You can extend your moss pole by following step 12 in our DIY moss pole guide above.
Plant Pot Falls Over When Moss Pole Is Inserted: It can be difficult to get a large moss pole to stand up in a small plant pot. We recommend using larger pots for larger poles, as a rule of thumb, we've found that the perfect size for a 36-inch pole is a 7.5 litre pot partially filled with stones to provide extra weight and balance for the moss pole.
Moss Pole Is Too Heavy To Stand Up: We've found that when making moss poles, sometimes, the moss can become waterlogged, causing it to become too heavy for the moss pole to stand up without support. In our experience, when this happens, it's best to give the pole 3–7 days to dry out before testing it again, or longer.
How To Keep a Moss Pole Moist
A wet moss pole helps your plant's roots attach to the pole. The moss pole absorbs water and nutrients, and becomes a secondary root system for your plant once established.
If you don't want to use a self-watering moss pole system, spray down the moss pole with water regularly to keep it moist, but be careful to spray at night when no light can touch the leaves. This allows the plant to dry overnight, preventing health issues with your houseplant. When moisture has prolonged exposure to plant leaves, fungal and bacterial problems can develop. When light hits wet leaves, they can burn and become bleached. We avoid spraying our plants too often for these reasons. We recommend you approach with caution when using this method to keep your moss pole moist.
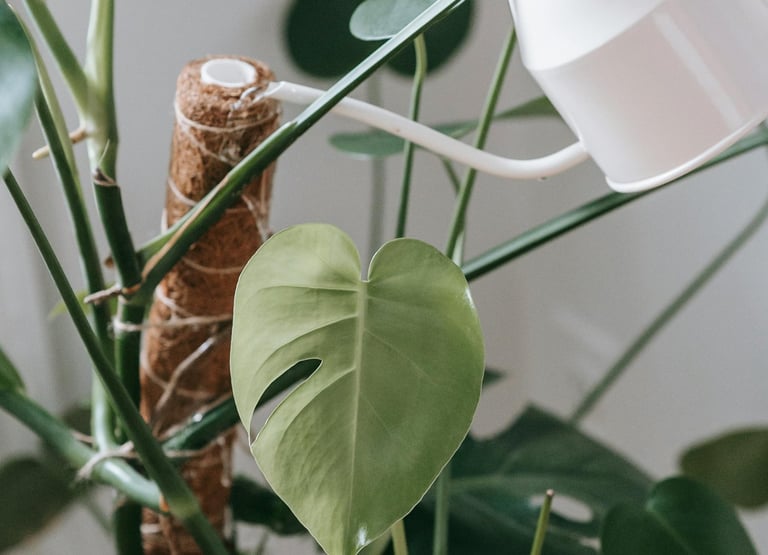
A more drastic approach is to pour water directly on the moss pole during your regular watering routine, however, this can be messy. We use a water sprayer bottle to lessen spillage when we use this method. We always recommend using full strength feed when wetting your moss pole, as this provides extra nutrients to the secondary root system that you have built within the moss pole.
Moss Poles & Aerial Roots
1. Anchoring and Support
Aerial roots help anchor the plant securely to the moss pole. This support allows the plant to climb and grow vertically, which is essential for many climbing plants like Monsteras and Philodendrons. As the plant climbs, it can produce larger leaves and exhibit more robust growth.
2. Nutrient and Moisture Absorption
Moss poles, especially those made with sphagnum moss, retain moisture well. Aerial roots can absorb this moisture and any nutrients dissolved in it. This additional source of water and nutrients helps the plant grow more vigorously and maintain its health. We recommend using a self watering moss pole for the ultimate moisture control for aerial roots, we've found at our nursery that they allow plants to grow bigger leaves, and to mature faster when given a self watering moss pole.
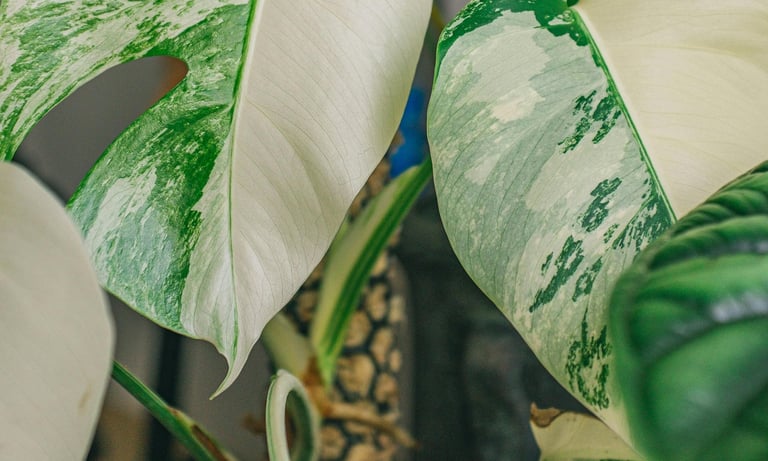
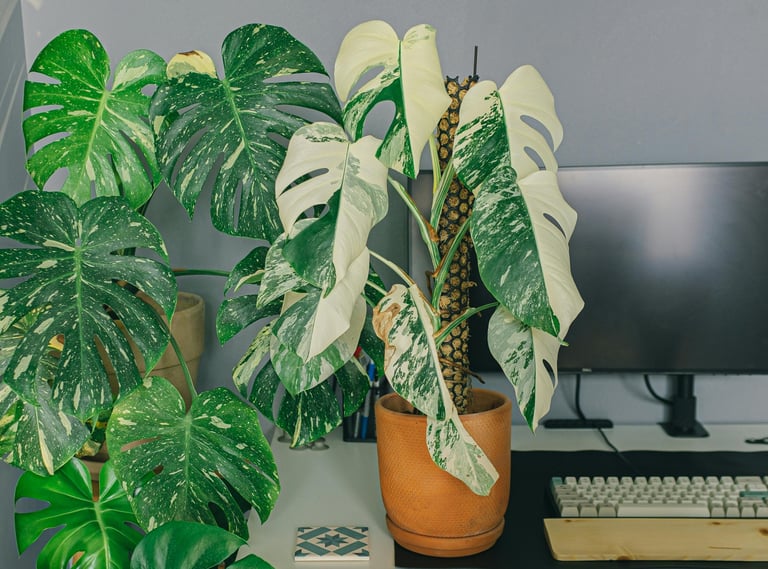
Monstera 'Deliciosa' Albo Variegata climbing a sphagnum moss pole
3. Enhanced Growth and Maturation
When aerial roots penetrate the moss pole, they establish a more extensive root system, which can contribute to the overall growth and maturation of the plant. This can lead to larger, more mature leaves and a healthier plant overall.
4. Stability and Structure
By attaching to the moss pole, aerial roots provide stability to the plant. This stability allows the plant to grow in an upright and structured manner, reducing the risk of it toppling over or becoming unruly.
5. Aiding Propagation
For those who propagate plants, having a moss pole with well-established aerial roots can make the process easier. Cuttings taken from these plants are more likely to root successfully, as they already have a head start with their aerial roots.
6. Microenvironment Creation
Moss poles create a humid microenvironment around the plant, which is beneficial for the aerial roots. This humidity mimics the plant's natural habitat and encourages healthy root growth.
7. Maintenance: One of the few regular maintenance jobs with a moss pole is to encourage the Monstera’s aerial roots to grow into the moss pole. Gently guide the new roots towards the pole, and use reusable moss pins to keep the root and node as close to the pole as possible. Over time, the roots will naturally seek out the moisture in the moss pole and attach themselves. Don't forget to remove the moss pins before the stem outgrows the size of the pin, as this can cause permanent scars in the stem.
How To Pin New Growth To Plant Moss Poles
Identify New Growth: Look for new vines or stems that need support.
Use Soft Ties: Use soft plant ties, moss pins or garden twine to secure the new growth to the pole or support structure. Be gentle to avoid damaging the stem.
Tie Loosely: Ensure the ties are loose enough to allow for growth, but secure enough to keep the plant in place. If using pins, make sure to check them every few weeks to make sure that the stem hasn't outgrown the pin, as it can cause permanent damage and scarring.
Regular Adjustment: As the Monstera grows, adjust the ties and add new ones as needed to continue guiding the plant up the pole or support structure. Try to pin nodes as closely to the pole as possible, as this encourages aerial roots to grow into the pole and not down the outside of it.
Aerial roots: Any aerial roots that are unsuitable to be pinned into the moss pole can be run down the outside of the pole and back into the pot itself. This will encourage your plant to size up and grow splits and holes in the leaves. Fenestrations only develop when a plant has an adequate support to climb. Planting the aerial roots back into the pot tricks the plant into thinking it has found more secure structures to climb, sizing up the leaves earlier than it would have without a plant support system.
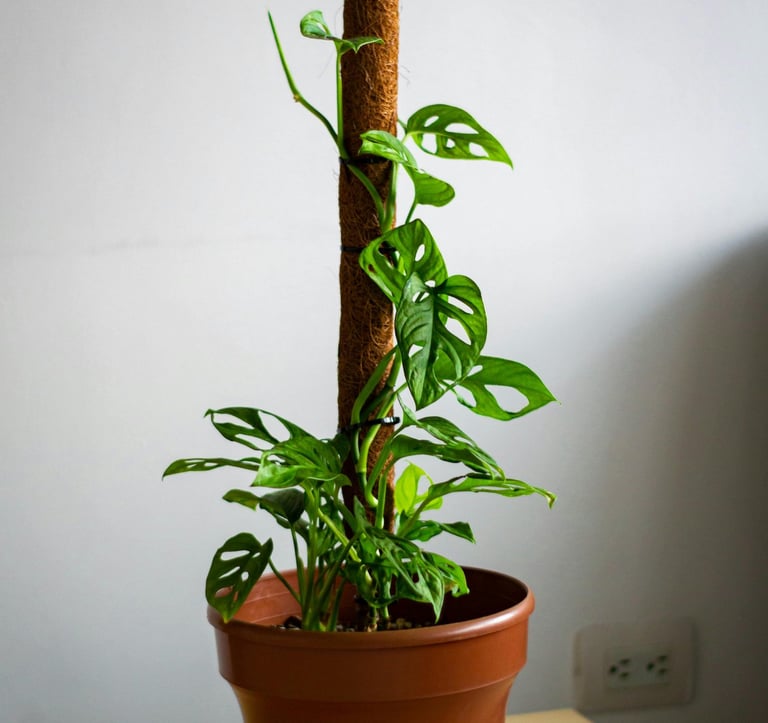
Monstera 'Adansonii' climbing a coco coir moss pole
Monstera 'Deliciosa' that's grown to the top of a coco coir moss pole
How To Extend a DIY Moss Pole
As your climbing plants flourish, they’ll eventually outgrow their DIY moss poles. This common scenario requires careful management to ensure continued healthy growth. Here’s what to do when your plant reaches the top of its moss pole:
Extend the Pole
A straightforward solution is to add another DIY moss pole on top of the existing one. This extension provides your plant with additional vertical space to climb, continuing its upward journey. This is usually done by making an identical pole, but making the diameter 5 mm smaller, then removing 6–8 inches of moss from the old pole and inserting the new section using cable ties to secure it to the old pole.
Pruning for Control
Alternatively, you can prune the top of the plant to manage its height. Use the cuttings for propagation, allowing you to grow new plants that can fill out your pot and enhance the overall density of the foliage. This method is both practical and beneficial for maintaining a lush, healthy appearance.
Redirect Growth
Training your plant to grow horizontally is another effective strategy. Tie the new growth to another support structure or guide it back down the pole. This technique can be challenging with mature plants, as their stems may be rigid and prone to snapping. In such cases, pruning is often the safer option. A professional trick is to allow the stem to grow the length of the moss pole, then direct it down to the bottom, pinning the active growth point upwards, encouraging it to grow back up the pole.
DIY Moss Pole FAQ
While moss poles are fantastic tools for supporting climbing plants, they can sometimes come with their own set of challenges. Here are some common problems and how to address them:
1. Moss Keeps Drying Out
One of the most frequent issues is the moss drying out, which can impede the growth of aerial roots. To combat this, regularly mist the moss pole and ensure it remains consistently moist. Alternatively, consider upgrading to a self-watering moss pole to reduce maintenance.
2. Moss Pole Has Structural Weakness
Over time, moss poles can become unstable, especially if they are not well-constructed. To prevent this, ensure the pole is securely anchored in the pot and reinforced with strong materials like plastic-coated chicken wire and extra-strong cable ties.
3. Moss Pole Has Rot
If the moss pole is kept too wet, it can lead to rot, which can harm your plant. Ensure good drainage in the pot and avoid overwatering. Regularly check the moss pole for signs of rot and replace any affected sections promptly.
4. Aerial Roots Not Adhering To Moss Pole
Sometimes, aerial roots may struggle to attach to the moss pole. This can happen if the moss is too dry or if the pole lacks a good structure. Keeping the moss moist and ensuring a firm, stable pole can help encourage root attachment.
5. Plant Outgrowing the Moss Pole
As your plant grows, it may outgrow the moss pole. When this happens, you can extend the pole, prune the plant, or redirect its growth horizontally. Each method has its advantages, so choose the one that best suits your space and plant care routine.
6. Moss Pole Attracting Pests
Moss poles can sometimes attract pests such as mites or fungus gnats. To prevent this, maintain cleanliness around the pole, monitor for signs of pests, and treat any infestations promptly with appropriate remedies.
Solutions and Best Practices:
Consistent Moisture: Regularly mist or soak the moss to keep it moist.
Secure Construction: Use durable materials and secure the pole firmly in the pot.
Good Drainage: Avoid waterlogging by ensuring proper drainage.
Encourage Root Attachment: Keep the moss moist and the pole stable to promote aerial root growth.
Manage Growth: Extend, prune, or redirect the plant as it grows.
Pest Control: Keep the area clean and monitor for pests.
Upgrade to a Self Watering Moss Pole
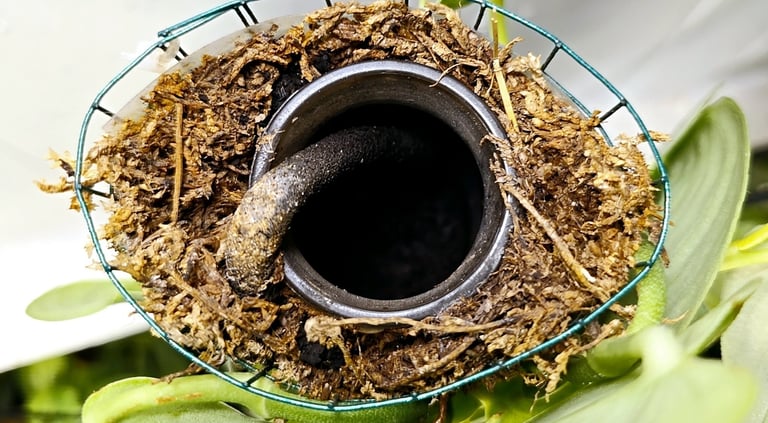
Opting for a DIY self watering moss pole over a standard DIY moss pole or a store-bought pre-made coco coir pole offers numerous benefits for both you and your climbing plants. Self-watering moss poles provide consistent moisture directly to the aerial roots, reducing the need for frequent watering and ensuring your plants remain hydrated. This continuous hydration promotes robust root development and healthier, more vibrant foliage. Sphagnum moss, used in DIY self-watering poles, excels at retaining moisture compared to coco coir, making it a superior choice for maintaining an optimal growth environment.
Moreover, creating your own self-watering moss pole allows for customization to fit the exact needs of your plant and space. You can adjust the height and width, ensuring the pole perfectly supports your plant's growth. Additionally, the DIY approach is often more cost-effective and gives you the satisfaction of building something tailored to your specific requirements.

DIY Moss Pole Summary
This page provides a comprehensive moss poles guide and covers all aspects of choosing your pole material, the best shop bought poles or making your own moss pole as an innovative solution for climbing plants. These poles provide consistent moisture directly to climbing plants, significantly reducing the need for frequent watering. Sphagnum moss, known for its excellent moisture retention, is highlighted as the preferred material for these poles.
The guide also discusses creating a DIY self-watering moss pole. Our ultimate moss pole guide covers everything from preparing materials to assembling the pole and securing it in your plant pot. Additionally, it offers tips on managing common problems like drying moss, managing aerial roots, structural weakness, sterilizing moss, extending the pole, and attaching new growth.
By following these instructions, climbing plant enthusiasts can create a customized, cost-effective support system that enhances plant health and growth while simplifying the care routine.

The Science Behind Moss Poles for Houseplants
Moss poles are more than just aesthetic additions to your houseplants; they play a significant role in supporting and enhancing plant growth through various scientific principles.
Nutrient Absorption at Growth Points
Moss poles, often wrapped with sphagnum moss or coco coir, provide a rich source of nutrients. These materials naturally hold onto moisture and nutrients, creating a beneficial environment for plants. When aerial roots come into contact with the moss, they can absorb these nutrients directly. This is particularly advantageous for epiphytic plants like Monsteras and Philodendrons, which rely on such roots for nourishment.
Aerial Roots and Secondary Root Systems
Aerial Roots: Aerial roots are specialized structures that grow above the ground and help plants attach to surfaces. These roots have adapted to absorb moisture and nutrients from the air and surrounding surfaces. By climbing a moss pole, plants can effectively use their aerial roots to access the nutrients and moisture held within the moss. This mimics their natural habitat, where they would typically grow on trees and other structures.
Secondary Root Systems: In addition to primary root systems, many climbing plants develop secondary roots that sprout from nodes along the stem. These secondary roots can latch onto the moss pole, expanding the plant's ability to absorb water and nutrients. This increased root surface area allows for more efficient nutrient uptake, supporting vigorous growth.
Moisture Retention
Moss poles excel at retaining moisture, which is crucial for plant health. The moss used on these poles can hold significant amounts of water, providing a consistent supply of moisture to the plant. This is especially important in indoor environments where humidity levels might be lower. Consistent moisture levels help prevent the plant from drying out and reduce the frequency of watering needed.
Support and Stability
Moss poles provide physical support for climbing plants, encouraging them to grow vertically. This is not just beneficial for the plant's structural integrity but also helps optimize light exposure. Vertical growth allows more leaves to receive direct light, enhancing photosynthesis and overall plant health. The added stability also reduces the risk of damage from drooping or bending stems.
Enhanced Growth and Health
By providing a nutrient-rich, moist environment, moss poles contribute to healthier and faster-growing plants. The consistent access to nutrients and moisture at multiple points along the stem supports continuous growth and development. Studies have shown that providing adequate support and ideal growing conditions can significantly improve a plant's biomass and overall health.
Ecological and Biological Benefits
Using moss poles can mimic a plant's natural habitat, promoting natural growth patterns and behaviours. This ecological approach to plant care not only supports individual plant health but also enhances the aesthetic and ecological balance of indoor gardens.
By understanding the science behind moss poles, gardeners can optimize their use to support the health and growth of their houseplants. This combination of physical support, nutrient absorption, and moisture retention makes moss poles an invaluable tool for indoor plant enthusiasts.
Edited & Fact Checked By: The Houseplant Shop
Article Published: 22nd November 2024

About The Houseplant Shop:
Independent Houseplant Nursery
Horticultural Specialists
Managing Over 250 Houseplant Species Onsite
Over 15 Years Of Experience With Horticulture
As head of horticulture, Sarah manages the care and propagation of over 250 plant species at a commercial houseplant nursery. With over 15 years of experience in horticulture, specializing in houseplants, Sarah has extensive expertise in plant biology, soil science, and integrated pest management. She continually reviews and integrates the latest research into her plant care guides. Dedicated to educating others, Sarah has spent years diagnosing houseplant care issues and sharing her real-world experience. Her commitment to scientific accuracy and helping people diagnose plant health issues has established her as a trusted authority and expert in the field.
The Houseplant Shop is a dedicated houseplant nursery, growing all of their own stock from their botanical library of over 250 houseplant species. The nursery staff are horticultural experts who have dedicated their lives to cultivating and nurturing over 250 different species of houseplants, focusing on Aroids, tropical plants, and NOID collectables. All their plants are grown in house in Britain to be more environmentally friendly. The nursery is proud to have been featured by the Royal Horticultural Society (RHS) as a 100% peat free nursery.
Recommended Further Reading:
People also looked at: DIY Self Watering Moss Pole Guide, Artificial Lighting, Watering, Fertilizer, and Pruning.
How We Reviewed This Article:
Our horticultural experts continually monitor the houseplant space, and we update our articles when new information becomes available. We are committed to providing current and reliable information. If you have some information that you think would be helpful in this article, we'd love to hear from you. Our team works hard to revise articles for factual accuracy, and we regularly update our pages with new information, techniques, tips, images, trade secrets, and real world experience from the team here at the houseplant nursery. You can find a list of the article updates below.
Written By: Sarah Brooks, Head of Horticulture
Article Received: 18th November 2024
Copyright: The Houseplant Shop (https://thehouseplant.shop)
The use, distribution, or reproduction is permitted, provided the original copyright owner is credited and that the original publication on this website is cited with a direct link to the article, only with these terms. Any other use is not permitted.
List of Article Updates:
20th December 2024: Minor UI updates
22nd December 2024: Formatting
21st January 2025: Added links to the self watering moss pole guide
23rd January 2025: Added “plant pot falls over” and “moss pole won't stand up” to the troubleshooting section of the how to make your own moss pole guide
Author Bio:
Author: Sarah Brooks
Head of Horticulture at The Houseplant Shop

