How To Propagate Plants: Every Propagation Method
Propagation Menu
Quickly navigate this page to find any topic without getting a sore finger
WHAT IS A PLANT NODE?
How To Propagate Plants Step-By-Step
Skip straight to the how-to guides for each sterilization method
Introduction To Propagating Plants
When mastered, propagation is one of the most rewarding aspects of being a plant keeper, giving you new young plants to fill your home with, or to give away as gifts!
There are more methods to propagate plants than we can list in this short introduction, so stay tuned as we break down every aspect of propagation, step-by-step. From selecting cuttings, to choosing a propagation method, from how to care for cuttings, to how to tell when cuttings are ready for potting up, this propagation guide has got you covered.
This comprehensive propagation guide will cover every aspect of plant care during propagation, and list every type of propagation method that you can use to clone your plants. Stay tuned as we explore which propagation method is right for each plant species, and which techniques get the fastest results.
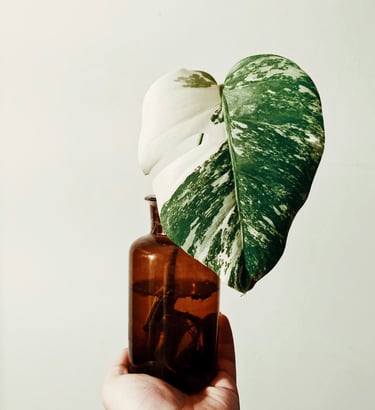

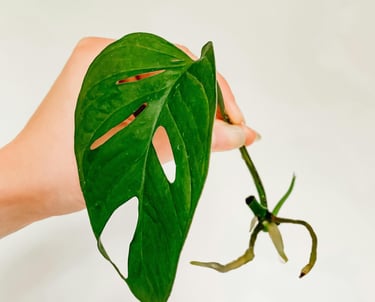

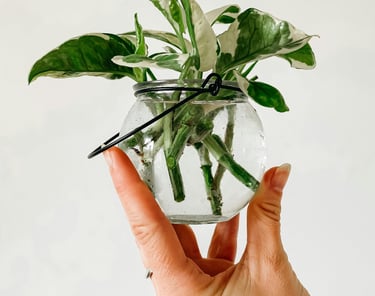

Why Propagate Plants
There are several reasons to propagate plants, the most obvious being to produce more of the mother plant, which is what we call the plant that you take the cuttings from. Here are the most common reasons for propagation:
To Multiply The Plant: The most common reason to propagate plants is to produce more of the mother plant.
To Prune The Plant: When plants grow out of control, it can be hard to cut the stems and throw them away. The least painful method for most plant parents is to trim the plant and propagate. Often, the cuttings are planted back into the mother's plant pot to create a more dense plant.
To Fill Out The Plant Pot: As mentioned above, sometimes propagation is simply to fill out a mother plant's pot. By putting cuttings back into the mother, you create a more dense, bushy mother plant over time.
To Provide A Spare: When precious plants get sick, it can sometimes be easier to start again with a cutting than to try to save the parent plant. Alternatively, the propagated plant could be to act as a spare in case the mother plant succumbs to pests or disease.
When propagation is successful, the result is always more copies of the mother plant. To increase the chances of your cuttings surviving, stay tuned as we explore every aspect of propagation and how to successfully take cuttings from plants.



Did You Know:
Adding perlite to propagation mixes can help to reduce the chances of root rot.
Studies have shown that perlite's porous structure improves drainage and aeration, which helps to prevent the anaerobic conditions that promote root rot. In our experience, adding perlite when propagating reduces the rate of disease, and helps to reduce cutting losses.
Propagation = Cloning
Propagation is essentially the process of cloning your houseplant. When you propagate a plant, you create a new, genetically identical copy of the parent plant. This is because the new plant grows from a piece of the original, such as a stem, leaf, root, or bud. Whether you use water, soil, perlite, sphagnum moss, LECA, or even techniques like air layering, the result is the same: a clone of the parent plant with the same genetic makeup.
This method of creating clones is particularly useful for maintaining the specific characteristics of your favourite plants. If you have a houseplant with desirable traits—like vibrant colours, unique variegation, or resilience to pests—propagation ensures these traits are passed on to the new plants. By mastering propagation techniques, you can expand your indoor garden with identical clones, ensuring uniformity and preserving the qualities you love about your original houseplants.


How Quickly Roots Develop During Propagation
The time it takes for cuttings to develop roots can vary significantly depending on the type of plant, the propagation method used, and the conditions provided. Typically, cuttings can take anywhere from a few weeks to a few months to establish roots.
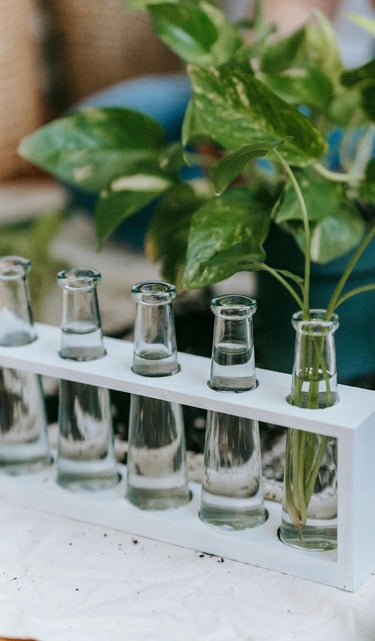
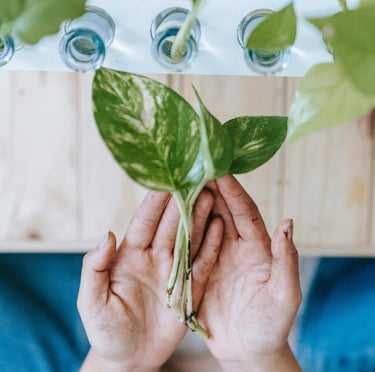
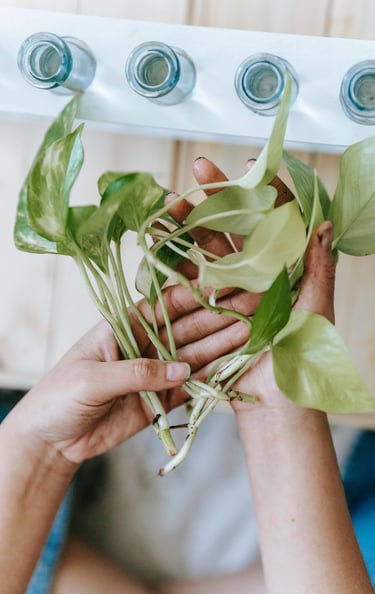
Water Propagation: This method is popular for its simplicity and ability to visually monitor root development. Many plants, like Pothos and Philodendrons, can start developing roots in water within 1–3 weeks.
Soil Propagation: Cuttings placed directly in soil may take a bit longer to root compared to water propagation, usually around 4–8 weeks. This method provides a natural environment for root development and is ideal for plants that prefer a stable medium.
Perlite, Vermiculite, and Sphagnum Moss: These mediums offer excellent aeration and moisture retention, promoting healthy root growth. Cuttings in perlite or sphagnum moss typically root within 2–6 weeks. Perlite is especially good for reducing the risk of rot, while sphagnum moss helps maintain consistent moisture levels.
LECA or Clay Balls(Lightweight Expanded Clay Aggregate): LECA is an inert medium that provides exceptional drainage and aeration. Rooting in LECA can take about 3–6 weeks, depending on the plant species. This method is gaining popularity for its ability to reduce the risk of overwatering and promote strong root systems.
Air Layering: This technique involves encouraging roots to form on a stem while it's still attached to the parent plant. Air layering can take a bit longer, often 6–12 weeks, but it is highly effective for plants like rubber trees and fiddle leaf figs, which can be challenging to root from cuttings.
Understanding the appropriate timing and conditions for each propagation method can help ensure successful root development and healthy new plants



How To Know When To Pot Up Cuttings
When working out when you should plant your cuttings, there are a few easy methods to help guide you.
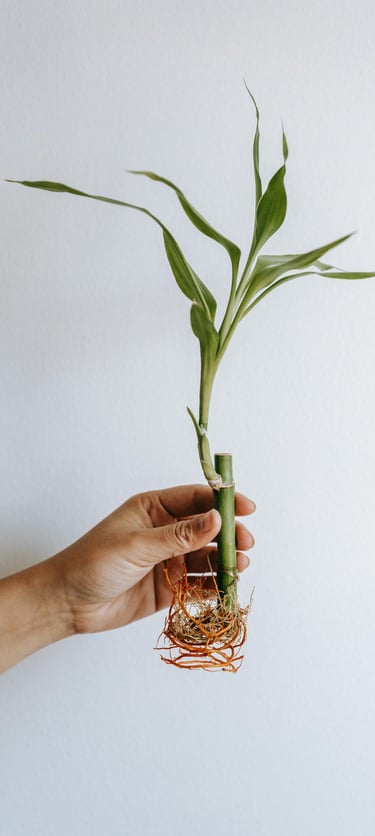
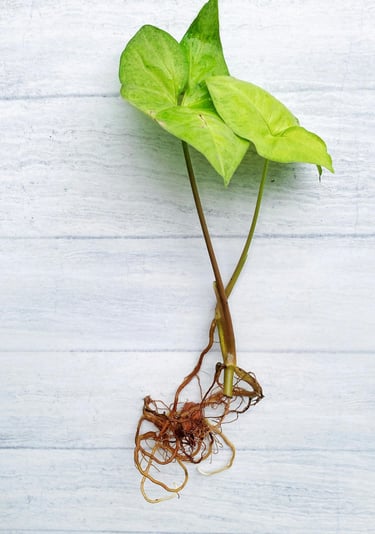
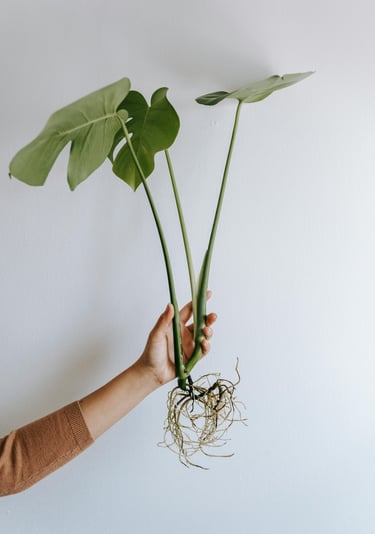
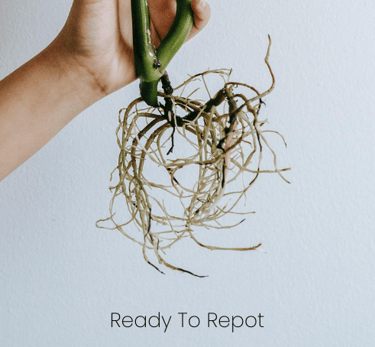
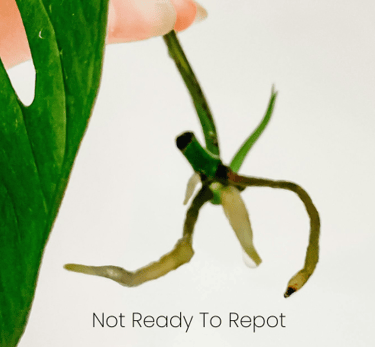
Water Cuttings: With water, perlite, vermiculite or LECA cuttings, when the roots reach 2–3 inches long, they're ready to pot up. You should be able to see secondary smaller roots coming off the main large roots.
Soil Cuttings: Cuttings planted in soil are usually ready within 4–8 weeks. You can tell by gently removing the cutting from the pot and checking how root bound the roots look. Cuttings aren't ready to be transplanted until there are visible roots wrapped around the outside of the soil ball. If you can't see roots, give it more time.
Air Layered Cuttings: Air layering takes a little longer than other methods, typically being ready to transplant within 6–12 weeks. You should be able to see roots poking through the layering material, or they should be visible when the wrap is removed.
If in doubt, it's always best to wait longer to pot up your cuttings. Propagation time can vary depending on environmental factors like lighting and temperature, the plant species and the propagation method chosen. Here at The Houseplant Shop, we prefer to use water for most of our cuttings. The only plants we put into the propagation box are Scindapsus or Pothos, as they don't tend to do so well in water.


What Is A Plant Node
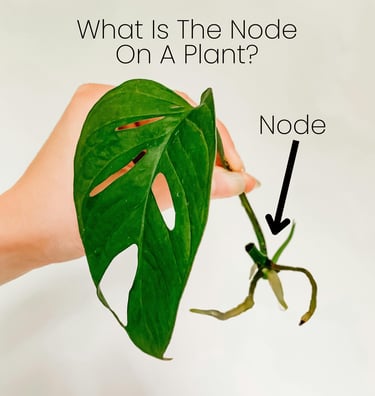
Before exploring propagation methods, let's have a quick look at plant anatomy to better understand propagation. The node of a plant is a crucial part of its anatomy. It is the point on a stem where leaves, branches, or buds are attached. Nodes play a vital role in plant growth and propagation because they are the sites where new roots and shoots develop. To understand what a plant node is, check the picture included for a visual guide.
When taking cuttings, always cut above the node, as this is where the new roots will form on your cutting. Without a node, your cutting will fail. Always make sure that there is at least one node left on the parent plant, or it may not grow back. Almost all plants have nodes (otherwise known as growth points), from Aglaonema to Dieffenbachia, to Monstera and Philodendrons. Some plants, like Spider Plants, Aloe or Agave, don't have obvious growth points and have to be propagated in different ways.
Nodes are essential for successful propagation, whether you're taking cuttings, layering, or using other propagation methods. Nodes also house the plant's axillary buds, which have the potential to grow into branches or flowers, contributing to the plant’s overall structure and productivity.

Propagating In Difficult Circumstances: Selecting Healthy Cuttings
The success of propagation can sometimes depend on the quality of the cutting. Healthy mother plants make vigorous cuttings, never choose a cutting from a plant with underlying issues.
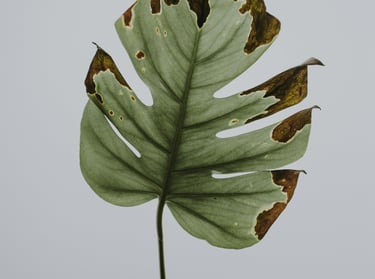
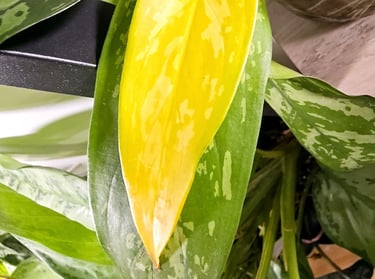
Propagating When Plants Have Yellow or Brown Crispy Leaves: Although it may seem trivial, even taking a cutting that has brown crispy leaf tips can negatively impact propagation as the leaf will be less able to photosynthesise to produce energy and grow roots. When plants have yellow leaves, your chances of propagation are slim to none, as yellowing leaves is usually a sign that the plant is killing off that leaf, making it unsuitable for propagation. If your cutting doesn't have at least one fully green leaf, it may fail.
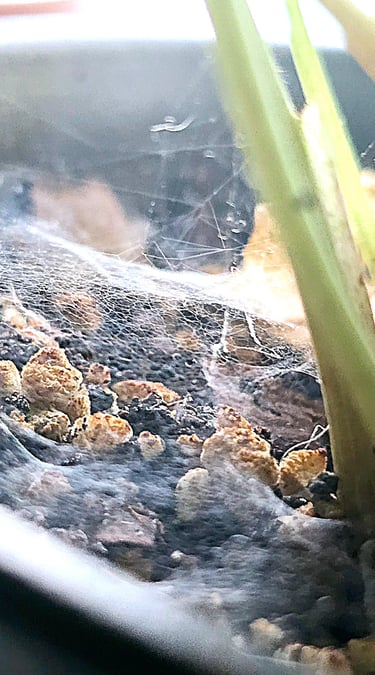
Propagating When Plants Have Pests: If you cut plants from a pest ridden mother, they will most likely infect your cutting and any other plants nearby. If using a prop box, be wary of adding diseased or pest ridden cuttings, as it could wipe out the entire prop box. Should you have no choice other than to take cuttings from a pest ridden plant, pay extra attention to plant care to try to give them a head start in life. Treating your cuttings with a gentle pesticide is possible, but you may stress the cuttings so much that they fail. To increase your chances of success when dealing with pests during propagation, place the cuttings in a sealed bag. This keeps the humidity high, which wipes out some pest species, although it isn't a solution for all unwanted guests.
Propagating To Clone a Sick Plant: If you are trying to clone a sick plant to increase your chances of one surviving, take as many cuttings as possible without putting the mother plant into shock. To increase your chances of success, take several cuttings and feed with a seaweed extract once a week until established.




How To Cut Plants For Propagation
How to Cut Plants for Propagation
Successfully cutting plants for propagation requires precision and care to ensure the health and viability of the cuttings. Here are the essential steps:
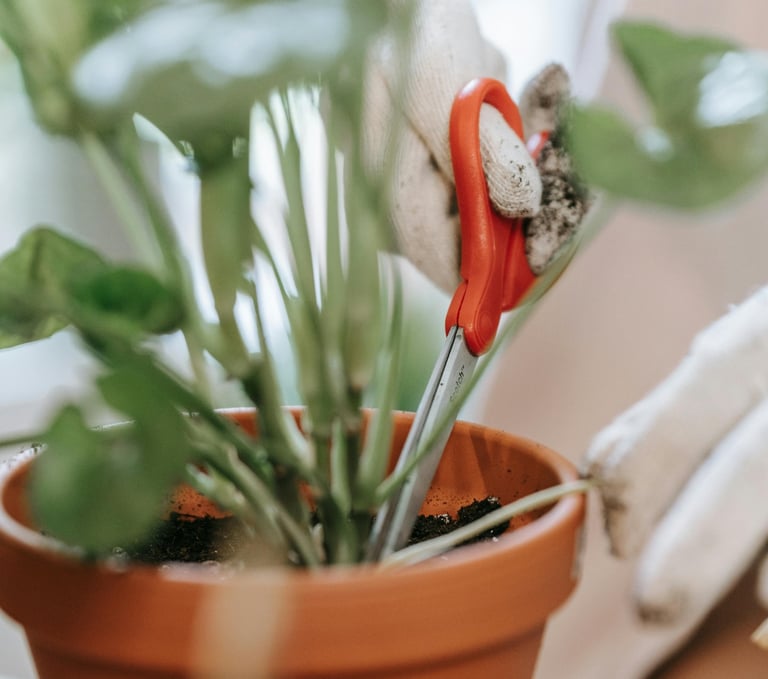
Choose the Right Tools: Use a clean, sharp pair of scissors or pruning shears. Sterilize them with rubbing alcohol to prevent the spread of diseases.
Select Healthy Stems: Choose healthy, robust stems that are free from pests and diseases. For many plants, look for stems that are neither too old nor too young.
Make the Cut: Cut just below a node (the point where leaves or buds attach to the stem) because this is where roots are most likely to form. The cutting should be about 10-15 cm (4–6 inches) long.
Remove Lower Leaves: Strip off the lower leaves of the cutting, leaving at least two or three leaves at the top. This helps reduce water loss and encourages root development.
Allow The Cut To Harden: We recommend dipping your cutting in rooting hormone, and then giving your cutting 30-60 minutes to dry after being cut before moving onto propagation. This allows the wound to callous over, reducing the chances of fungal or bacterial infections, or loss of the cutting. We do this with all of our plants to reduce cutting losses.

Use Rooting Hormone To Speed Up Propagation
The use of rooting hormones is widely debated in the plant community, however, we've experienced great success using natural hormones to aid propagation in our plants. We've written about this in more detail in our rooting hormone article, which also dives into the scientific research and studies showing its success. As we've experienced such good results with it, we always recommend using it during propagation to speed up the rate of growth, root development, and in the case of seaweed, it encourages the cutting to create side branches.
There are two options when it comes to rooting hormones — natural seaweed extract and natural rooting hormones. Both are excellent choices and can be used together in combination to provide an additional boost to the cutting.
For difficult-to-root plants, dip the cut end of the stem into rooting hormone and allow it to absorb for 30 minutes before adding it to a propagation medium to promote root growth. Alternatively, use seaweed as a pretreatment by submerging the root node for 30 minutes before continuing. You can use both methods together to give your plant a double boost, however, always do the seaweed dip first to avoid washing off the rooting hormone powder.



The Best Ways To Propagate Plants: Propagation Methods Explained
When it comes to propagating houseplants, the choice of method can significantly impact the success rate and health of the new plants. The best method of propagation for beginners is water, followed closely by soil. If you want to venture into all the different ways that you can propagate plants, stay tuned. Here are the best propagation methods, along with their benefits and examples of which houseplants are suitable for each type:
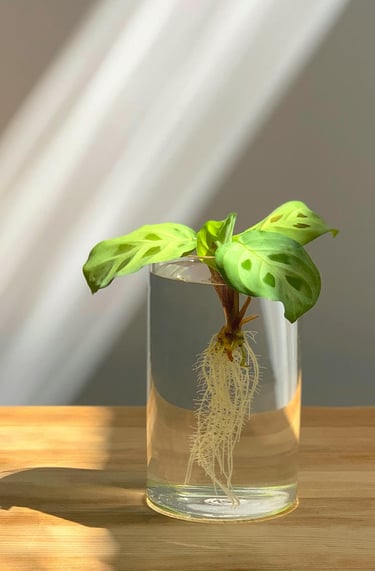
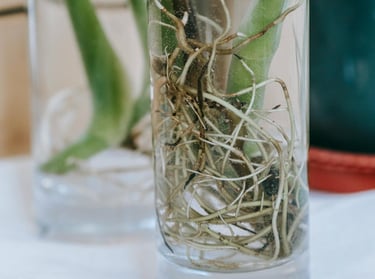
Water Propagation: Water is highly popular for its simplicity and visual appeal. This method is perfect for beginners as it allows you to monitor root development easily. It's ideal for plants like Philodendrons, and Monsteras, which tend to root quickly in water. The ability to see the roots forming can be very encouraging and helps ensure the cuttings are healthy before transferring them to soil.
Soil or Coco Coir Propagation: This method closely mimics the plant's natural environment and is excellent for plants that prefer stable conditions. Soil propagation works well for succulents, geraniums, and many other houseplants. We exclusively use soil propagation for our Tradescantia, as they're one of the species that love to root in soil. While it might take longer for roots to develop in soil or coco coir compared to water, it often results in a stronger root system that’s better adapted to normal soil conditions. It's worth noting that coco coir has natural antifungal properties. These properties are due to its high lignin content, low nutrient content, slightly acidic pH, and physical structure that promotes good drainage and aeration1. These factors help prevent mould and fungal growth, making it a popular choice for propagation and hydroponics.
Perlite, Vermiculite, and Sphagnum Moss: Using perlite, vermiculite, or sphagnum moss provides exceptional aeration and moisture retention, making these mediums ideal for delicate cuttings that are prone to rot. Perlite is especially useful for plants that need dry conditions, while sphagnum moss maintains a consistent moisture level. This method is beneficial for plants like Epipremnum, Scindapsus, Aloe and Agave, which can be sensitive to overwatering. Out of perlite, sphagnum moss, and vermiculite, perlite is typically considered the best for propagation due to its excellent drainage and aeration properties, which help to prevent root rot, which has been proven in studies. However, sphagnum moss contains natural rooting agents called phytohormones, which are natural plant hormones. These hormones, such as auxins, cytokinins, and abscisic acid, play a role in regulating plant growth and development, so we recommend the use of sphagnum moss to encourage faster rooting.
Division: Division is one of the quickest ways to propagate clumping houseplants such as Spider Plants and Peace Lilies. This method provides almost instant new plants and is less stressful for the parent plant. Rhizomes are a special type of root system which allows each cutting to have a partially established root system, allowing them to grow faster. Propagation via division is particularly advantageous for plants that naturally produce offshoots or runners.
Air Layering: For larger houseplants like rubber trees and fiddle leaf figs, air layering is a highly effective propagation method. It encourages roots to form on a stem while still attached to the parent plant, which can lead to higher success rates. Air layering is ideal for plants that are difficult to root from cuttings, and ensures the new plant has a robust root system before being potted separately. Ficus trees and Monstera plants are a great example of a houseplant that benefits from air layering propagation.
LECA & Clay: LECA offers excellent drainage and aeration, making it an increasingly popular choice for propagating aroids and orchids. This medium helps prevent overwatering and promotes strong, healthy roots. LECA is particularly useful for plants that thrive in high-humidity environments but need good root aeration.
Leaf Cuttings: Leaf cuttings are particularly effective for plants like Succulents, Begonias, and African Violets. A single leaf or a section of a leaf can generate new plants when placed in soil, water, or other mediums like perlite or sphagnum moss.
Root Cuttings: This method involves cutting a section of the root and planting it to grow a new plant. This is not suitable for most houseplants. It's often used for plants like African Violets. The cuttings are typically taken during the plant’s dormant season and placed in a suitable growing medium.
Offsets (Pups): Some plants, such as Spider Plants and Bromeliads, produce small offshoots or “pups” that can be separated from the parent plant and replanted. This method is straightforward and usually very successful.
Corms and Bulbs: Plants like Alocasia can be propagated by dividing their corms and bulbs. Each section can grow into a new plant. This method is typically done during the plant’s dormant period.
Layering: Layering involves bending a low branch to the ground, covering it with soil, and allowing it to root while still attached to the parent plant. Once roots have formed, the new plant can be separated. This technique is effective for plants like azaleas and hydrangeas.
Micropropagation (Tissue Culture): This advanced method involves growing plants from tiny tissue samples in a sterile laboratory environment. It’s used for mass-producing plants, especially those that are difficult to propagate by other means, such as orchids.
How To Propagate Stem Cuttings In Water
Propagating plants in water is a simple and satisfying method that allows you to easily monitor the development of roots. Here’s a step-by-step guide to get you started:
Select a Cutting Suitable For Water Propagation
Choose a Plant: Ideal plants include Philodendrons, Monsteras, and Spider Plants.
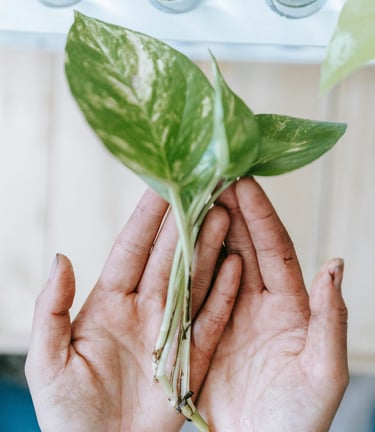
Cut the Stem: Use a sharp pair of scissors or pruners to cut a healthy stem just below a node. The cutting should be about 10-15 cm (4–6 inches) long.
Prepare the Cutting
Remove Lower Leaves: Strip off the leaves near the bottom of the cutting, leaving at least 2–3 leaves at the top. This prevents the leaves from rotting in the water.
Harden The Cutting: Dip the cuttings in rooting hormone to encourage faster root development. Leave the cutting for 30–60 minutes to harden off the cut. This allows the wound time to heal a little, reducing the chances of fungal or bacterial infections, and of cutting losses.Place in Water
Submerge the Node: Fill a clear glass or jar with room temperature water and place the cutting inside. Ensure the node (where roots will grow) is fully submerged. Mist the cutting lightly every few days to provide humidity until roots start to form. Only do this at night to avoid fungus or mould growing on the leaves.
Position Properly: Place the container in a location with indirect sunlight.
Change the Water Regularly
Maintain Freshness: Change half the water every 7 days to keep it fresh and oxygenated. Never empty all the water as this contains a natural rooting hormone which the plant will pause root growth to reproduce when emptied. Changing part of the water prevents the growth of bacteria that could harm the cutting.
Monitor Root Development
Watch for Roots: Within 1–3 weeks, you should see roots beginning to form.
Wait for Adequate Length: Allow roots to grow a minimum of 5-7 cm (2-3 inches)
Potting Up
Transition to Soil: Once the roots are long enough, transfer the cutting to a pot filled with well-draining soil. Make sure to water the newly potted cutting thoroughly.

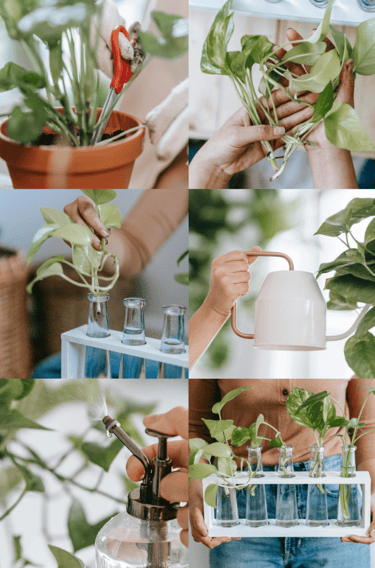
How To Propagate Plants In Soil or Coco Coir
Propagating plants in soil is a highly effective method that closely mimics their natural growing conditions. Here’s a step-by-step guide to help you propagate your plants:
Select a Healthy Cutting Suitable For Soil Propagation
Choose a Plant: Ideal plants include succulents and most houseplants.
Cut the Stem: Use scissors or pruning shears to cut a healthy stem just below a node. The cutting should be about 10-15 cm (4–6 inches) long.
Prepare the Cutting
Remove Lower Leaves: Strip off the leaves near the bottom of the cutting, leaving at least 2–3 leaves at the top. This reduces water loss and prevents leaves from rotting.
Harden The Cutting: Dip the cuttings in rooting hormone to encourage faster root development. Leave the cutting for 30–60 minutes to harden off the cut. This allows the wound time to heal a little, reducing the chances of fungal or bacterial infections, and of cutting losses.Prepare the Pot and Soil
Select a Pot: Choose a small pot with drainage holes to prevent waterlogging.
Fill with Soil: Fill the pot with soil mix or coco coir. For succulents, use cactus mix.
Plant the Cutting
Insert the Cutting: Make a small hole in the soil with your finger and sprinkle some rooting hormone into the soil. Insert the cutting into the hole, ensuring the node is buried.
Firm the Soil: Gently press the soil around the cutting to secure it in place.Initial Watering: Lightly water the soil. Keep the soil consistently moist.
Provide Proper Conditions
Light: Place the pot in a location with bright, indirect sunlight.
Humidity: Maintain a humid environment to encourage rooting. You can cover the pot with a plastic bag or plant dome to create a mini greenhouse effect, but ensure it has some ventilation to prevent mould growth.
Monitor Root Development
Check for Resistance: After 4–8 weeks, gently tug on the cutting. If you feel resistance, roots have formed. New leaf growth is a good indicator to pot up.

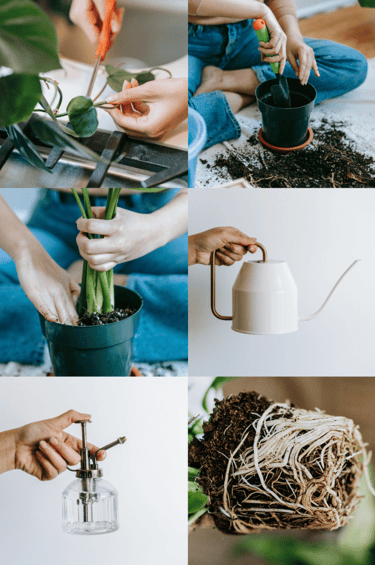
How To Propagate Plants In Sphagnum Moss
Propagating plants in sphagnum moss is an excellent method for promoting root growth due to its excellent moisture retention and aeration properties. Here’s how to do it:
Select a Healthy Cutting
Choose a Plant: Ideal plants for this method include Scindapsus, Hoya, Epipremnum, African violets, begonias, and orchids.
Cut the Stem: Use clean scissors or pruning shears to cut a healthy stem just below a node. The cutting should be about 10-15 cm (4–6 inches) long.
Harden The Cutting: Dip the cuttings in rooting hormone to encourage faster root development. Leave the cutting for 30–60 minutes to harden off the cut. This allows the wound time to heal a little, reducing the chances of fungal or bacterial infections, and of cutting losses.Prepare the Moss
Moisten the Moss: Dampen the sphagnum moss with water until it is moist but not soaking wet. Squeeze out any excess water.
Insert the Cutting
Plant the Cutting: Make a small hole in the damp moss and sprinkle a small amount of rooting hormone into the hole. Insert the cutting, ensuring the node is buried. Gently press the moss around the cutting to secure it.
Create a Humid Environment
Cover the Cutting: Place the moss and cutting in a clear plastic bag or a propagation dome to maintain high humidity. Ensure there is some ventilation to prevent mould growth.
Monitor Root Development
Check Roots: After 2–6 weeks, check for root development. Once the roots are about 5-7 cm (2-3 inches) long, the cutting is ready to be potted up.

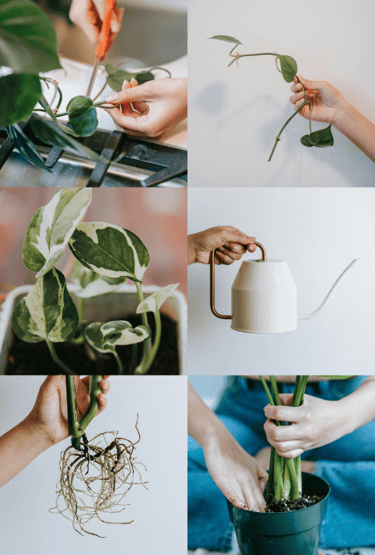
How To Propagate Plants In Perlite or Vermiculite
Perlite is a volcanic glass that is lightweight and highly porous, offering excellent aeration and drainage, making it a great medium for propagation. Vermiculite is a lightweight, sterile medium that retains moisture and nutrients, making it ideal for propagating a wide range of plants. Here’s how to use it:
Select a Healthy Cutting
Choose a Plant: Ideal plants for perlite propagation include succulents, begonias, and hoyas.
Cut the Stem: Use cleaned scissors or pruning shears to cut a healthy stem just below a node. The cutting should be about 10-15 cm (4–6 inches) long.
Harden The Cutting: Dip the cuttings in rooting hormone to encourage faster root development. Leave the cutting for 30–60 minutes to harden off the cut. This allows the wound time to heal a little, reducing the chances of fungal or bacterial infections, and of cutting losses.Prepare the Perlite
Moisten the Medium: Wet the perlite or vermiculite with water and let it drain to ensure it is moist but not waterlogged.
Insert the Cutting
Plant the Cutting: Make a small hole in the moist perlite and insert the cutting, ensuring the node is buried. Gently press the perlite around the cutting.
Maintain Humidity
Cover the Cutting: Place the container in an airtight tub, clear plastic bag or under a propagation dome to maintain humidity. If your container is airtight, open daily to exchange the air and prevent mould.
Monitor Root Development
Check Roots: After 2–6 weeks, check for root development. Once the roots are about 5-7 cm (2-3 inches) long, the cutting can be potted up.

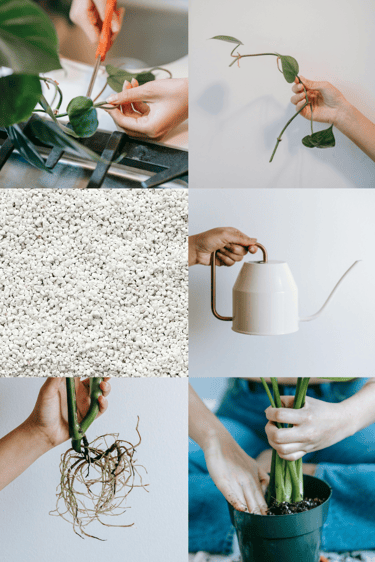
How To Propagate Plants By Division
Propagating by division is an efficient method for plants that naturally grow in clumps or produce offsets. It involves separating a mature plant into smaller sections, each with its roots and shoots, and replanting them. Here’s how you can do it:
Choose the Right Time
Best Time: The ideal time to divide plants is during their dormant period, usually in early spring or late autumn. This reduces stress and gives the divisions time to establish before the active growing season.
Prepare the Plant
Water Thoroughly: A day before dividing, water the plant thoroughly. This helps to reduce transplant shock and makes it easier to separate the roots.
Harden The Cutting: Dip the cuttings in rooting hormone to encourage faster root development. Leave the cutting for 30–60 minutes to harden off the cut. This allows the wound time to heal a little, reducing the chances of fungal or bacterial infections, and of cutting losses.Remove the Plant from Its Pot
Gently Uproot: Carefully remove the plant from its pot, taking care not to damage the roots. If the plant is in the ground, use a spade to dig around it and lift it out.
Divide the Plant
Separate Sections: Using a sharp set of pruners or your hands, divide the plant into smaller sections. Each division should have a healthy portion of roots and shoots. For particularly tough root masses, you may need to use a trowel.
Replant the Divisions
Prepare New Pots: Fill new pots with a well-draining potting mix. If replanting in the ground, ensure the soil is well-prepared.
Plant the Divisions: Plant each division at the same depth it was growing originally. Firm the soil around the roots to remove air pockets.
Water and Care for the Divisions
Water Thoroughly: After replanting, water the divisions thoroughly to help them settle in. Keep the soil consistently moist but not waterlogged.
Provide Proper Conditions: Place the newly potted divisions in a location with appropriate light and temperature conditions for the specific plant species.

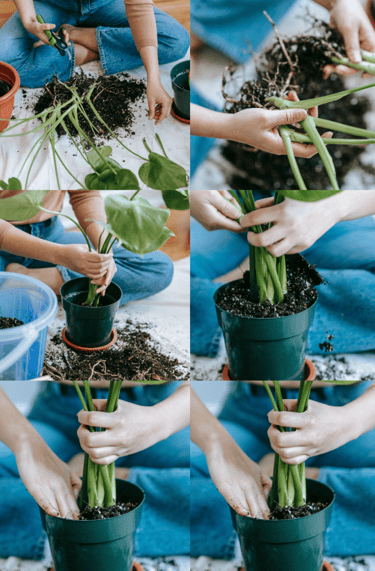
How To Propagate Plants By Air Layering
Air layering is an advanced propagation technique that encourages roots to form on a stem while it is still attached to the parent plant. This method is particularly effective for larger houseplants and woody plants that are difficult to root from cuttings. Here’s a step-by-step guide to air layering:
Choose the Right Plant
Ideal Plants: This works for trees, fiddle leaf figs, and other woody houseplants.
Select a Healthy Stem
Choose the Location: Identify a healthy, mature stem that is at least 30 cm (12 inches) long. Select a point on the stem where you want roots to develop, usually a few inches below a node.
Make a Cut or Wound
Create an Incision: Using shears, make a cut around the stem to create a wound. This cut should be about 2.5-5 cm (1-2 inches) long. Remove a ring of bark to expose the inner stem.
Optional: Apply Rooting Hormone: To encourage faster root development, apply rooting hormone and water with seaweed extract.
Wrap with Moist Sphagnum Moss
Prepare the Moss: Dampen a handful of sphagnum moss with water until it is moist but not soaking wet.
Wrap the Stem: Wrap sphagnum moss around the stem, covering the wound.
Secure with Plastic Wrap
Cover with Plastic: Wrap the sphagnum moss with clear plastic wrap to keep it in place and maintain humidity. Ensure the wrap is snug but not too tight to allow air circulation. Secure the ends of the wrap with twist ties, string, or tape.
Monitor Root Development
Check for Roots: Over the next 6–12 weeks, periodically check the moss for root development, you should see roots through the wrap.
Separate and Pot the New Plant
Cut the Stem: Once roots are established, cut the stem just below the roots.
Plant the New Rooted Section: Remove the wrap and plant in a pot filled with well-draining soil. Water the new plant thoroughly.
How To Propagate Plants In LECA Clay Balls
LECA, also known as clay balls or hydroton, is a popular medium for hydroponic gardening due to its excellent drainage and aeration properties. Here’s how to use LECA for propagation:
Select a Healthy Cutting
Choose a Plant: Ideal plants for LECA propagation include orchids, philodendrons, and snake plants.
Cut the Stem: Use a clean, sharp pair of scissors or pruning shears to cut a healthy stem just below a node. The cutting should be about 10-15 cm (4–6 inches) long.
Prepare the LECA
Rinse Thoroughly: Place the LECA balls in a strainer and rinse them under running water until the water runs clear. This removes any dust and fine particles.
Soak the LECA: Submerge the LECA balls in water for at least 6–8 hours or overnight to ensure they are fully saturated and ready to support plant growth.
Harden The Cutting: Dip the cuttings in rooting hormone to encourage faster root development. Leave the cutting for 30–60 minutes to harden off the cut. This allows the wound time to heal a little, reducing the chances of fungal or bacterial infections, and of cutting losses.Plant the Cutting
Use a Container: Choose a container with drainage holes and fill it with the soaked LECA balls.
Insert the Cutting: Make a small hole in the LECA and insert the cutting, ensuring the node is buried. Gently press the LECA around the cutting to secure it.
Provide Proper Conditions
Watering: Water the LECA regularly to keep it moist but not waterlogged. LECA retains water well, so be cautious not to overwater.
Light: Place the container in a location with bright, indirect sunlight. Direct sunlight can stress the cutting.
Monitor Root Development
Check for Roots: After 2–6 weeks, check for root development, once established, the cutting can stay in hydroponics or be potted up in houseplant soil.

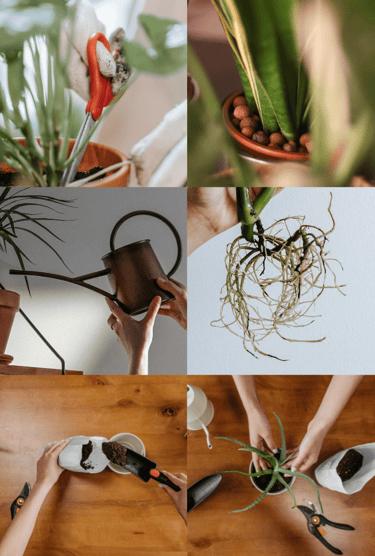
How To Propagate Plants With Leaf Cuttings
Leaf cuttings are a fantastic way to propagate many types of houseplants, especially those that can regenerate from a single leaf or a section of a leaf. Here’s a step-by-step guide to help you successfully propagate plants using leaf cuttings:
Select a Healthy Leaf
Choose a Plant: Ideal plants include African violets, begonias, and jade plants.
Cut the Leaf: Use a clean scissors to cut a healthy leaf from the parent. For some plants, you use the entire leaf; for others, a section of the leaf suffices.
Prepare the Cutting
Full Leaf: If using a whole leaf, you may also cut the petiole (the stalk attaching the leaf to the stem) to about 2-3 cm (1 inch) long.
Leaf Section: For plants that propagate from leaf sections, cut the leaf into smaller pieces, each with a part of the main vein.
Harden The Cutting: Dip the cuttings in rooting hormone to encourage faster root development. Leave the cutting for 30–60 minutes to harden off the cut. This allows the wound time to heal a little, reducing the chances of fungal or bacterial infections, and of cutting losses.Choose a Growing Medium
Soil: Fill a small pot with a well-draining cactus potting mix or houseplant soil. Moisten the soil.
Perlite or Vermiculite: Alternatively, you can use perlite or vermiculite for improved aeration and moisture retention.
Plant the Cutting
Insert the Cutting: Insert the base of the leaf or the leaf section into the growing medium. For leaf sections, make sure the main vein contacts the soil.
Firm the Soil: Gently press the soil around the cutting to secure it in place.
Create a Humid Environment
Cover with Plastic: Place the pot in a clear plastic bag or under a propagation dome to maintain high humidity. Ensure there is ventilation to prevent mould.
Provide Proper Conditions
Light: Place the pot in a location with bright, indirect sunlight.
Watering: Keep the growing medium consistently moist, but not waterlogged.
Monitor Root Development
Check for Roots: After 4-8 weeks, roots and new shoots should begin to develop. You can gently tug on the cutting to check for resistance.
Transplanting
Move to a Larger Pot: Once the new plantlets are well-established, they can be transplanted to larger pots and cared for as mature plants.

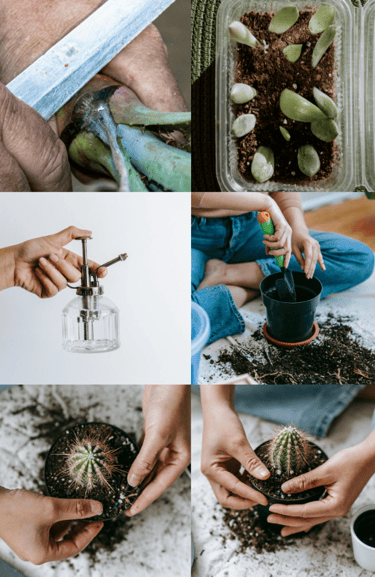
How To Propagate Plants By Root Cuttings
Propagating using root cuttings is an effective method for plants that have robust root systems and can regenerate from root segments. This technique is useful for propagating plants that are difficult to prop using other methods. Here’s a step-by-step guide:
Select the Right Plant
Ideal Plants: Plants that work well include Sanseveria, Pepperomia, African Violets, and Begonias. Choose plants that have developed root systems.
Prepare the Plant
Best Time: The best time to take root cuttings is during the plant's dormant season, usually in late autumn or early winter. This minimizes stress on the parent plant.
Water Thoroughly: Water a day before you take cuttings to hydrate the roots.
Harden The Cutting: Dip the cuttings in rooting hormone to encourage faster root development. Leave the cutting for 30–60 minutes to harden off the cut. This allows the wound time to heal a little, reducing the chances of fungal or bacterial infections, and of cutting losses.Select and Prepare the Cuttings
Choose Healthy Roots: Remove the plant from the pot and select healthy, thick roots that are at least pencil-thickness. Avoid thin, fibrous roots.
Cut the Roots: Use clean scissors to cut roots into segments, each about 5-10 cm (2-4 inches) long. Make a straight cut at the top and a slanted cut at the bottom.
Plant the Root Cuttings
Prepare a Pot: Fill a pot with a well-draining potting mix or a mix of soil and sand.
Insert the Cuttings: Insert the root cuttings vertically into the soil, with the straight cut end facing up and the slanted cut end down. Bury them about 2-3 cm (1 inch) deep.
Care for the Cuttings
Water Lightly: Water the soil lightly. Keep the soil consistently moist.
Provide Proper Conditions: Place the pot in a location with indirect sunlight and maintain a cool temperature to encourage root growth.
Monitor Growth
Check for Shoots: After a few weeks, new shoots should begin to emerge from the soil. This indicates that the cuttings have successfully rooted.
Transplanting: Once the new plants are established, transplant into pots.
How To Propagate Plants With Pups
Propagating plants using pups, also known as offsets, is a simple and effective method. Pups are small offshoots that grow from the base of the parent plant and can be separated to grow independently. Here’s a step-by-step guide to propagating plants using pups:
Identify the Pups
Choose the Right Plant: Ideal plants include Spider Plants, Aloe Vera, and Agave.
Look for Pups: Pups are smaller versions of the parent plant that grow from the base. Ensure they are large enough to have their roots before separating them.
Prepare for Separation
Water the Plant: Water a day before propagation to reduce transplant shock.
Gather Tools: Use pruning shears to cut the pups away from the parent plant.
Separate the Pups
Cut the Pups Away: Remove the parent from its pot and cut the pups off with its roots intact. If the pup doesn’t have roots, it may still grow.
Harden The Cutting: Dip the cuttings in rooting hormone to encourage faster root development. Leave the cutting for 30–60 minutes to harden off the cut. This allows the wound time to heal a little, reducing the chances of fungal or bacterial infections, and of cutting losses.Plant the Pups
Select a Pot: Select a small pot with drainage holes for each pup.
Use Appropriate Soil: Fill the pot with a well-draining potting mix.
Plant the Pup: Make a small hole in the soil and place the pup, ensuring its roots are covered. Firm the surrounding soil to provide stability.
Provide Proper Care
Watering: Water the newly potted pup lightly. Keep the soil consistently moist.
Light: Place the pot in a location with bright, indirect sunlight.
Humidity: Consider placing a humidity tray nearby or misting the plants.
Monitor Growth
Watch for New Growth: After a few weeks, the pup should start to grow and develop new leaves. This indicates successful rooting and establishment.

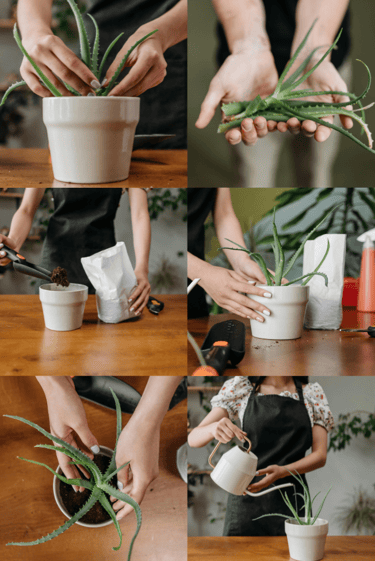
How To Propagate Plants With Corms Or Bulbs
Select a Healthy Corm or Bulb
Choose a Plant: Ideal plants include tulips, daffodils, crocuses, and gladiolus.
Inspect the Corm/Bulb: Ensure the corm or bulb is firm, plump, and free from any signs of rot or damage.
Prepare the Corm/Bulb
Trimming: If there are any old roots or remnants of previous growth, gently trim them off using clean scissors or a knife.
Choose a Growing Medium
Soil: Fill a pot or garden bed with well-draining soil. Bulbs prefer a mix that's rich in organic matter.
Perlite or Vermiculite: For improved aeration and moisture retention, you can mix in some perlite or vermiculite.
Plant the Corm/Bulb
Depth: Plant the corm or bulb at the appropriate depth. As a general rule, plant them about three times as deep as their height.
Spacing: Leave enough space between corms or bulbs to allow for growth. Typically, 3–6 inches apart, depending on the size of the corm/bulb.
Create a Humid Environment
Water: After planting, water the area thoroughly to help settle the soil around the corm or bulb.
Mulch (Optional): Applying a layer of mulch can help retain moisture and protect the corms or bulbs from temperature fluctuations.
Provide Proper Conditions
Light: Place the pot in a location with bright, indirect sunlight. If planting outdoors, ensure the area receives the right amount of light for the specific plant type.
Watering: Keep the soil consistently moist, but not waterlogged.
Monitor Growth
Check for Growth: After a few weeks, you should start to see shoots emerging from the soil. This indicates that the corm or bulb is successfully developing roots and new growth.
Transplanting (If necessary)
Move to a Larger Pot or Bed: Once the new plants are well-established, they can be transplanted to larger pots or garden beds and cared for as mature plants.


How To Propagate Plants By Layering
Layering is a propagation method that allows new roots to form on a stem while it is still attached to the parent plant. This technique is especially useful for plants that are difficult to propagate through cuttings. Here’s a step-by-step guide to layering:
Choose the Right Plant
Ideal Plants: Suitable plants for layering include Philodendrons, and Ficus trees.
Select a Healthy Stem
Choose the Location: Identify a low, flexible stem that can be bent to the ground or a pot. The stem should be healthy and free from disease.
Prepare the Stem
Create a Wound: Using a sharp, clean knife, make a small cut or wound on the selected stem where you want roots to form. This cut should be about 2.5 cm (1 inch) long.
Apply Rooting Hormone (Optional)
Encourage Rooting: Applying rooting hormone to the cut area can promote faster root development, though it’s optional. We also recommend watering with natural seaweed to give the plant extra strength and nutrients.
Secure the Stem
Bury the Cut Area: Bend the stem down so that the wounded area is in contact with the soil. Bury the cut area about 5-10 cm (2-4 inches) deep. You can use a stone or a U-shaped pin to keep the stem in place.
Ensure Contact: Ensure the wounded part stays in contact with the soil to encourage root growth.
Water and Care
Water Thoroughly: Water the area well after burying the stem and keep the soil consistently moist but not waterlogged.
Provide Proper Light: Ensure the parent plant continues to receive adequate light and care while the roots develop.
Monitor Root Development
Check for Roots: After 6–12 weeks, roots should begin to form at the buried section. You can gently tug on the buried part to check for resistance, indicating root growth.
Separate and Pot the New Plant
Cut the Stem: Once roots have formed, carefully cut the stem just below the rooted area using a sharp knife or pruning shears.
Transplant the New Plant: Gently dig up the new plant with its roots and transplant it into a pot filled with well-draining soil. Water it thoroughly.
How To Propagate Plants With Tissue Culture
Tissue culture, also known as micropropagation, is an advanced propagation method that involves growing new plants from small tissue samples in a sterile laboratory environment. This technique is particularly useful for mass-producing plants, ensuring genetic uniformity, and propagating rare or endangered species. Here’s a step-by-step guide to tissue culture:
Select the Plant Tissue
Choose a Plant: Ideal plants for tissue culture include Orchids, Monstera, Philodendrons, Ferns, and many ornamental plants.
Collect Explants: An explant is a small piece of plant tissue, such as a leaf, stem, or root, that is used for propagation. Select healthy, disease-free tissue from the parent plant.
Sterilize the Explants
Disinfection: Clean the explants with a sterilizing solution (commonly a diluted bleach solution) to remove any contaminants. Rinse thoroughly with sterile water to remove all traces of the sterilizing agent.
Prepare the Growth Medium
Nutrient Medium: Prepare a nutrient-rich growth medium which provides the necessary vitamins, minerals, and growth hormones. This medium is usually gelled with agar to provide support for the explants.
Initiate the Culture
Inoculation: Place the sterilized explants onto the growth medium in sterile Petri dishes. Ensure the work area is sterile to prevent contamination.
Seal the Vessels: Seal the culture vessels to maintain a sterile environment and place them in a controlled growth chamber or incubator with appropriate light and temperature conditions.
Induce Callus Formation
Hormonal Treatment: Apply plant growth hormones (such as auxins and cytokinins) to the culture medium to induce callus formation. A callus is a mass of undifferentiated plant cells that can develop into new plantlets.
Differentiate and Regenerate Plantlets
Shoot and Root Induction: Adjust the concentration of growth hormones in the medium to promote the differentiation of the callus into shoots and roots. This process involves transferring the callus to different media stages tailored to induce shoot and root formation.
Acclimatize Plantlets
Transplanting: Once the plantlets have developed roots and shoots, transfer them from the culture vessels to pots with soil or a soilless medium. This step is known as acclimatization.
Gradual Transition: Gradually expose the plantlets to external environments by increasing ambient light and reducing humidity levels.
Monitor Growth and Care
Care for the Plantlets: Provide appropriate care, including watering, light, and temperature, to help the plantlets establish and grow into mature plants. Ensure that the transition from the sterile culture environment to normal growing conditions is smooth.
Houseplant Propagation FAQ
Q: What is plant propagation? A: Plant propagation is the process of creating new plants from existing ones. It can be done through seeds, cuttings, division, or other methods.
Q: What are the most common methods of propagation? A: The most common methods include stem cuttings, leaf cuttings, division, and layering. Each method works best for different types of plants.
Q: When is the right time to take cuttings of houseplants? A: The ideal time is during the growing season, typically late spring to early summer, when plants are actively growing and temperatures are warm.
Q: How do I take stem cuttings? A: Identify a healthy stem with at least 3–4 nodes, make a clean cut just below a node, remove lower leaves, and place the cutting in water or moist soil. Change the water every few days or keep the soil moist until roots develop.
Q: Can I propagate any houseplant from a leaf cutting? A: Not all plants can be propagated from leaf cuttings, but plants like snake plants, succulents, and ZZ plants can be propagated this way. Allow the cut end to callus for a day or two before placing it in moist soil.
Q: How do I propagate plants by division? A: Carefully remove the plant from its pot, gently separate the root ball into sections, ensuring each section has healthy roots and leaves, and replant the divisions in fresh potting mix.
Q: What is rooting hormone, and do I need it? A: Rooting hormone is a plant growth hormone that helps cuttings root faster and easier. It's optional but can improve success rates, especially for difficult-to-root plants. We've written an article about rooting hormones in more detail, diving into the science, including research and studies showing it's effectiveness.
Q: How long does it take for roots to develop on cuttings? A: It typically takes 2–4 weeks for roots to develop on stem cuttings in water, but it can vary depending on the plant species and environmental conditions.
Q: How do I know if my propagation was successful? A: Look for new growth, such as new leaves or roots, which indicate that the cutting or division has successfully rooted.
Q: Can I propagate houseplants from seeds? A: Yes, many houseplants can be propagated from seeds, though it's less common than vegetative propagation methods like cuttings and division.
Q: What should I do if my propagated plant isn't thriving? Ensure it's getting the right amount of light, water, and nutrients. Check for pests or diseases, and adjust care as needed. Sometimes, it just takes a bit of patience!
Houseplant Propagation Summary
Houseplant propagation is the practice of creating new plants from existing ones, using methods such as stem cuttings, leaf cuttings, division, and layering. It’s a fantastic way to expand your collection, to share your plants with friends, and keep your plants healthy and thriving. Sometimes, it's great to take cuttings to fill out the mother's pot, and make it more dense and full. Remember to use the right propagation technique for each type of plant and provide the proper care to ensure successful propagation. Whether you’re using water or soil, rooting hormones, or just your green thumb, patience and regular monitoring are key. Happy growing!
The Science Behind Houseplant Propagation
Propagation, the process of creating new plants from existing ones, involves several scientific principles that ensure successful growth and development. Understanding these principles can enhance your propagation efforts and lead to healthier, thriving houseplants.
Hormonal Regulation
Hormones play a critical role in the propagation process. Two key hormones are auxins and cytokinins:
Auxins: These hormones are primarily produced in the plant's apical meristem and are crucial for root initiation. Auxins stimulate the division and elongation of cells in the root's meristematic tissue. When a cutting is made, the concentration of auxins at the cut site increases, promoting the formation of new roots. This process is known as adventitious rooting.
Cytokinins: Produced mainly in the roots, cytokinins promote cell division and the development of shoots. In propagation, the balance between auxins and cytokinins is vital; while auxins favour root development, cytokinins encourage shoot growth. Managing this hormonal balance ensures both root and shoot formation, leading to a well-established new plant.
Cellular Differentiation
Cellular differentiation is a process where unspecialized cells (such as those in the cambium or meristematic tissue) transform into specialized cells to form new roots, shoots, or leaves. When a plant cutting is made, the cells at the cut site undergo differentiation, forming the necessary tissues to develop into a new plant. This transformation is influenced by hormonal signals and environmental factors like light, temperature, and moisture.
Adventitious Root Formation
Adventitious roots are roots that form from non-root tissues, such as stems or leaves. This is a key aspect of vegetative propagation. The process involves:
Callus Formation: Following a cut, a mass of undifferentiated cells called callus forms at the wound site. This callus serves as a protective barrier and a site for cellular differentiation.
Root Primordia: Within the callus, root primordia (precursors to roots) develop under the influence of auxins. These primordia grow and elongate to form adventitious roots.
Genetic Stability and Cloning
Asexual propagation methods, such as cuttings and division, produce clones of the parent plant. This means the new plants are genetically identical to the original, ensuring the same traits and characteristics. This genetic stability is advantageous for maintaining desirable plant qualities, such as flower colour, growth habit, and resistance to diseases.
Environmental Factors
Successful propagation is heavily influenced by environmental conditions:
Light: Adequate light is essential for photosynthesis and energy production. Indirect or filtered light is ideal for cuttings, as it prevents excessive transpiration and dehydration.
Temperature: Optimal temperatures (generally between 20-25 °C or 68-77 °F) promote cell division and root formation. Extreme temperatures can stress the cuttings and hinder propagation success.
Humidity: High humidity levels reduce water loss through transpiration and support root development. Using humidity domes or plastic bags can help maintain the necessary humidity levels around the cuttings.
Moisture: Maintaining consistent moisture in the rooting medium is crucial. The medium should be moist but not waterlogged to prevent rot and support root growth.
Rooting Hormones and Antimicrobial Agents
Commercial rooting hormones containing synthetic auxins, such as indole-3-butyric acid (IBA), can enhance root development and increase the success rate of cuttings. Additionally, using antifungal or antibacterial agents can prevent infections and rot during the propagation process, ensuring healthy development of the new plant.
Studies on Plant Propagation
Scientific studies have shown that the use of rooting hormones significantly increases the success rate of plant cuttings. For instance, research published in the Journal of Horticultural Science found that cuttings treated with IBA had a higher rooting percentage and faster root development compared to untreated cuttings. These findings highlight the importance of using hormonal treatments to improve propagation outcomes.
Understanding these scientific principles behind houseplant propagation allows you to optimize your techniques and achieve successful results. By leveraging hormonal regulation, cellular differentiation, and environmental factors, you can propagate houseplants effectively and enjoy the rewards of growing new, healthy plants.
Edited & Fact Checked By: The Houseplant Shop
Article Published: 4th December 2024

About The Houseplant Shop:
Independent Houseplant Nursery
Horticultural Specialists
Managing Over 250 Houseplant Species Onsite
Over 15 Years Of Experience With Horticulture
As head of horticulture, Sarah manages the care and propagation of over 250 plant species at a commercial houseplant nursery. With over 15 years of experience in horticulture, specializing in houseplants, Sarah has extensive expertise in plant biology, soil science, and integrated pest management. She continually reviews and integrates the latest research into her plant care guides. Dedicated to educating others, Sarah has spent years diagnosing houseplant care issues and sharing her real-world experience. Her commitment to scientific accuracy and helping people diagnose plant health issues has established her as a trusted authority and expert in the field.
The Houseplant Shop is a dedicated houseplant nursery, growing all of their own stock from their botanical library of over 250 houseplant species. The nursery staff are horticultural experts who have dedicated their lives to cultivating and nurturing over 250 different species of houseplants, focusing on Aroids, tropical plants, and NOID collectables. All their plants are grown in house in Britain to be more environmentally friendly. The nursery is proud to have been featured by the Royal Horticultural Society (RHS) as a 100% peat free nursery.
Recommended Further Reading:
People also looked at: How Rooting Hormones Speed Up Propagation, Fertilizer, Lighting, Artificial Lighting, Temperature, Watering, Houseplant Care Guides By Species, and Pruning.
How We Reviewed This Article:
Our horticultural experts continually monitor the houseplant space, and we update our articles when new information becomes available. We are committed to providing current and reliable information. If you have some information that you think would be helpful in this article, we'd love to hear from you. Our team works hard to revise articles for factual accuracy, and we regularly update our pages with new information, techniques, tips, images, trade secrets, and real world experience from the team here at the houseplant nursery. You can find a list of the article updates below.
Written By: Sarah Brooks, Head of Horticulture
Article Received: 25th November 2024
Copyright: The Houseplant Shop (https://thehouseplant.shop)
The use, distribution, or reproduction is permitted, provided the original copyright owner is credited and that the original publication on this website is cited with a direct link to the article, only with these terms. Any other use is not permitted.
List of Article Updates:
20th December 2024: Minor UI updates
22nd December 2024: Formatting
21st January 2025: Bug fixes and new links added
29th January 2025: Added links to an article reviewing studies on the effectiveness of rooting hormones
Author Bio:
Author: Sarah Brooks
Head of Horticulture at The Houseplant Shop

