Monstera Plant Care Guide
Monstera — Noun
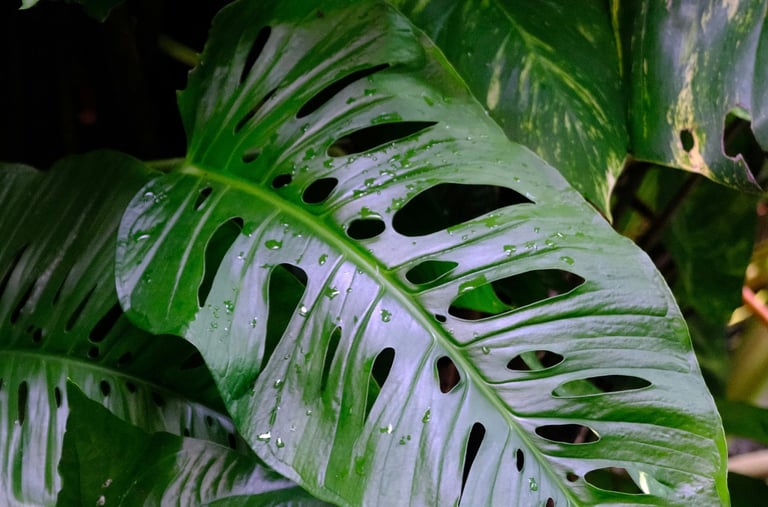
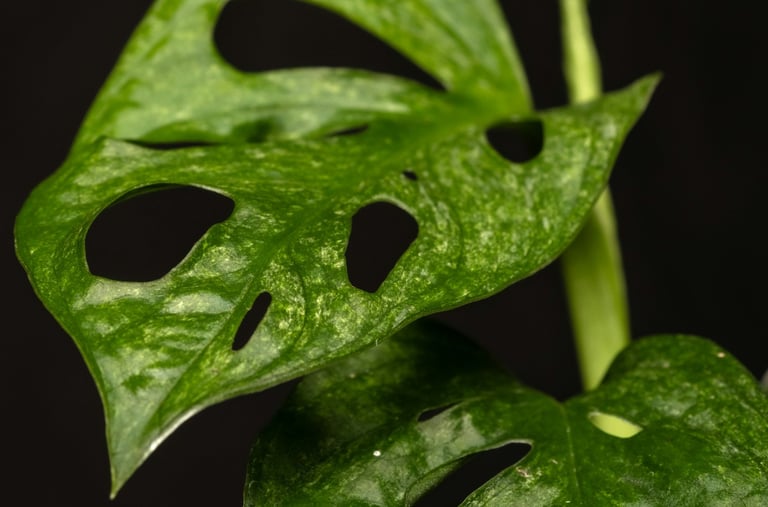
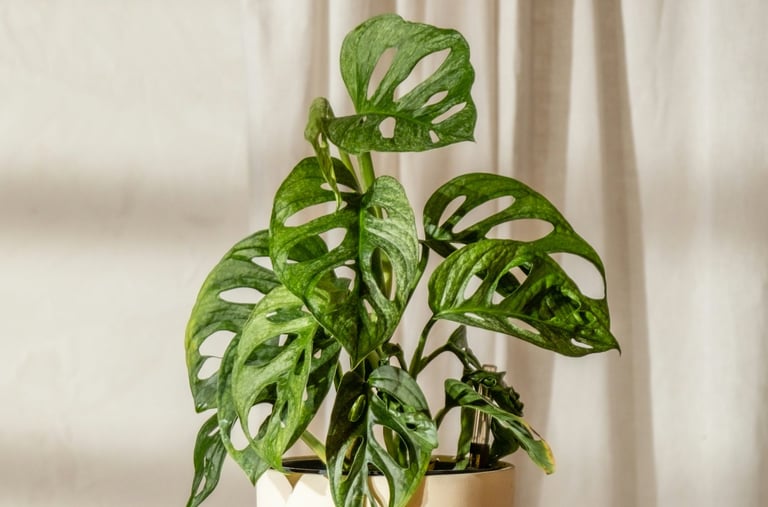
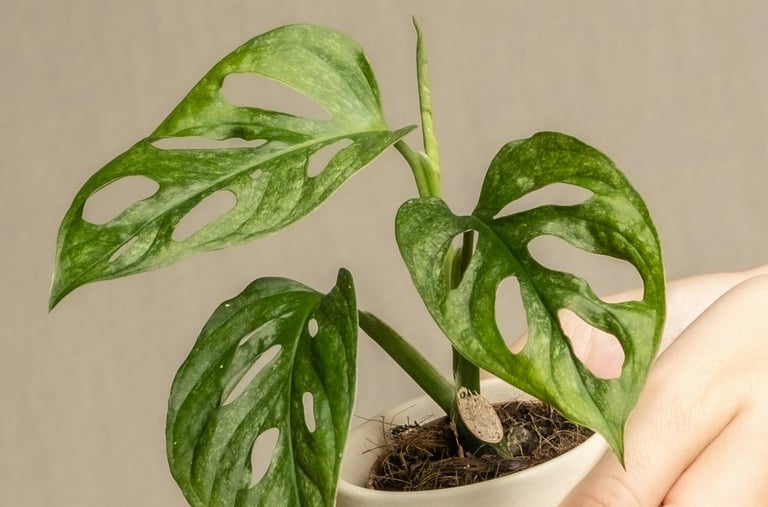
Tropical American climbing plants of the arum family that have deeply incised or perforated leaves. Leaves come with various types of fenestrations, including splits, holes, and perforations. Some more recent varieties of Monstera, like the Thai Constellation, are artificially created in labs, while others grow naturally in the wild.
Pronounced: Mon — steer — ah
Genus: Monstera is a genus made up of 48 species of flowering plants, of the arum family Araceae, otherwise known as Aroids. They are native to tropical regions of the Americas.
First Use: The first known use of the word Monstera was by French botanist Michel Adanson in 1763.
Otherwise known as:
Swiss Cheese Plant
Hurricane Plant
Mexican Breadfruit
Custard Plant
Ceriman
Overview: Monstera are iconic for their fenestrated leaves, with splits, holes, and perforations. Swiss cheese plants are easy to care for and range from small plants with tiny leaves to giant plants with 3 ft (0.91 m) leaves. They come in a huge variety of colours, shapes, and variegation patterns. Monstera is arguably one of the most popular houseplants of all time, and the leaves are instantly recognisable. Monstera plant care is reasonably easy as they are very laid-back houseplants that are easy to look after, and they can flower indoors with the right plant care and environment.
Figures
Ultimate height
0.1-20 metres
Ultimate spread
1.5–2.5 metres
Time to ultimate height
10–20 years
Monstera lifespan
40+ years
Monstera Leaf Size
3ft (0.91 m) on larger varieties
Monstera Facts & Figures
In The Pot
Soil
Sand
Loam
Chalk
Clay
Moisture
Well–draining chunky but moist soil
pH
Acid, Neutral, Alkaline
Out Of The Pot
Windows
South–facing bright indirect light. Monstera do not need direct sunlight as it can bleach the leaves.
Exposure
Sheltered
Hardiness
Can be grown outside in the summer, but Monstera dislike cold temperatures and frost.
Temperature Tolerance: 15 °C (59 °F) – 30 °C (86 °F)
Facts
Family
Arum
Native to GB / Ireland
No — Native to America
Foliage & Habit
Evergreen / Climber
Safety
Harmful to humans and animals if eaten. Causes skin & eye irritation.
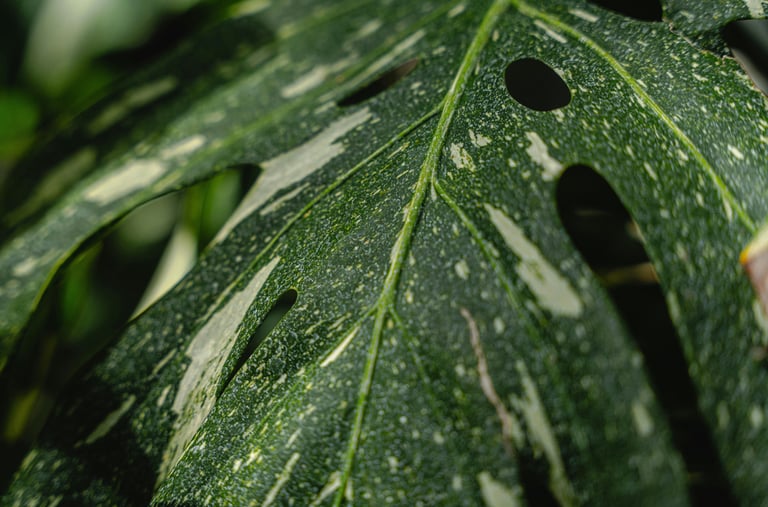

Monstera Thai Constellation
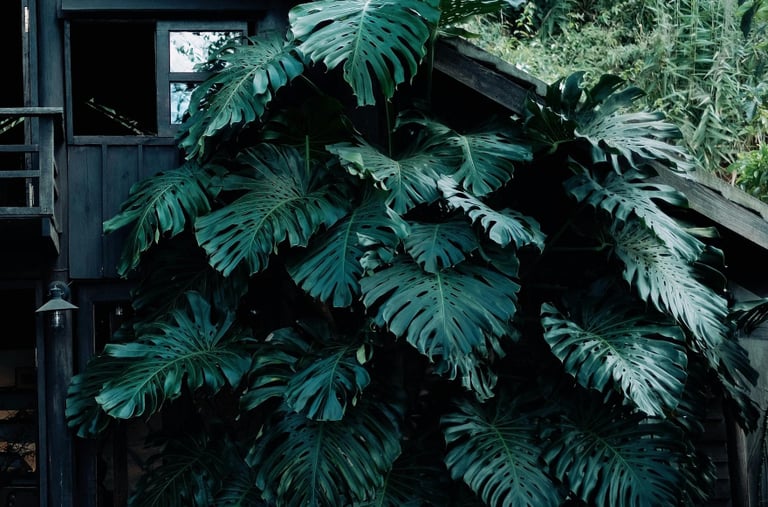
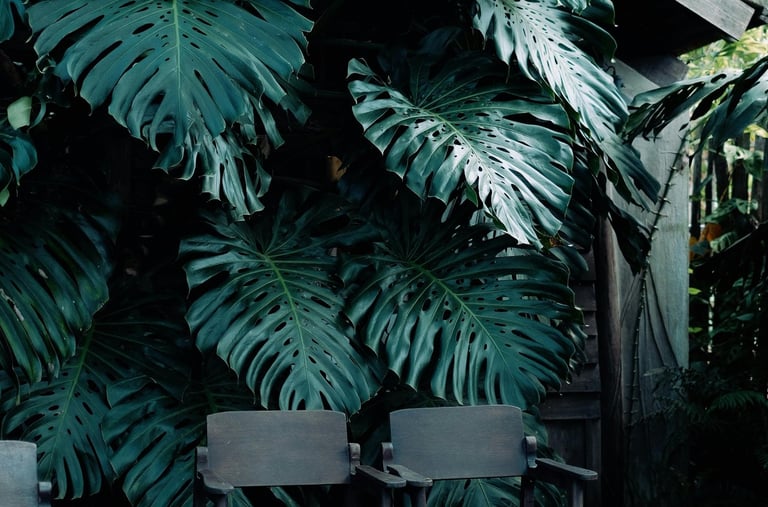
Fully fenestrated mature Monstera deliciosa plant in the wild
Monstera deliciosa inflorescence, otherwise known as a flower

Monstera Light Requirements
Monstera are tropical plants that thrive in specific lighting conditions. Proper lighting is crucial for their growth and development — when we get that right, our plants thrive. Our Monstera plant care guide aims to arm you with all the knowledge that you need to give your Monstera the perfect lighting conditions.
How Much Light Do Monstera Plants Need?
Monstera plants do best in bright, indirect light. This mimics the dappled sunlight they receive in their natural rainforest habitat, where they grow under the canopy of larger trees. Monstera can handle morning or late afternoon sun, but may struggle under the harsh afternoon rays. In bright lighting, Monstera are easy to care for and will thrive, soon growing to their maximum potential when given a suitable support to grow up.
Do Monstera Need Sunlight?
While they enjoy bright light, direct sunlight can scorch their leaves, leading to browning and damage. If your Monstera is in a spot that receives direct sunlight, consider using a sheer curtain to diffuse the light or moving it back from the window a few feet until you find that sweet spot. Monstera are only easy to care for when they're in the right conditions — always remember that Monstera plants do not prefer direct sunlight, as this burns their leaves.
How To Promote Indoor Flowering In Monstera Plants
To encourage a Monstera plant to flower, it requires bright, indirect light. Place your Monstera in a spot where it gets plenty of filtered sunlight. Direct sunlight can scorch its leaves, while insufficient light can hinder blooming. Position the plant near an east or west-facing window, as it provides enough light without the intense afternoon sun. If natural light is limited, consider using grow lights to ensure your Monstera receives the necessary light intensity for flowering. We've written about their flowers in more detail in our Monstera inflorescence guide, including how to promote flowering indoors, and how to pollinate Monstera seeds.
Can Monstera Survive Low Light?
Monsteras can tolerate lower light conditions, but their growth will be slower, and they may develop fewer splits and holes in their leaves. This low light tolerance makes Monstera good plants for bedrooms and offices. If your Monstera is placed in low light, be mindful of overwatering, as the soil will dry out more slowly, and they require food less frequently. Whilst Monstera are still easy to care for in low lighting, they may not reach their full potential.
Monstera Care For Beginners: Lighting
The easiest way to manage lighting as a beginner plant keeper is to put your plant in a shaded window where direct sun can never touch the leaves. Managing Monstera care for beginners is easy when you ensure that direct sunlight never touches the leaves. Swiss Cheese plants can handle some gentle morning, afternoon, or some gentle winter sun, but Monstera do not need direct sunlight for long periods or their leaves may burn and lose their lush green colour.
Monstera Winter Lighting
During the winter months, when natural light levels decrease, consider moving your Monstera closer to a window or adding a grow light. In summer, ensure that your Monstera is protected from intense midday sun. Morning or late afternoon light is usually gentler and less likely to cause damage. This ensures your Monstera care routine doesn't neglect light levels in the darker months, as this can often be overlooked. Don't forget to move your plant before the spring rolls around, as Monstera plants do not need sunlight.
Can You Grow Monstera Under Grow Lights?
If natural light is insufficient, especially during winter, consider using plant grow lights. Monstera are easy to grow under LED grow lights, as they provide the full spectrum of light required for plant growth without emitting too much heat. Place your bulb near your Monstera, with a minimum of 4 inches (ca. 10 cm) between the plant and the leaves. Whilst Monstera plants do not need direct sunlight, they don't like to be without bright light. Use your grow light for about 10–12 hours a day to mimic natural daylight. Any more than that and your Monstera care routine will take longer as you will have to prune off dead leaves.
Monstera Lighting Troubleshooting
Monstera Has Yellowing Leaves: Insufficient light or lack of food. Whilst Monstera are easy to care for, they do need a regular feeding schedule.
Monstera Has Leggy Growth: Not enough light. Monstera do not need direct sunlight, but they like bright, indirect light, and without this, they grow leggy.
Monstera Leaves Have No Holes: Low light or no support. Read our plant care guide on how to get fenestrated leaves in Monstera plants. Moss poles for Monstera plants are readily available, or you can make your own moss pole following our Monstera DIY moss pole guide.
Monstera Disappearing Variegation: Inadequate lighting can cause Monstera to lose their variegation, whilst Monstera survive in low lighting, they don't thrive. Consider adding supplemental lighting.
Monstera Dull New Leaf Colours: Monstera do not like direct sun, but they do need bright indirect lighting to thrive, losing colours is normal in low lighting. Move the plant to a brighter spot or add LED grow lights.
Soggy Yellow Monstera Stems: Mushy stems can often be caused by overwatering or soil that's too dense. Read our guide on how much water to give your Monstera.
Slow Winter Growth: Whilst Monstera don't need direct sunlight, they like bright lighting. Monstera care in the UK is slightly different, as you can keep them in full sun during the winter without worrying about leaf scorching.
By providing your Monstera plant with the right lighting conditions, you can ensure it thrives and displays its characteristic lush, split leaves. Monstera are very easy to care for when kept in the right conditions. Always remember that you don't need to keep your Monstera in direct sunlight. Proper lighting enhances growth, allowing your plant to display the right colours, variegation and eventually to develop those iconic holes in the leaves.
Monstera deliciosa inflorescence, otherwise known as a flower

Monstera Watering Needs
Monstera Care For Beginners: Watering
The easiest and most simple way to tell if your Monstera requires water is to stick your finger into the top 1 inch (2.54 cm) of the soil to feel it. If you have trouble telling wet soil apart from dry soil, you can purchase a moisture meter to tell you exactly when to water. For beginner Monstera keepers, this could be a great solution if you can't tell with your finger. Overwatering is one of the biggest houseplant killers, so it's really important to make sure that you don't overwater your Monstera plant. Monstera care for beginners can be extremely easy if you can avoid your soil getting soggy and staying wet for too long.
Monstera Watering Tips
Use Room Temperature Water: Always water with room temperature water to avoid shocking the roots. This is a trade secret! Monstera Plant Care in the UK, Netherlands, Europe, or in colder areas is slightly different to the tropical climates. Never give your plant water straight out of the tap in the winter months, as it can be so cold that it could cause your Monstera to go into shock. We allow our water to warm up all year round, but this is especially significant in the winter.
Water Evenly: Ensure the water reaches all parts of the root system by watering evenly around the base of the plant. If your soil doesn't take up water, it may be hydrophobic. You can add a drop of horticultural soap to encourage the soil to soak up water again.
Drainage: Make sure your pot has good drainage to prevent water from sitting at the bottom, which can lead to root rot. Never be afraid to drill extra holes in your pot if you need more. Use a 4-6 wood drill bit for this. Pierce the spiked end of the bit through the pot and then gently power up the drill to create a hole, brushing any plastic away afterwards to prevent contamination of microplastics in your soil.
Proper watering is essential for keeping your Monstera plants healthy and vibrant. One of the biggest issues with Monstera plants is overwatering, it is one of the biggest killers of houseplants in general. In this Monstera plant care guide, we're going to break down how to correctly water your Swiss Cheese Plant so that you don't become yet another statistic!
When To Water Monstera Plants
Growing Season Watering Schedule: Water your Monstera plant every 1–2 weeks from spring to summer, allowing the top inch of soil to dry out between watering. This is typically in the spring and summer.
Dormant Season Watering Schedule: In the autumn and winter, reduce watering to every 2–4 weeks as the plant's growth slows down. For feeding in winter, check our detailed Monstera fertilizer guide.
How to Tell if Your Monstera Needs Water
Check the Soil: Stick your finger about an inch into the soil. If it feels dry at this depth, it's time to water. Consider purchasing a soil moisture meter to take all the guesswork out of watering your Monstera.
Drooping Leaves: Leaves that start to droop can be a sign that the plant needs water. However, ensure the soil is dry before watering, as drooping can also indicate overwatering. Tricky, we know!
Yellowing Leaves: Consistently yellowing leaves can be a sign of overwatering. Allow the soil to dry out more between watering. Check your soil to make sure it isn't too dense — Monstera plants love chunky, airy soil recipes.
Monstera Thai Constellation
Monstera Thai Constellation
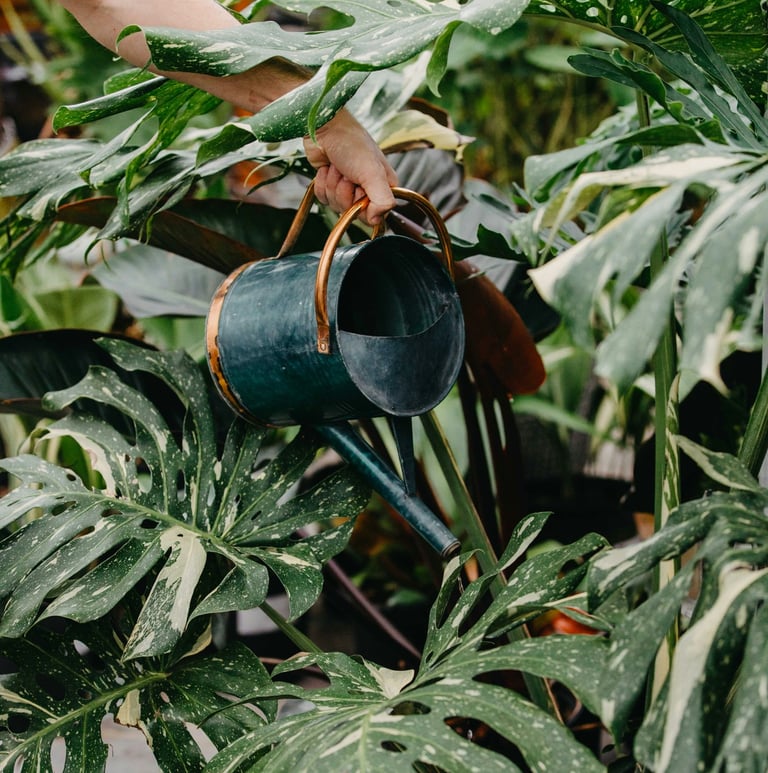

Mature Monstera Thai Constellation being watered
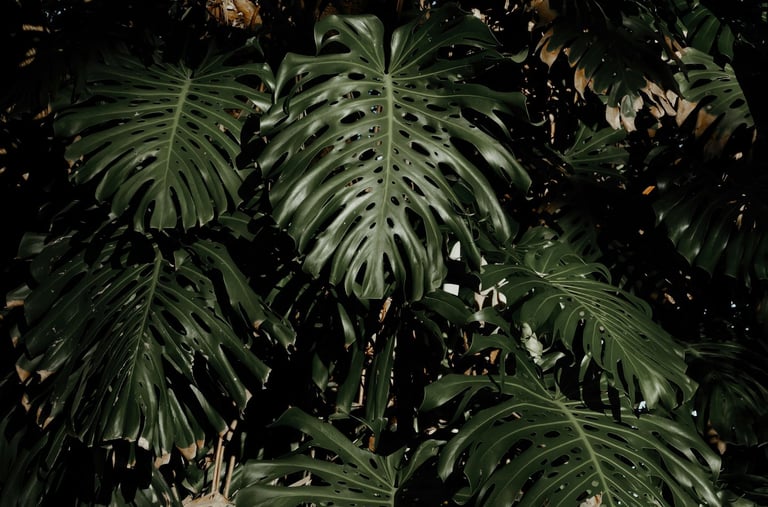

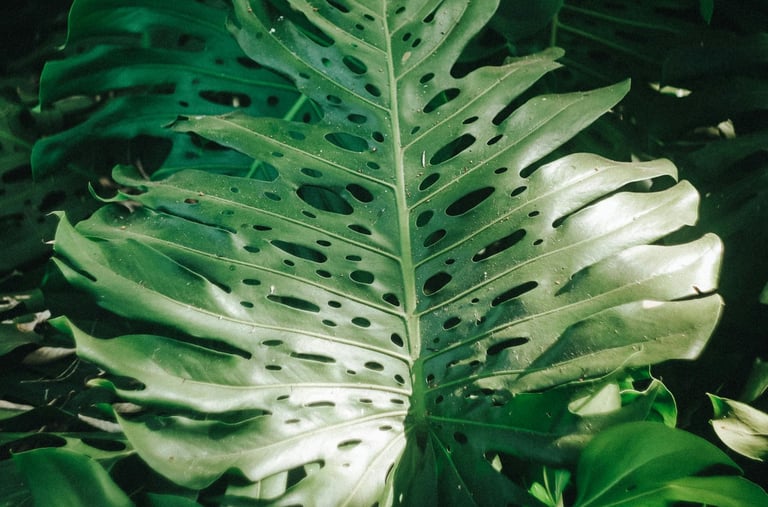

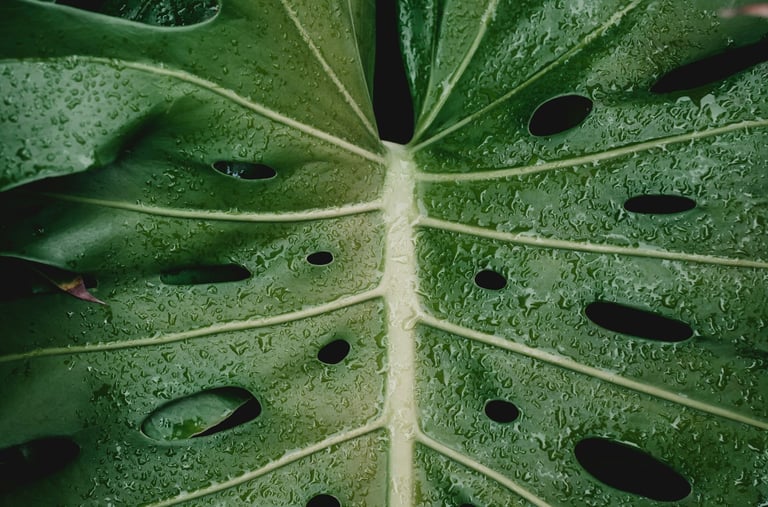

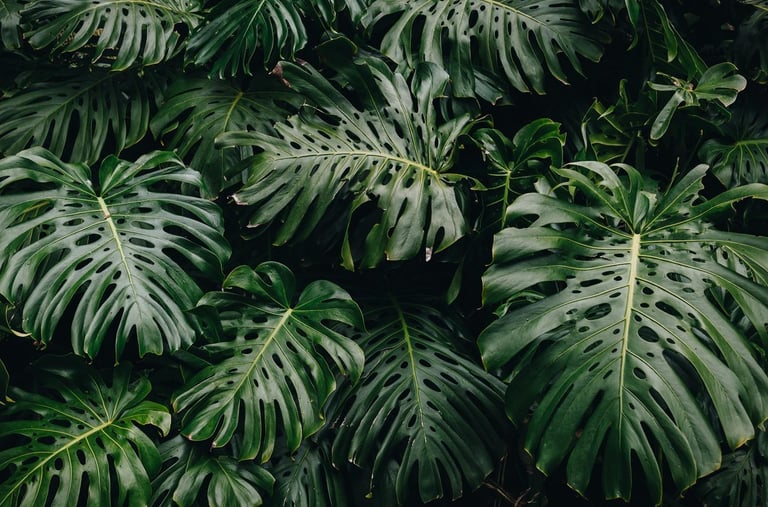
Mature fully fenestrated Monstera deliciosa plant in the wild
Mature fully fenestrated Monstera deliciosa plant
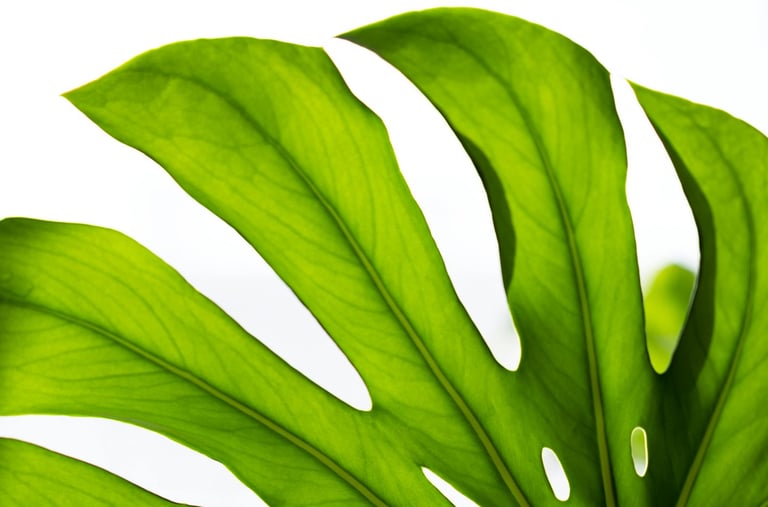
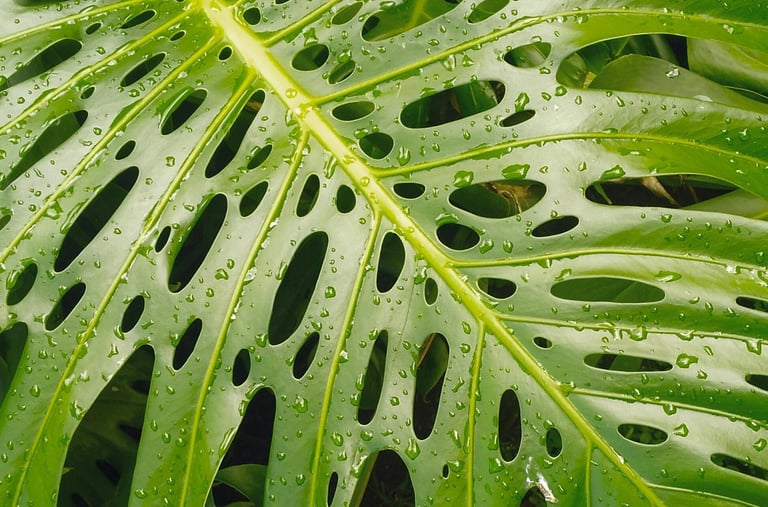
Close up of a fenestrated Monstera deliciosa leaf

Monstera Humidity Requirements
Monstera plants thrive in environments with higher humidity levels as they're tropical plants in the wild, and we're always trying to replicate a houseplants natural environment. Monstera are easy to care for in the UK, as we already have the right sort of conditions for the plants in our homes.
Ideal Monstera Humidity Levels
A range of 60-80% humidity is ideal for Monstera plants and is achievable in most homes. They can tolerate levels as low as 40%, but this might slow their growth and cause the edges of their leaves to brown. Reduced growth rate or crispy brown edges of leaves can indicate the plant isn't receiving adequate humidity.
Tips for Maintaining Monstera Humidity
Humidifier: Using a humidifier can help maintain consistent humidity levels, especially in drier climates or during winter months. If your plant is near a dehumidifier, consider moving it to a more humid environment.
Pebble Tray: Place a tray or bowl filled with pebbles and water beneath the pot. As the water evaporates, it increases the humidity around the plant locally. This works well coupled with grouped plants to bring up humidity in an area in two different ways, so it's a double win.
Grouping Plants: Grouping your Monstera with other plants can create a microenvironment with higher humidity. This is an official The Houseplant Shop trade secret that we use to get our nursery plants to thrive. Plants transpire throughout the day, which allows some water to evaporate into the atmosphere to bring up the localised humidity in your home. This means that you can get your plants to do some hard work for you simply by grouping them together!
Misting: Regularly misting the leaves can provide temporary humidity boosts. However, ensure the leaves have time to dry between misting to prevent fungal and bacterial issues.
Monstera Care For Beginners: Humidity
Humidity can be overwhelming when there's so much information to take in, but if your plant is happy, there's no need to worry too much. If there are no signs of stress from your Monstera plant, like crispy brown leaf tips, it's likely that it's perfectly happy just how it is. The chances are, if you're comfortable in your home, so is your plant. The easiest way to manage Monstera care for beginners is to keep your plant in an area of your home that you're comfortable in, and to monitor for any signs of stress.
To summarise, maintaining proper humidity levels will help your Monstera plant stay healthy and vibrant, allowing it to live its best life. Replicating the tropical conditions Monstera naturally thrive in allows your houseplant to grow to their maximum potential and to display the stunning colours, variegation, and leaf holes that this plant has become so well known for. We all love those iconic fenestrations!
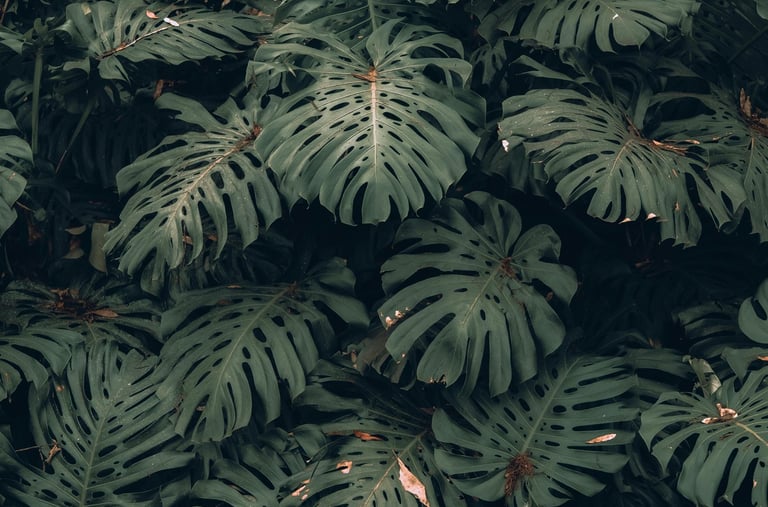

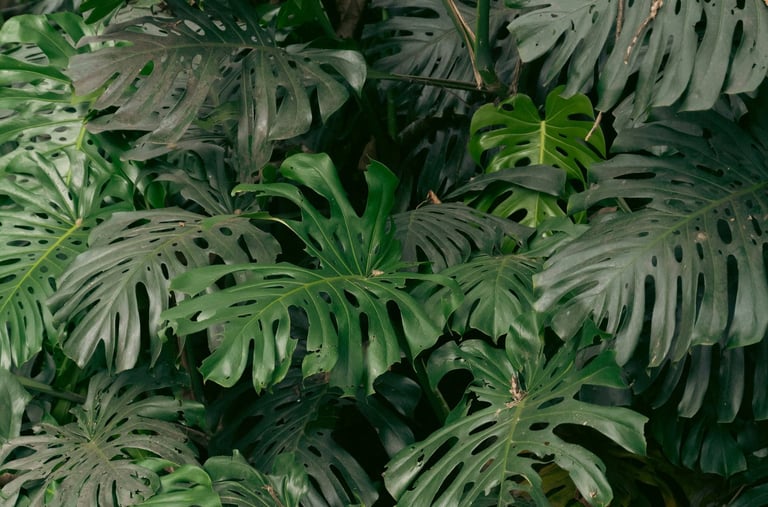

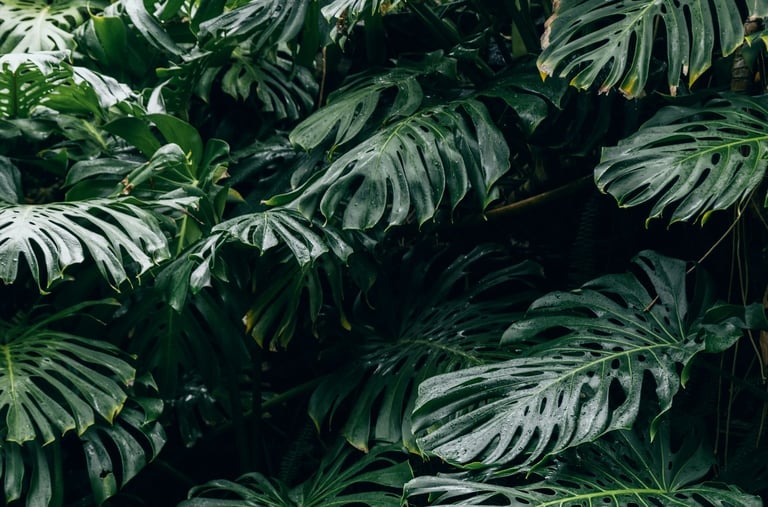

Mature fully fenestrated Monstera deliciosa plant growing outdoors
Mature fully fenestrated Monstera deliciosa growing up a tree
Fully fenestrated Monstera deliciosa plant in the wild

The Right Temperature For Monstera Plants
Monstera plants, native to tropical rainforests, thrive best in warm temperatures that mimic their natural habitat. Monstera are easy to keep indoors because their natural habitat already mimics our household environment. Here's what you need to know about Monstera temperature requirements:
Optimal Monstera Temperature Range
A Monstera plant's ideal temperature range is 15 °C (59 °F) – 30 °C (86 °F), preferably not dropping below 15 °C (59 °F). Think tropical rainforest rather than a British rainstorm! Monsteras can tolerate slightly lower temperatures, but may show slowed growth and reduced vitality. Monstera plants are easy to care for when kept within this range.
Avoiding Temperature Extremes For Monstera
Keep Monstera plants away from cold drafts, air conditioning vents, and windows or doors that open frequently during the winter. Avoid placing them near radiators, heaters, or direct sunlight that can cause rapid temperature fluctuations and potential leaf burn. If you keep within these temperatures, Monstera plants should thrive indoors and be very easy to care for long term.
Monstera Care For Beginners: Temperature
Temperatures are important but try not to stress about your plant too much if there are no signs of temperature stress like crispy brown tips or yellowing leaves. If you're comfortable in your home environment, it's likely that your Monstera is too. The easiest way to manage Monstera care for beginners is to see if you're comfortable in your plant's space — if it's warm enough for you, then it's warm enough for your Monstera plant.


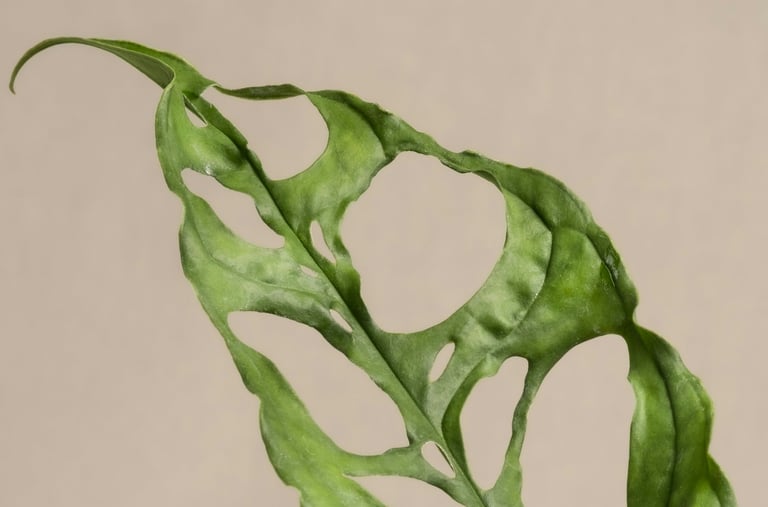

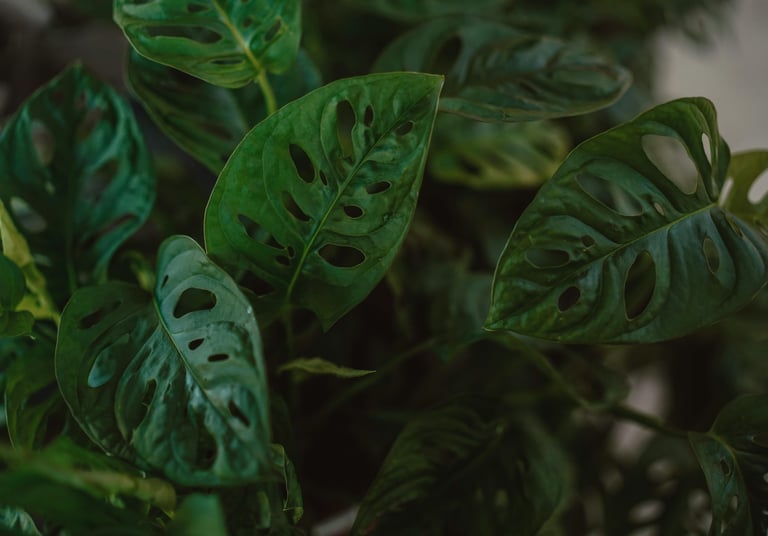
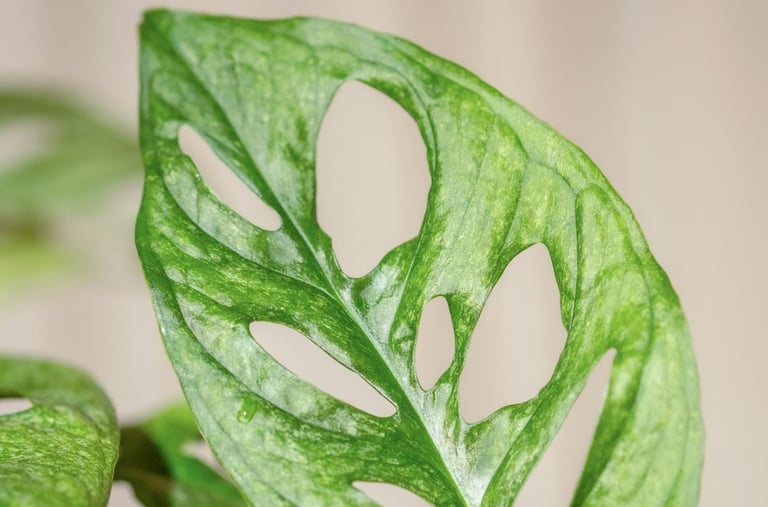
Monstera Obliqua with natural holes in the leaf
Mature Monstera deliciosa with splits, and holes in the leaf
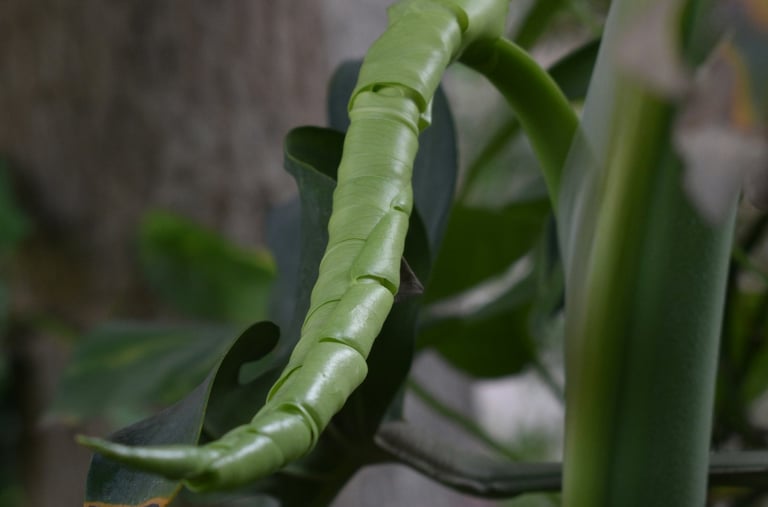
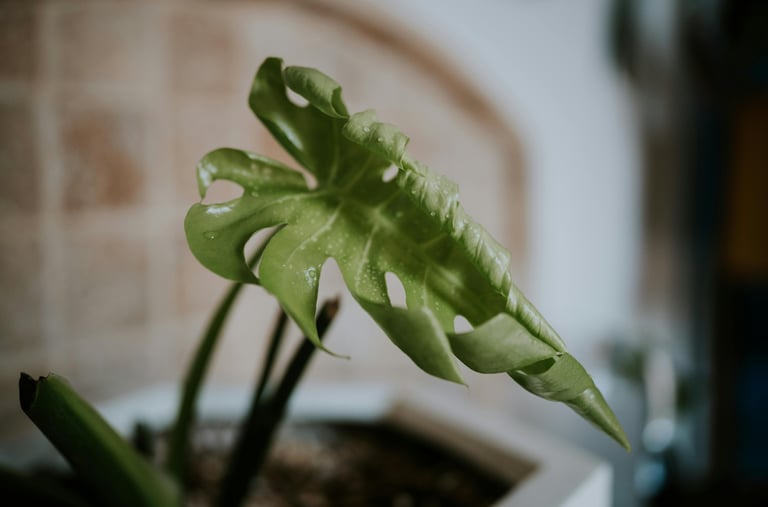
New Monstera deliciosa leaf unfurling

The Best Type Of Soil For Monstera
Monstera plants are beloved houseplants known for their striking leaves and relatively easy care. To ensure your Monstera thrives, providing the right type of soil is essential. The type of soil can significantly impact your plant's health and growth. When keeping a Monstera plant indoors, it's important to replicate their natural environment. Here at The Houseplant Shop, we avoid using peat due to its negative environmental impact on wildlife habitats.
Monstera Care For Beginners: Soil
Soil is one of the most significant aspects of your plants' health. For easy Monstera care for beginners, choose a premixed commercial soil suitable for Aroids or Monstera plants. This mix should be chunky and airy, with lots of additional ingredients other than soil itself. Monstera plants flourish in chunky, airy soil. This kind of soil allows their roots to breathe, preventing root rot. Monsteras naturally grow in environments with bark-filled, chunky soil that supports their roots. If a pre-mixed commercial bag is unavailable, you can create your own soil mix using our recipe below.
Monstera Soil Mix Recipe
Basic DIY Monstera Soil Mix: For a basic soil recipe, mix 1 litre of coco coir, 1 litre of compost, 1 litre of perlite and 1 litre of orchid bark. Feel free to scale this recipe up to meet your potting needs.
Advanced DIY Monstera Soil Mix: For a more advanced soil recipe, mix 4 litres of coco coir, 4 litres of perlite, 4 litres of orchid bark, 2 litres of Lecca balls and 1 litre of worm castings. Optional: 1 litre each of pumice, activated charcoal, and unscented zeolite
Sourcing Soil Mix Ingredients: If you cannot find these ingredients locally, they can be purchased online: Small Coco Coir Pack — Bulk Coco Coir Pack, Orchid Bark, Pumice, Horticultural Sand, Horticultural Grit, Worm Castings, Perlite, Lecca Balls, Activated Charcoal, Zeolite
Soil vs Soilless Mix For Monstera Plants: If you've ever had a pest infestation, then you may be tempted to grow plants hydroponically without any soil at all so that pests cannot survive in it. Coco Coir is the bridge between hydro and soil, giving you the best of both worlds. Coir has natural antifungal properties that help prevent root rot, furthermore it's completely inert which means that pests cannot survive in it unless you keep it really wet until it rots. You can even pasteurise the coir before use to ensure no hitch-hikers have jumped in during transport. You can add perlite or vermiculite to make it more chunky, but avoid adding any organic material that could decompose and attract pests. Be sure to stick to a good houseplant fertilizer, as coco coir has no natural nutrients to feed your plant.
Rich in Organic Matter: A soil mix rich in organic matter provides necessary nutrients. Adding worm castings or compost enhances nutrient content. Without organic matter, use a complete feed like Ionic Formulex weekly.
Neutral pH: Aim for a soil pH between 6.0 and 6.5. The ingredients in our soil mix recipes should naturally provide this pH level. Check the pH of any commercial soil before use.
Preparing to Pot Up Your Monstera
Inspect the Root Ball: Before repotting, check the root ball. If roots resemble raw ramen noodles, your Monstera is ready for a new pot. If roots appear mushy or rotten, trim them and consider a smaller pot.
Choose the Right Size Pot: Use a pot with drainage holes, only 1 inch (2.54 cm) larger than the current root ball. This helps prevent waterlogging and root rot.
Prepare the Soil Mix: Mix your DIY soil or open your pre-mixed bag, ready for potting.
Hot To Pot Up Monstera Plants
Prepare the Pot: Add a small handful of soil at the bottom.
Prepare the Monstera: Gently remove your Monstera from its current container and place it in the new pot.
Fill Around the Roots: Add soil mix around the roots, leaving about 1 inch (2.54 cm) of space. Gently press to eliminate air pockets.
Water: Water thoroughly, allowing excess water to drain. After draining, place your plant in a decorative pot or on a plant stand for display.
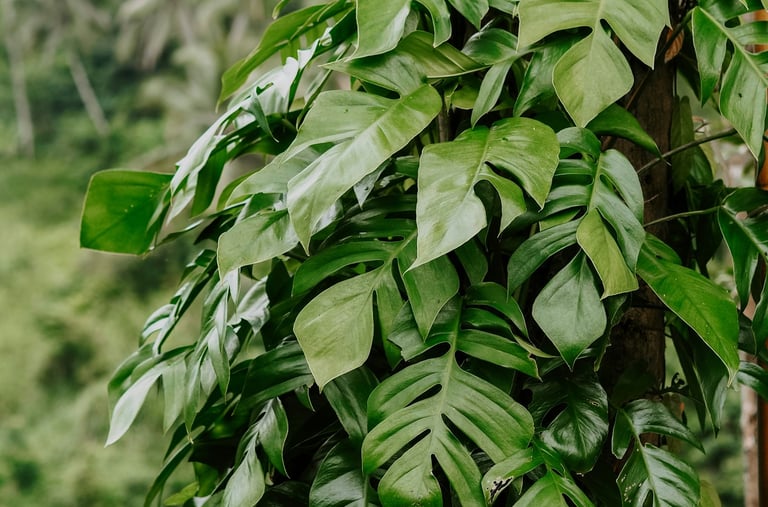


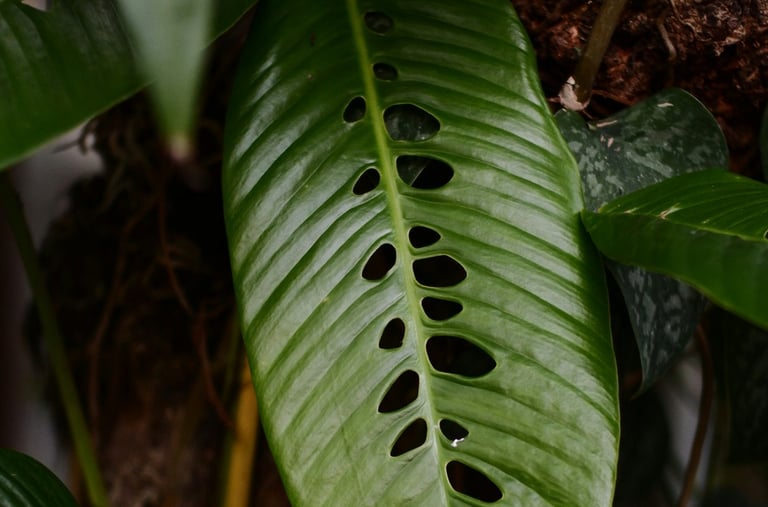

Rhaphidophora foraminifera leaf
Wild Rhaphidophora pertusa - Often confused with tetrasperma “mini” Monstera
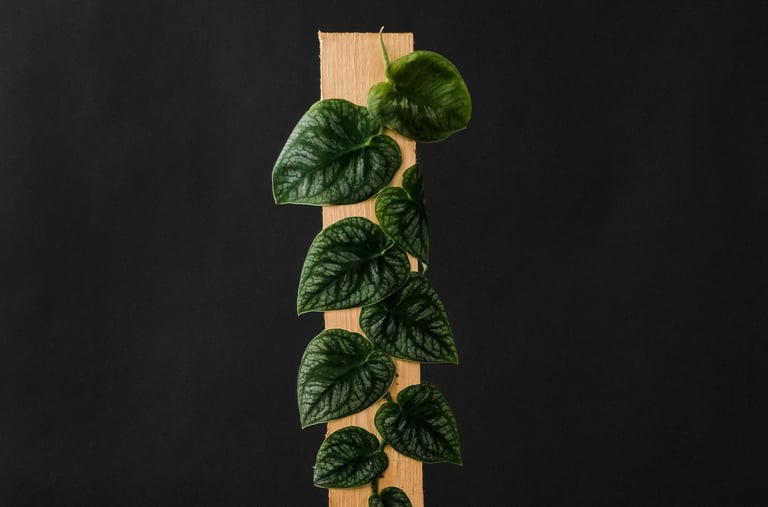
Monstera dubia shingling plant climbing a wooden support

Monstera Fertilizer & How Often To Feed Your Swiss Cheese Plant
Fertilizing Your Monstera: A Comprehensive Guide
Even the easiest houseplants appreciate a little TLC now and then. For your Monstera, this means providing the right nutrients to keep those leaves lush and vibrant. Think of fertilizer as a boost—it’s what transforms your Monstera from just surviving to thriving! If you've been wondering how to feed Monstera plants, our plant feeding section will guide you through all the important aspects of Monstera care for beginners when it comes to feeding your plant. If you're wondering how often Monstera plants need watering, check our detailed Monstera watering guide. When it comes to nourishing your Monstera, this plant care guide aims to give you a few different options:
What Fertilizer To Use For Monstera Plants
Balanced Liquid Fertilizer: A well-balanced, water-soluble fertilizer with an equal ratio of nitrogen, phosphorus, and potassium, such as 20-20-20 or 10-10-10, is an excellent all round choice. It offers a comprehensive mix of nutrients for overall plant health. We recommend using Ionic Formulex plant food for an all-in-one solution.
Slow-Release Fertilizer: For those seeking a low-maintenance option, slow-release granular houseplant fertilizer is perfect. Simply mix it into the soil, and it will gradually provide nutrients over time. Granular fertilizers are a great way to manage Monstera care for beginners without becoming overwhelmed by dilution ratios of liquid fertilizers.
Biofertilizers: A more natural approach involves using biofertilizers containing beneficial microorganisms that enhance soil fertility and promote plant growth. Products like houseplant seaweed extract or biochar are fantastic options. At The Houseplant Shop, we frequently use seaweed as it helps reduce stress during repotting, moving, or pruning.
How Often To Feed Monstera Plants
Spring and Summer: These are the active growing seasons for your Monstera. Feed every 4–6 weeks with a balanced, water-soluble fertilizer to encourage vigorous growth.
Autumn and Winter: During the cooler months, your Monstera's growth slows down. Reduce feeding to every 8–10 weeks, dilute the fertilizer to half strength, or even pause feeding altogether. It’s important to keep things balanced during this period.
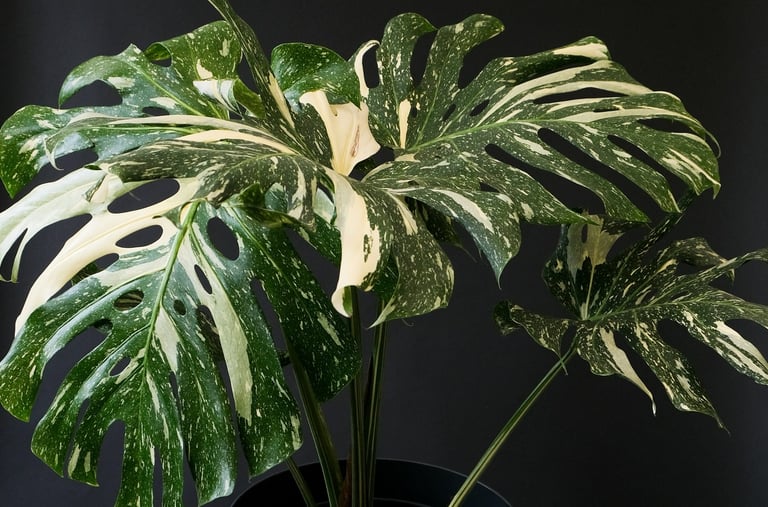

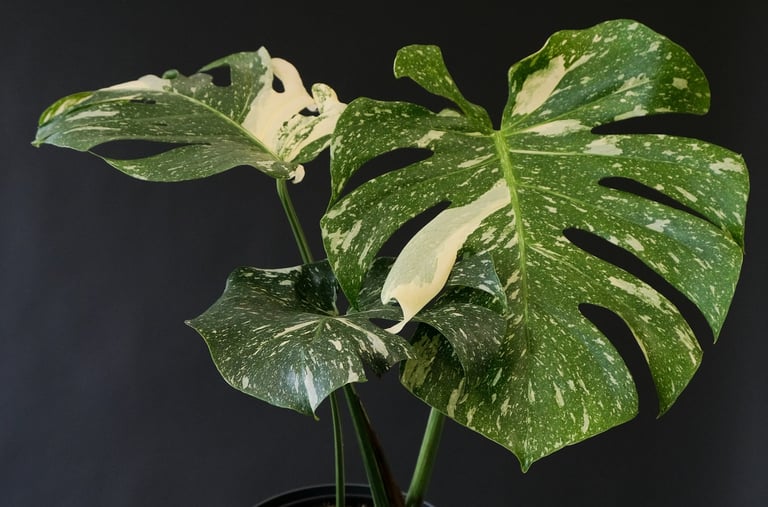

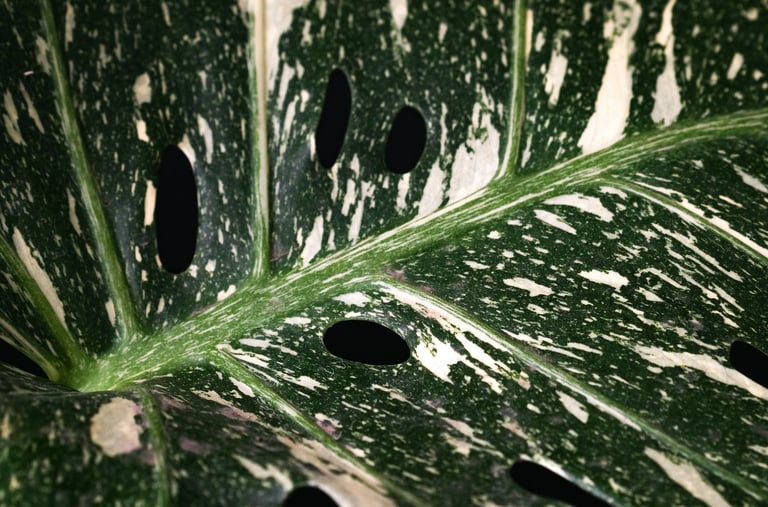

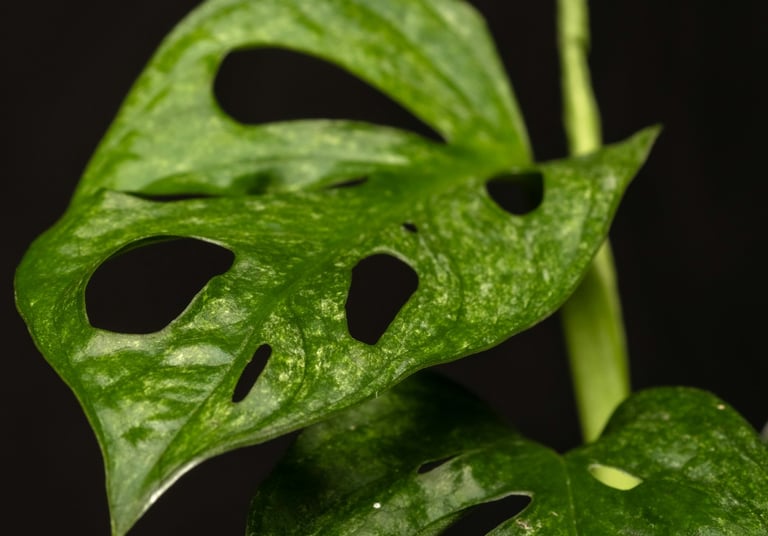
Close up of a Monstera Thai Constellation leaf
Mature fenestrated Monstera Thai Constellation plant
Juvenile Monstera Thai Constellation plant

How To Prune Your Monstera
Is your Monstera starting to take over your living room? Time for a pruning session! Monstera are easy to care for when kept pruned and under control. Not only will it keep your space looking neat, but it’ll also ensure your plant stays healthy and happy whilst encouraging new growth.
Monstera Pruning Tips
Shears at the Ready: Get a pair of sharp, clean plant pruning shears. Think of them as your plant’s styling scissors—precision is key to avoiding a bad trim. Always keep your pruning shears clean and free of plant sap to avoid rust. Wipe the blades in-between each cut to avoid transmitting bacterial and fungal diseases.
Identify the Targets: Look for yellowing or overgrown stems. A bit of control goes a long way in keeping your Monstera looking stylish and well-maintained. Never be afraid to cut back dead or yellowing growth as this encourages new healthier growth from your Monstera plant.
Snip with Precision: Make your cuts just above a leaf node (the point where the leaf joins the stem). This encourages your plant to sprout new growth like confetti at a celebration. Do not cut your monstera back further than 2 nodes from the stem, or it may struggle to recover with new foliage.
Be Bold: Don’t be afraid to prune back significantly. Your Monstera will benefit from a good trim and will grow back fuller and more vibrant. Trimming helps activate new growth points (nodes) and it promotes a bushier, more dense plant in the long term.
Add A Moss Pole: Using a moss pole for Monstera plants allows them to size up their leaves to their mature forms, getting those iconic splits and holes in the leaves. One of the best ways to stop Monstera from falling over, or getting leggy, is to offer them a growing support. There are several types of moss poles available for Monstera, for a detailed guide on plant supports, check our dedicated moss pole guide.
Pruning is more than just a cosmetic touch-up for your Monstera; it’s crucial for promoting healthy growth and keeping your indoor jungle thriving. One of the most common mistakes with Monstera care for beginners are pruning related issues, causing the plant to look 'wrong'. To ensure your Monstera is easy to care for, pruning is a crucial aspect of Monstera plant care. Think of it as a spa day for your plant—everyone loves a bit of pampering!
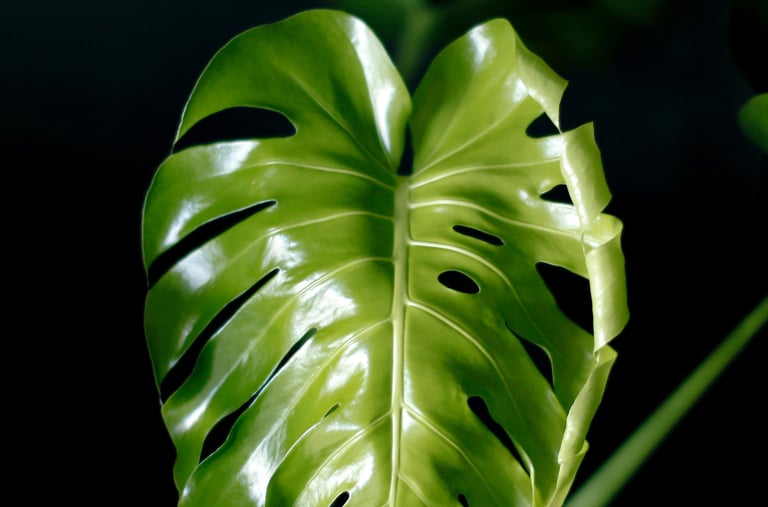

Unfurling leaf on Monstera deliciosa

Propagating Monstera Plants
Ever feel like your Monstera is so amazing that you want more of them? Good news — you can easily propagate your Monstera and create a lush, tropical jungle vibe in your plant space. Monstera cuttings are very easy to care for and the chances of losing them are very slim as long as you follow the plant care guide. Like your odds? Here's how to propagate your Monstera like a pro:
Monstera Propagation For Beginners:
Snip, Snip, Snip: Use a sharp, clean pair of scissors or pruning shears to cut a 4-6 inch section of stem just below a node (where the leaf meets the stem). Make sure your cutting has at least 3–4 leaves. The more leaves, the quicker your Monstera cutting will establish. Think of it as giving your plant a trendy trim! Don't worry, it will always grow back as long as you leave 1–2 nodes on your plant. Never prune all the nodes, as the plant will not grow without these growth points. Cut the leaves off of the lowest node to allow it to create roots.
Hardening Off: We like to allow our cuttings some time for the wound to harden after cutting, so we recommend leaving them out for 30–60 minutes before moving onto the next step. In addition to this, we also recommend dipping the cutting in a natural rooting hormone to encourage faster rooting and growth. If you have cut the stem more than once, make sure that you apply the rooting hormone to both ends that have been cut. This maximises how much the plant will absorb and helps to encourage faster root development, whilst reducing the chances of fungal infections.
Water Magic: Place your fresh Monstera cuttings in a glass of room temperature dechlorinated water, submerging at least one node. Keep the glass in a bright spot but out of direct sunlight. Your cutting will soon start growing roots—it’s like plant magic! Alternatively, you can use perlite, sphagnum, soil, or lecca balls for propagation.
Patience is Key: Monitor your Monstera cutting and change at most half of the water once a week to keep it fresh. No one likes smelly water, least of all your Monstera cuttings! Some sources suggest changing the water every few days, but at The Houseplant Shop, we believe that keeping some original water helps maintain the natural rooting hormones that the cutting produces. If you change all the water every few days, as some sources recommend, the cutting has to switch its focus away from rooting to produce more of these hormones rather than establishing itself faster. This can drastically slow down cutting rooting speeds. Leave your cutting in a bright spot for a few weeks, and you’ll soon see roots sprouting. Once the roots are 2–3 inches long, it's time to pot them up.
Potting Up: Fill a small pot with a well-draining Monstera soil mix. Create a hole in the soil, gently place your rooted cutting in, and firm the surrounding soil gently. Be careful not to firm it down too much, as this can make it hard for the roots to grow, which will slow down growth. Give your Monstera cutting a good drink of water and place it in a bright spot out of direct sunlight, as Monstera leaves can scorch in direct sun.
Monstera Care UK: When taking cuttings in the UK, or anywhere nearby, be aware that there may not be enough light in the winter for cuttings, and it may be beneficial to add a LED grow light.
By following these steps, you can easily propagate your Monstera and enjoy more of these beautiful plants in your home. Young Monstera plants are easy to care for and will soon grow into beautiful plantlets of their own. If you follow this Monstera plant care guide, you could soon be producing Swiss Cheese plants quicker than you can offload the cuttings to your neighbours! For detailed step-by-step instructions on every way to propagate houseplants, check our dedicated plant propagation guide.
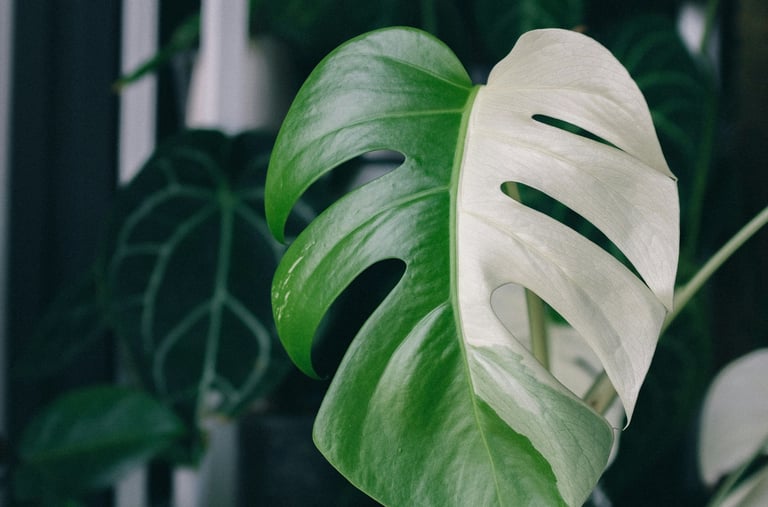

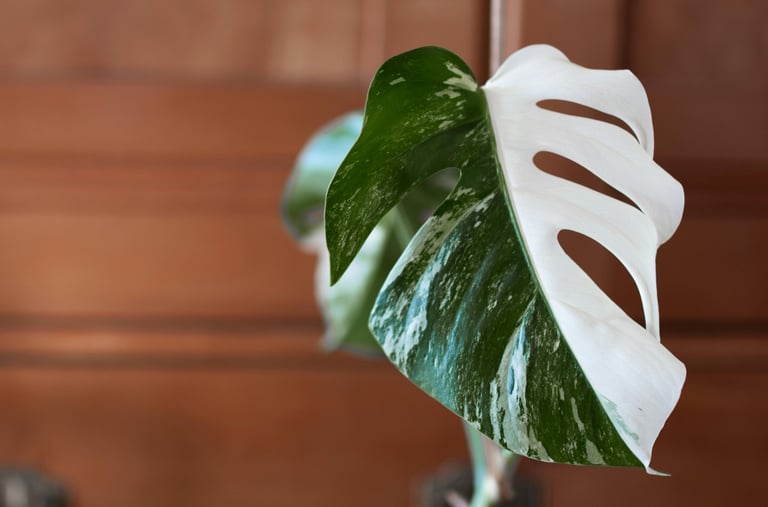

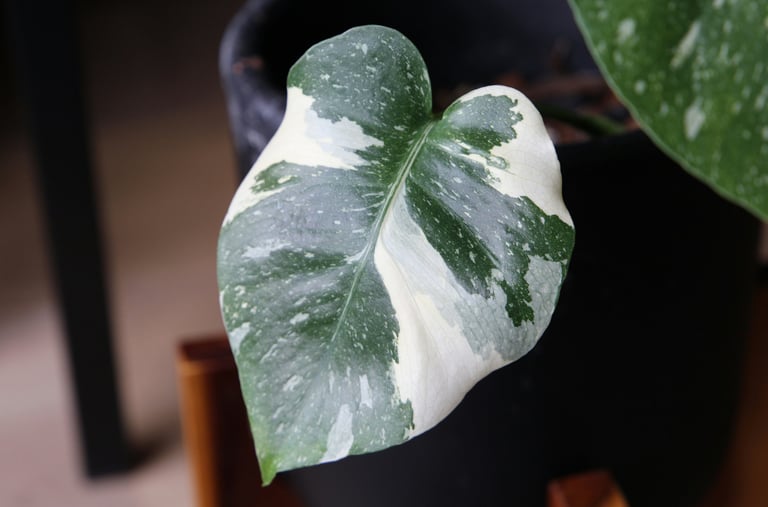

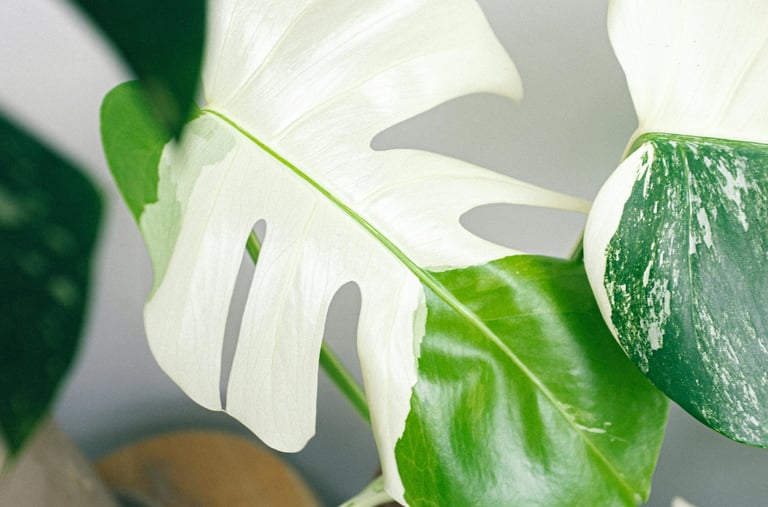
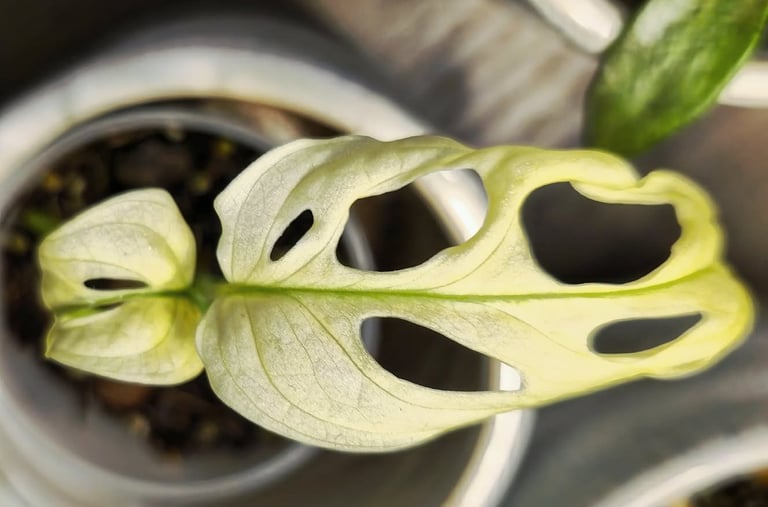
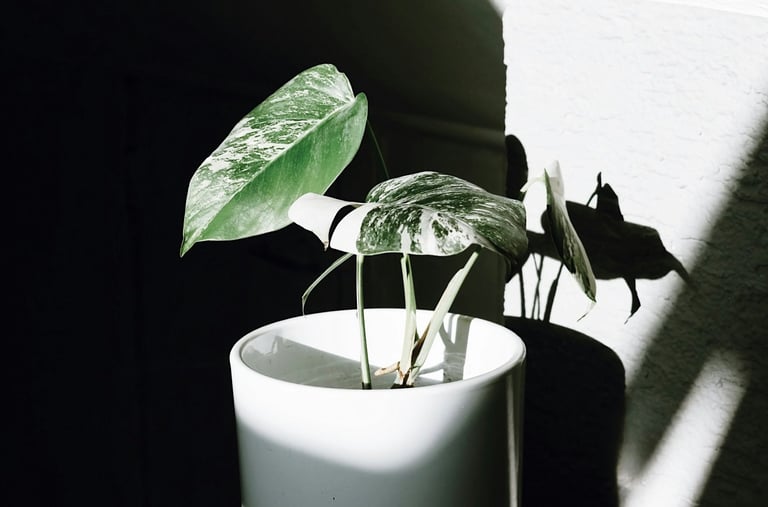
Juvenile Monstera Albo Variegata leaf
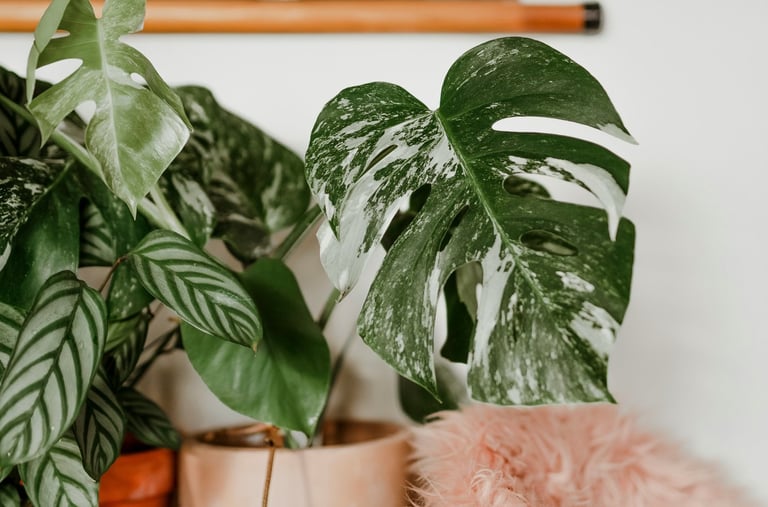
Semi-mature Monstera Albo Variegata leaf
Semi-mature half moon Monstera Albo Variegata

Monstera Pests & Common Problems
Even the most carefree of houseplants can run into a few issues. Even though Monstera are easy to care for, they do still run into a few problems occasionally. Here's how to tackle common Monstera pests, unwanted guests and frequent issues that may affect your Swiss Cheese plant.
Monstera Common Pest Species
Spider Mites: These tiny pests can spin small, discrete webs towards the base of a plant, and they suck the life out of it until it dies. They have a 2-4 week life cycle, making them one of the shorter living pests that invade our houseplants. Spider mites can often be found by spotting small, discrete webs in the lower parts of your plants that look like a spider may have moved in — bad news — 9/10 times it's not a spider, but you'll wish it was.
Aphids: Often unwanted guests brought in from our gardens or intruders who fly through our windows, aphids can be tricky to get rid of once established due to the life cycle of an adult aphid. Eggs are typically laid within the plant itself and are impossible to remove. Always be vigilant for eggs hatching after 30 days, and continue treatment for several full adult life cycles. Consider using a systemic pesticide to provide a 4-week window of treatment.
Mealy Bugs: These fluffy white bugs love hiding in leaf joints. They look kind of like large fluffy lice. They have very visible legs and antennae, and are visibly hairy, ranging from the size of a pin head to the size of a small woodlouse. Mealy bugs can be very difficult to get rid of due to laying eggs inside the stems, in the folds of leaves and within the soil where you can't see them. It can be helpful to change your Epipremnum's substrate if you have a bad mealy bug infestation. The life cycle is 4–7 weeks from egg to adult, so you need to be vigilant for eggs hatching out after the first treatment, and you must keep reapplying pesticides. Consider using a systemic treatment to give you a 4-week window of assistance with your pest infestation. If you can't re-apply the systemic, resort to other listed methods until you can re-apply.
Scale Insects: These hard-shelled pests can be tricky. Solution: Scrape them off gently with a soft brush and spray the plant down with our DIY pesticide listed below.
Monstera Common Pest Treatments
Natural Leaf Wipe: As a preventative and spot treatment, you can wipe leaves with undiluted pure neem oil to give them a gentle shine whilst deterring any pests.
Instant Death: Dab visible plant pests with a cotton swab dipped in rubbing alcohol to send them packing. This is a tried and tested classic method. If the pests don't die instantly when they're drenched in the liquid, or they are large like scale insects, pick them off the plant and put them into a glass with enough alcohol to completely cover them. Few creatures can survive being submerged in pure alcohol.
Natural Homemade DIY Pesticide: If you’re having issues, we would always recommend an insecticidal soap based approach as a first line of defence, as it's much more gentle on your plants. To be effective, the pests must come into contact with the liquid. To make a simple DIY neem oil and soap recipe, mix 1 teaspoon of neem oil with 1/2 teaspoon of insecticidal soap and 1 litre of water. Apply the DIY pesticide with a spray bottle, ensuring all parts of the plant are covered in the pest spray. You can re-apply this solution every few days without upsetting your plants until there's no more signs of pests.
Natural Pesticide: If you prefer a premixed solution, you can purchase concentrated neem and soap solutions like SB Plant Invigorator that you dilute and apply with a spray bottle. Make sure you follow the directions on the back of the bottle. This premixed natural pesticide is a concentrated formula of horticultural soap and neem oil to help remove pests from your plants naturally and without the use of harsh chemicals. Sprays like this often have added nutrients, so you cannot reapply it every few days as it could burn the plant leaves.
Chemical Pesticide: For a tougher approach, we recommend a systemic pesticide to give the plants a 4-week window of protection to kill all stages of the pest's life cycle without repeated treatments. The only systemic pesticide available in the UK currently is Acetamiprid concentrate. This is known to cause some distortion in new growth immediately after application. To fix Acetamiprid distorted leaves, simply cut the new growth off back to the last healthy point, and your plant should grow back with normal leaves.
Monstera Common Problems: Diagnosing and Fixing Plant Woes
Monstera Plant Keeps Falling Over: Provide a support structure like a moss pole or a trellis for your Monstera to climb. In their natural habitat, Monsteras climb trees, and this vertical growth encourages the development of larger, fenestrated leaves. For more information on how to get holes in your Monstera leaves, read our guide to getting fenestrated Monstera leaves. Gently tie the plant to the support structure to guide its growth upward.
No Holes In Monstera Leaves: Although Monstera are easy to care for, it can be hard to get fenestrated leaves without proper care and support. Check our guide on how to get holes in Monstera leaves for more detailed information. Developing Monstera fenestrations can take time, especially for younger plants. Consistently providing the right care and environment will eventually lead to the formation of those iconic holes and splits.
Yellow Leaves: If your plant has yellowing leaves, it might be overwatered. Solution: Check the soil—if it's soggy, let it dry out and reduce watering. Consider purchasing a digital water meter to take the guesswork out of watering. Also, make sure your pot has good drainage and that your soil recipe is chunky and airy. The hardest part of Monstera care for beginners is managing overwatering, which causes root rot.
Brown Leaf Tips: This could be a sign of low humidity or under watering. Monitor your humidity, and if needed, increase your humidity by using a humidity tray to increase localised humidity. We don't recommend regularly misting your plant as this can lead to fungal issues. If you proceed, do so with caution and only spray the leaves at night to allow them time to dry before light hits them in the morning.
Leggy Growth: If your plant looks more vine than leaves, it might need more light. Most plant species start to look bad when they're not getting their needs met — it's one of the first signs of lighting issues. Try moving your plant to a brighter spot or adding supplemental LED lighting.
Root Rot: If the roots are black and mushy, your plant might be suffering from root rot due to overwatering. Cut off the affected roots and repot the plant in fresh soil. The biggest mistake in Monstera care for beginners is overwatering, which causes root rot.
Loosing Leaves: If your Monstera is loosing leaves, it could be nothing to worry about and simply a part of the ageing process. As plants make new leaves, they naturally shed the lower leaves that don't get as much light. It doesn't make sense economically for the plant to put all of that energy into a leaf that can't photosynthesise as well as newer ones. Plants love efficiency. The dead leaves go yellow as the plant pulls all the nutrients out of it to recycle for newer leaves. It can be beneficial to leave the dying leaves on the plant until they have gone fully yellow to allow maximum nutrient recycling. If your plant is throwing off more than one or two leaves at a time, then you may need to have a look at your plant care or your plant's environment. One of the biggest causes of premature yellowing of leaves is overwatering or soil that's too dense and stays too wet. It could also be a nutrient deficiency causing the plant to pull the nutrients that it needs from older leaves, causing them to die off. If you don't have a feeding schedule for your plants, it may be worth adding a good quality fertilizer to your plant care routine.
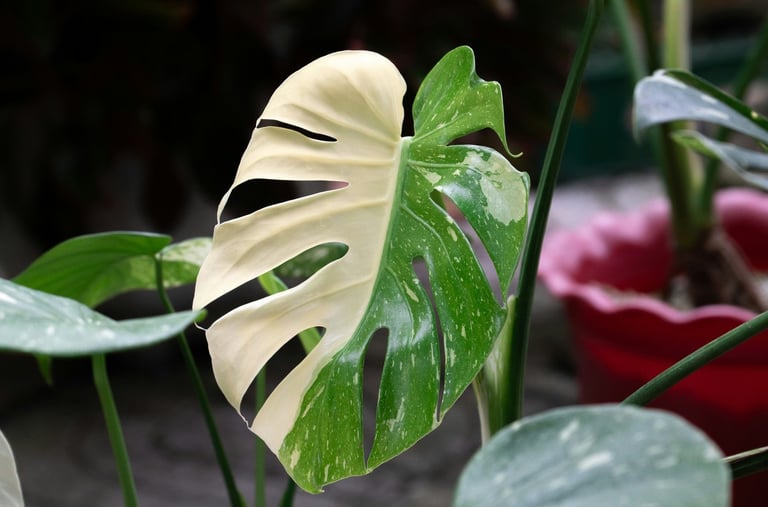


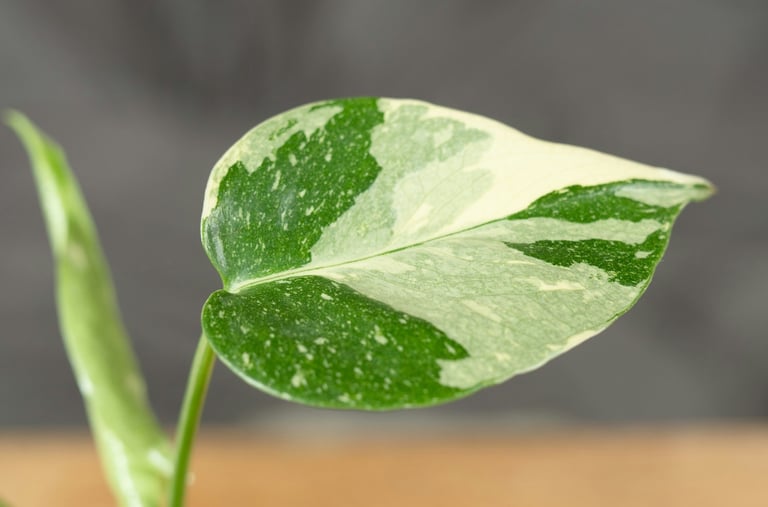

Semi mature Monstera Albo Variegata
Mature Monstera Albo Variegata with splits, and holes
Juvenile Monstera Albo Variegata

How to Get Holes In Your Monstera Leaves
Monstera plants are famous for their beautiful, fenestrated leaves. You can find them all over the world printed on mugs, t-shirts and stationary. Their split leaves have become iconic in our modern age, a symbol of nature itself. If you've ever wondered why those iconic leaves are full of holes, you're not alone. They don't just look great in our living rooms, they have interesting practical uses for the plant in the real world! Monstera leaves have splits and holes in them to help them survive in their natural rainforest environment. The gaps allow light and rain to reach the lower leaves, ensuring that the huge Monstera canopy doesn't kill off the lower parts of the plant. This is really helpful as the leaves get much larger as the plant grows taller — without those holes, a Monstera couldn't survive growing that tall as no light or water would reach the lower parts of the plant. Neat, eh?! We have a comprehensive deep dive into achieving fenestrations in indoor plants if you want to read more about the subject, we have a detailed fenestration guide. It covers the science behind fenestrations, what triggers them, how to make your plant think it needs to produce them, and what to do when your plant won't fenestrate. If you just want a quick summary, keep reading to find out how to encourage your plant to produce leaf splits, holes, and perforations:
How To Get Holes & Splits In Your Monstera Leaves
When your Monstera plant starts to develop larger leaves, you will notice that at first there are no holes around the leaves — just splits. It's totally normal for your Monstera to develop splits in the leaf first, then as it matures, new leaves will start to come out with holes around the splits too. IT does take a while for the leaves to mature to this point, so don't be disheartened if you don't see them to begin with — they will come in time!
Moss Poles To Encourage Monstera Leaf Holes
The biggest cause of non-fenestrated leaves is usually a lack of climbing support. In their natural habitat, Monsteras climb trees, and this vertical growth is what encourages the development of larger, fenestrated leaves with 'splits' and 'holes'. Moss poles provide a rooting medium for aerial roots, which encourages the Monstera to size the leaves up faster and to develop splits and holes in the leaves. This extra support for aerial roots is the main reason that most people use moss poles over other structural supports. We have dedicated pages for both moss poles and self watering moss poles for a more detailed how-to guide with pictures.
Moss Pole Alternatives For Monstera Plants
We know that moss poles aren't always practical for everyone. If you want a more simple solution, a bamboo cane, stick, trellis or metal pole would work. Anything that supports the weight of the plant and allows you to tie the plant stem to it will work as a Monstera support. Just bear in mind that Monstera plants take longer to develop splits and holes without the aid of a moss pole, as the aerial roots don't have anywhere to grow without one. A good trick with or without a moss pole is to guide those aerial roots back down into the soil, as this can trick the plant into sizing up the leaves faster.
How To Attach Your Monstera To A Pole
Using plant wire, Velcro ties or string, gently tie the Monstera to your support structure to guide its growth upwards. Ensure that you continue to tie up new growth as it appears. If you have a moss pole, try to get the node to touch the moss pole to allow it to create aerial roots. If you consistently tie up the new growth your plant will think it's found a structure to climb, and it will start to slowly size up the leaves, eventually developing holes and then after some time, splits. A great alternative we've found is to use moss pins to gently push the node towards the moss pole.
Monstera Aerial Roots Promote Split Leaves
You can make your Monstera plant grow bigger leaves by guiding its aerial roots back down into the soil or moss pole. This can make the plant grow bigger leaves faster. When the aerial roots hit the moss or the soil, they start to establish themselves and branch off into a secondary root system for the plant. This trick works both with or without moss poles. If you don't have a pole, guide the aerial roots back down into the plant pot and pin them in the soil until they establish.
Pruning Your Monstera To Encourage Fenestrated Leaves
If your Monstera has leaves with no holes, don't be afraid to cut these back once you have addressed any basic care issues. This will give your Monstera the chance to re-grow and mature to fenestration earlier than it would have if you didn't cut it.
Getting Rid Of Monstera Leaves With No Splits Or Holes
One of the easiest ways to get a mature looking Monstera with fully split leaves is to allow it to develop the holes and then take a top cutting, discarding the rest of the plant. When you plant the top cutting back into the pot, you will have a plant that has fenestrations right from the very first leaf. Don't forget to address any care issues that we have discussed in the rest of this Monstera plant care guide. If you don't change anything after pruning, it will more than likely grow back exactly the same as before, without any holes or splits.
Monstera Fenestration Troubleshooting Guide
If you've tried everything above but still have no holes in your new leaves, look at your Monstera's care requirements. Sometimes the only way to fix plant care issues is to go back to basics. It may feel like teaching a hen to suck eggs, however, it can definitely be worth checking over a plant's basic care needs if you're having trouble.
Bright, Indirect Light: Insufficient light may prevent the development of fenestrations. Read our full Monstera lighting guide for more information. If your plant is in your brightest spot, and it is not maturing with each new leaf, consider adding a grow light to your Monstera.
Consistent Watering Schedule: Keep the soil consistently moist but not waterlogged. Water when the top inch of soil feels dry to the touch. Ensure your pot has drainage holes to prevent water from sitting at the bottom, which can lead to root rot. Check our full Monstera watering guide for more information.
Humidity: Monstera plants thrive in high humidity environments. Aim for humidity levels between 60-80%. To learn how to manage humidity, check our Monstera humidity plant care guide.
Nutrient-Rich Soil: Use a well-draining soil mix designed for Monstera that is rich in organic matter, like our DIY Monstera soil recipe.
Keeping The Moss Pole Moist: If your pole isn't wet, the Monstera plant won't grow aerial roots into the pole as quickly, and this will slow down maturation of the leaves. Consider converting to a self-watering moss pole to provide more consistent moisture to the plant.
Regular Feeding: Fertilize your Monstera every 4–6 weeks during the growing season with a balanced, water-soluble Monstera suitable fertilizer.
Patience and Consistency: Developing Monstera fenestrations can take time, especially for younger or less mature plants. Consistently providing the right care and environment will eventually lead to the formation of those iconic holes and splits. If in doubt, you can always cut your plant back and let it re-grow with better conditions. The younger your plant is when you give it a support to climb, the more chance you have of developing holes and splits in your leaves. For older plants, it can be beneficial to cut them back hard and start again from only a couple of leaves. Never cut all the nodes off of your Monstera, or it will not be able to grow back — nodes are growth points and the plant cannot survive without at least one of these to make new leaves from. If you've tried everything else, and you still can't get your Monstera to produce fenestrations, you can read a more detailed article on how to get plants to fenestrate.
How To Get Fenestrated Monstera Leaves


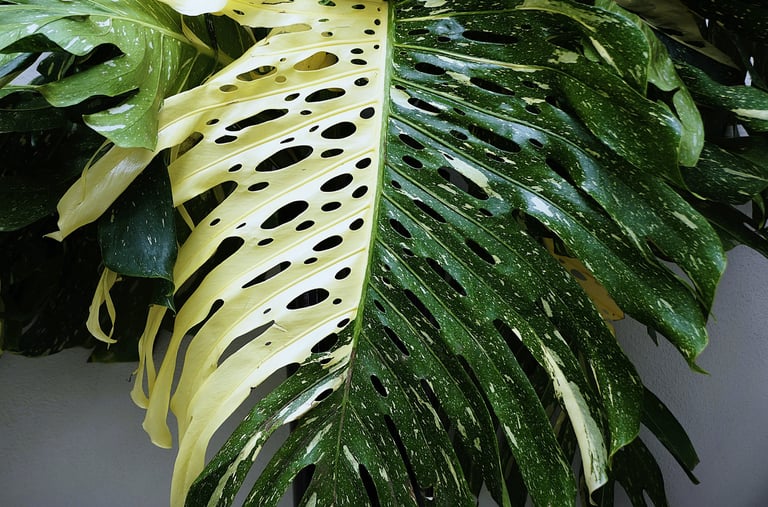

Mature half moon Monstera Thai Constellation leaf with splits, and holes
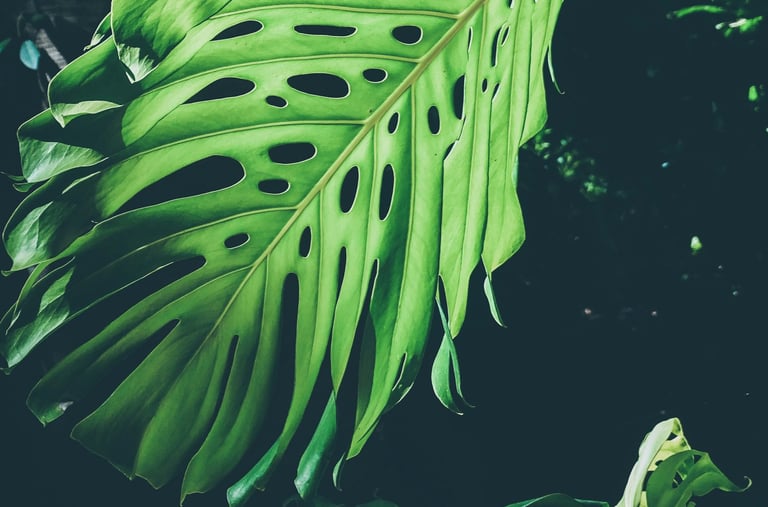
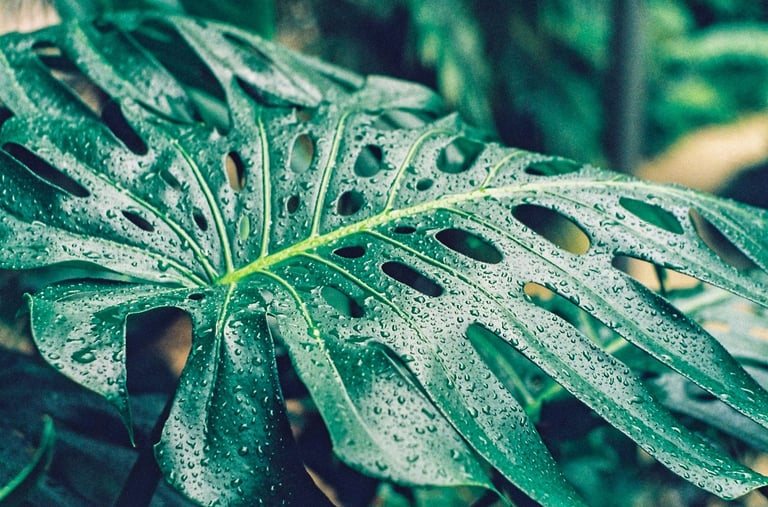
Fully fenestrated Monstera deliciosa leaf with splits, and holes
Fully matured Monstera leaf with fenestrations

Monstera Moss Poles
Why Use Moss Poles for Monstera Plants
Monstera plants, with their iconic split and hole-filled leaves, often need a little extra support to grow to their full potential. Although Monstera plants are easy to care for, they do require some support to thrive. A moss pole is a perfect solution, providing support and helping your Monstera climb, grow larger, and develop those beautiful fenestrations.
Moss poles mimic the natural environment of Monstera plants, which climb trees in the wild and use the natural snags in the trunks as support. You may have noticed that your Monstera roots love to wrap themselves around anything they can - this is a natural defence mechanism from the wild to attach them to the trees that they climb. This aerial root support helps the plant grow larger, with bigger leaves that eventually develop splits and holes, which are often called fenestrations. Using a moss pole is the best way to manage Monstera care for beginners.
Climbing also encourages the plant to grow upwards, resulting in a more compact and visually appealing shape. Without support, Monstera plants can fall over and potentially damage their pot, themselves, and anything around them as they fall. No one likes to come home to soil all over the floor and their favourite plant snapped in half! This section of the Monstera plant care guide offers a quick how-to make a moss pole, but if you'd like to dive deeper into the world of moss poles, you can read a more detailed moss pole article here. We prefer self-watering poles because they keep the moss much more moist than a standard moss pole, however, either support will encourage fenestrations, mature leaves, and give the plants enough support so that they won't fall over.
How To Choose a Moss Pole for Monstera Plants
When selecting a moss pole, look for one that is sturdy and of adequate height, with good moisture retention qualities. Our first choice at The Houseplant Shop is always sphagnum moss. It's better to choose a taller pole, as Monstera plants can grow rapidly once they are established. If you can, try to ensure that your moss pole is made from materials that retain moisture well and promote aerial root growth, as this is what really tricks your Monstera into thinking that it's found a great tree trunk to climb. When your Monstera thinks it has found a suitable support, this tricks it into sizing up the leaves and eventually producing splits and holes. We always recommend that people make their own moss pole at home because it's much cheaper than buying one from a shop, and more customizable to your plants size and shape.
The 5 Best Types of Moss Poles for Monstera Plants
Sphagnum Moss Poles: These poles are made from sphagnum moss and are excellent for retaining moisture. They are ideal for promoting aerial root growth and providing a natural climbing surface. This is what we use here at The Houseplant Shop for all of our Monstera climbers, and climbing aroids in general. We love to add glass jars to our moss poles to make DIY self watering poles, we will go into more detail about this in the DIY section below.
Coco Coir Poles: Made from coconut fibres, coco coir poles are another great option. They retain moisture well and offer a sturdy support structure for Monstera plants to climb. They can be hard to keep wet as the surface can become somewhat hydrophobic, which means that it repels water rather than soaking it up. One of the best ways to combat this is to soak the coir in water, but this isn't always possible when there is a Monstera attached to it!
Kratiste Poles: These poles are highly durable and provide excellent support. Kratiste poles are often made from natural materials and are designed to blend seamlessly into your plant’s environment.
Bamboo Canes: Bamboo canes are a cost-effective and eco-friendly option. They provide sturdy support but do not retain moisture, so they may not promote aerial root growth as effectively as moss or coir poles.
Metal Stakes: Metal stakes are very strong and long-lasting. However, they don’t provide the same natural climbing surface or moisture retention as moss or coir poles. They are better suited for structural support rather than promoting natural climbing behaviour.
How To Make Your Own DIY Moss Pole
Making your own moss pole is not only cheaper than buying it from a shop in most cases, but it's also then customised to your Monstera plant and tailored to your home. This allows you to choose the height that's suitable for your space and even adjust the width - we have a 1.5ft wide and 8ft tall moss pole here at The Houseplant Shop for our prized highly variegated golden Pothos made with the exact materials linked below. We always encourage people to make their own moss pole at home as it's much cheaper than buying one from a shop. We also love to add self watering glass jars to our poles, which we will explain in more detail below.
Materials you will need:
13mm Diameter plastic coated chicken wire
Sphagnum moss
Extra strong cable ties
600 Micron minimum acetate sheets
Wooden stake
Sharp scissors or wire cutters
Waterproof sheet or flooring
Choose a clean dry area that can get wet as this is likely to get messy. If you don't have a suitable floor, use a waterproof plastic sheet. First, make sure your sphagnum moss is moist by adding water and soaking for 30 minutes, or until fully saturated. Drain the water and ring out any excess moisture. Roll out the chicken wire to measure the final size of the pole. Once measured, cut along the nearest edge of the square. Add the wooden stake to the bottom of the pole to use as the ground stake in the plant pot.
Add sphagnum moss and roll up the pole to check fill density. Do not overfill the pole as it can cause stress on the joints, causing it to snap and weaken the structure. Frequently roll the pole and stand it up to test the structural integrity whilst making it.
Once the moss is in and the pole is rolled up ready to tie, cut the acetate sheets to half the width of the pole and insert them at the back of the pole underneath the join. Pull the wire together and secure with cable ties. Once fully tied, cut the ends off the cable ties as close to the join as possible, being careful not to cut the cable tie's head as this is what holds it shut. Brush down your pole to remove any excess moss and attach your Monstera plant. For a more detailed hot-to guide, check our ultimate diy moss pole guide.
How To Make Your Own DIY Self Watering Moss Poles
Here at The Houseplant Shop, some of our more thirsty Aroids are given self watering sphagnum moss poles that we make in-house ourselves. We always encourage people to make their own moss pole at home as it's much cheaper than buying one from a shop. Monstera plants are easy to care for, but they do love to be well hydrated, so we love to give them self watering moss poles. Following our previous method, we then add a clean glass herb jar small enough to conceal within the top of the moss pole and a cotton thick rope running from inside the jar to halfway down the moss pole.
It's really important not to run the string down the whole length of the moss pole as it can cause flooding in the pot. By only running it halfway down, you're allowing the bottom to adsorb excess moisture, and by only using a small herb jar, you're ensuring that there's never enough water to flood the pot.
We use a cable tie to attach the rope to the outside of the jar, with a trail of it all the way down to the bottom of the jar. You soon get a feel for when the pole is dry visually, and you can gauge how often to fill your jar up - for our most thirsty plants on self watering moss poles, we refill the jar every 3–5 days. We use full strength plant food in our moss poles to promote strong root growth, and we encourage you to do the same - it's a great way to get extra nutrients to your Monstera plant! For a more detailed guide, check our DIY self watering moss pole guide.
How To Attach Your Monstera to a Moss Pole
Position the Pole: Place the moss pole in the centre of the pot, ensuring it’s securely embedded in the soil.
Attach the Stem: Gently tie the main stem of the Monstera to the moss pole using soft plant ties or garden twine. Tie the plant every few inches, making sure not to damage the stem.
Encourage Climbing: As the plant grows, continue to tie new growth to the pole to encourage upward growth.
Keeping Your Monstera's Moss Pole Moist
A moist moss pole helps the aerial roots of your Monstera to attach themselves to the pole, furthermore it allows those roots to absorb water and nutrients through the moss pole, and it acts as a secondary root system once established. Monstera are easy to care for but they do like to be kept hydrated, so don't forget to water your moss pole. If you fancy a more hands-off approach to moss pole water management, head to our self watering moss pole page for a step by step DIY method with pictures.
If you don't want to use a self watering system, spray down the moss pole with water regularly to maintain moisture, but be careful to spray it down at night when no light can touch the leaves before the water dries as this can cause fungal and bacterial issues. A more drastic approach is to pour water directly on the moss pole during your regular watering routine, however, this can be messy. We use a water sprayer bottle to lessen spillage when we use this method. We always recommend using full strength feed when wetting your moss pole, as this provides extra nutrients to the secondary root system that you have built within the moss pole.
Regularly Directing Monstera Aerial Roots into the Moss Pole
One of the few regular maintenance jobs with a moss pole is to encourage the Monstera’s aerial roots to grow into the moss pole. Gently guide the new roots towards the pole, and use reusable moss pins to keep the root and node as close to the pole as possible. Over time, the roots will naturally seek out the moisture in the moss pole and attach themselves. Don't forget to remove the moss pins before the stem outgrows the size of the pin, as this can cause permanent scars in the stem.
Pinning New Growth to the Support System
Identify New Growth: Look for new vines or stems that need support.
Use Soft Ties: Use soft plant ties, moss pins or garden twine to secure the new growth to the pole or support structure. Be gentle to avoid damaging the stem.
Tie Loosely: Ensure the ties are loose enough to allow for growth, but secure enough to keep the plant in place. If using pins, make sure to check them every few weeks to make sure that the stem hasn't outgrown the pin as it can cause permanent damage and scarring.
Regular Adjustment: As the Monstera grows, adjust the ties and add new ones as needed to continue guiding the plant up the pole or support structure. Try to pin nodes as closely to the pole as possible as this encourages aerial roots to grow into the pole and not down the outside of it.
Aerial roots: Any aerial roots that are unsuitable to be pinned into the moss pole can be run down the outside of the pole and back into the pot itself. This will encourage your plant to size up and grow splits and holes in the leaves as fenestrations only develop when a plant has an adequate support to climb and planting the aerial roots back into the pot tricks the plant into thinking it has found more secure structures to climb.
Managing Monstera Growth When the Plant Reaches the Top of the Moss Pole
Over time, your Monstera will eventually outgrow the moss pole, unfortunately this is inevitable with most climbing houseplants. Adding a moss pole ensures easy Monstera care for beginners, but it can always be hard to know what to do when your plant reaches the top of the moss pole. When your Monstera is at top of the moss pole, you have a few options:
Extend the Pole: Add another moss pole on top of the existing one to provide more vertical space for your plant to climb.
Pruning: Trim the top of the plant to control its height. Use the cuttings for propagation to grow new Monstera plants to fill out the pot to create a more dense look with the foliage over time
Redirect Growth: Train the plant to grow horizontally by tying the new growth to another support structure or guiding it back down the pole. This can be tricky with more mature specimins as the stem is more likely to snap than to bend. In these cases, it can be better to prune.
How To Use Moss Poles For Monstera Plants

How To Get Monstera To Flower Indoors
Monstera plants rarely bloom indoors, but it's not impossible to get your plant to flower with the right plant care and environmental conditions. Often seen as the ultimate sign that plant care is met, indoor flowers area a huge achievement for gardeners. Usually celebrated on social media as a milestone, these flowers both look and smell great, and they're pretty big too! If you want to get your Monstera plant to flower indoors, join us to learn the facts and figures about Monstera flowers, plus how to get them to bloom indoors, and how to pollinate the seeds.
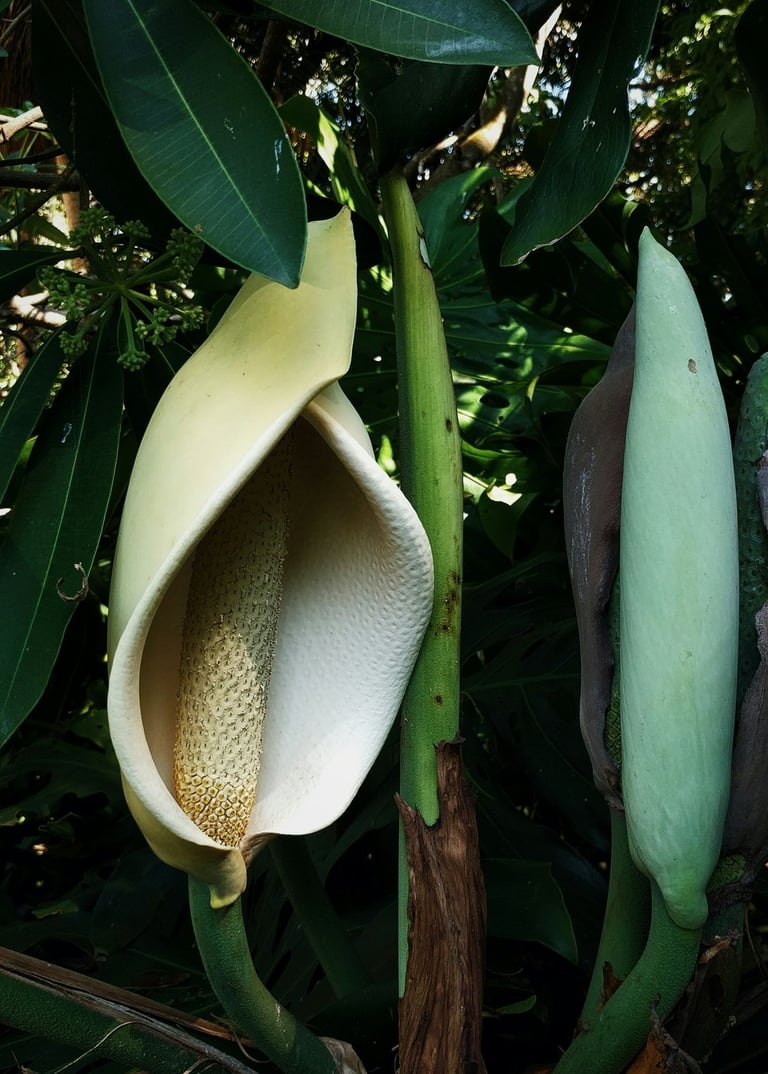
Monstera deliciosa's inflorescence is a fascinating structure that plays a crucial role in the identification of the plant. Contrary to what might be assumed, it is not a single flower. The large, white, petal-like structure is actually a modified leaf known as a spathe. This spathe protects the central structure, called the spadix, which is where the magic happens. The spadix is densely packed with numerous tiny flowers that collectively form the inflorescence.
Identifying plants like Monstera deliciosa often relies heavily on the examination of their inflorescence because leaf morphology (shape and form) can be quite deceptive. As the plant matures, its leaves can undergo significant changes, and there can be considerable variation even among individuals of the same species. Therefore, the inflorescence provides a more reliable characteristic for accurate identification, ensuring botanists and plant enthusiasts can distinguish the Monstera deliciosa from other similar species.
Can Monstera Plants Flower Indoors?
It is quite rare for Monstera plants to bloom indoors. The specific conditions required for flowering are challenging to replicate in typical home environments, making indoor blooms an uncommon event. However, with dedication and optimal conditions, it is still possible for a Monstera to flower indoors, but it remains a rare occurrence.
Which Monstera Plants Can Produce Flowers Indoors?
The most common variety of Monstera that flowers indoors is Monstera deliciosa, also known as the Swiss Cheese Plant. While it's relatively rare for indoor Monsteras to bloom, Monstera deliciosa is the most likely candidate due to its popularity and adaptability to indoor conditions.
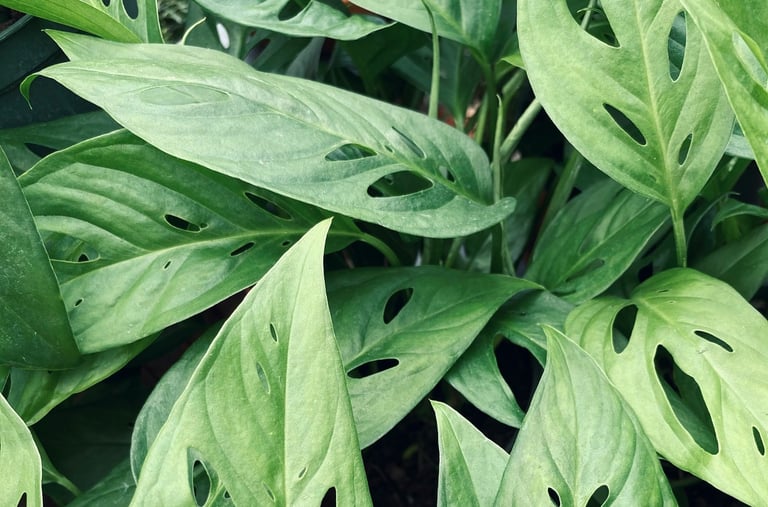
Other varieties, such as Monstera adansonii (Swiss Cheese Vine) and Monstera acuminata, are less commonly known to flower indoors, but they can still produce inflorescences under optimal conditions.
What Do Monstera Flowers Smell Like?
Monstera flowers have a mild, fruity scent that is often described as resembling pineapple or banana. This pleasant aroma is more commonly associated with the ripe fruit that develops from the flowers, rather than the flowers themselves.
How Big Are Monstera Flowers?
Monstera flowers, specifically from the Monstera deliciosa species, can be quite large. The spathe (the modified leaf that looks like a petal) can grow up to 10-15 inches (25-38 cm) long. The central spadix, which houses the tiny flowers, can reach a length of 6–12 inches (15-30 cm). This impressive size makes the inflorescence of the Monstera deliciosa a striking and noticeable feature when it blooms.

Can Monstera Plants Produce Seeds Indoors?
While it is possible for Monstera plants to produce viable seeds indoors, it is quite rare. Meeting all the conditions in an indoor environment can be challenging, but it is not entirely impossible. If successful, the seeds can be harvested and used to grow new Monstera plants. For this to happen, several conditions need to be met:
Flowering: The Monstera must first produce flowers, which is uncommon indoors.
Pollination: The flowers need to be successfully pollinated. In nature, this is often done by insects, but indoors it may require manual pollination.
Fruit Development: After successful pollination, the plant needs to develop fruit, which contains the seeds.
Seed Maturity: The seeds within the fruit must mature fully to be viable.
How To Hand Pollinate Monstera Plants
Manually pollinating Monstera plants indoors can help ensure successful fruit development. Here's a step-by-step guide:
Identify Male and Female Flowers: Monstera plants have separate male and female flowers. Male flowers are usually smaller and clustered, while female flowers are larger and solitary.
Collect Pollen: Use a small brush or cotton swab to gently collect pollen from the male flowers. The pollen should be powdery and easy to transfer.
Transfer Pollen to Female Flowers: Carefully brush the collected pollen onto the stigma of the female flowers. The stigma is the sticky part at the centre of the female flower.
Repeat the Process: Perform this process for each female flower you wish to pollinate. It's best to do this in the morning when the flowers are freshly open and receptive to pollen.
Timing: Pollinate during the warmer months when the plant is actively producing new flowers.
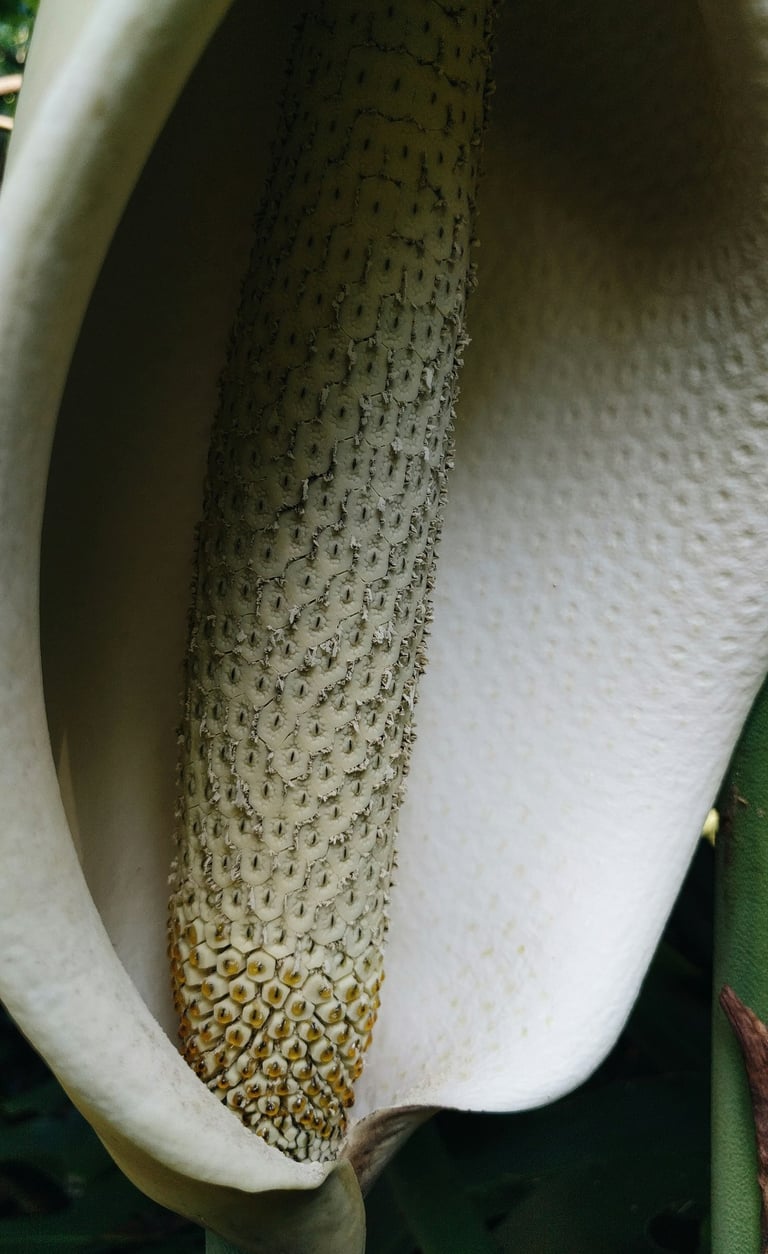

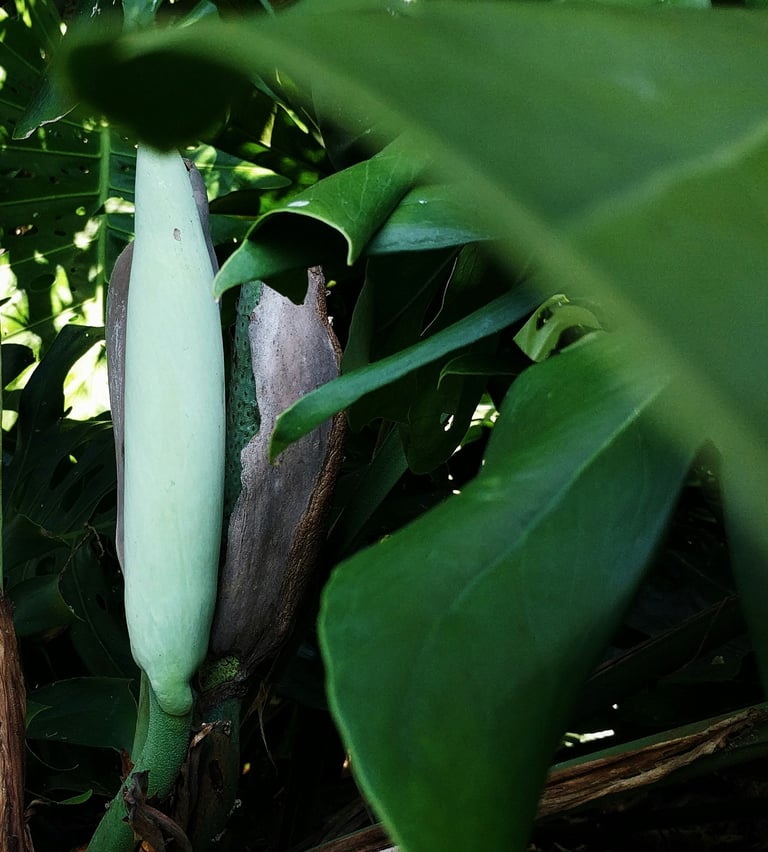

Monstera deliciosa flower (inflorescence)
Monstera deliciosa flower (inflorescence)
Monstera deliciosa unopened flower bud
How To Get Monstera Plants To Flower Indoors
Promoting flowering in Monstera plants, particularly Monstera deliciosa, requires creating the optimal conditions for the plant to thrive. Here are some tips to encourage your Monstera to bloom:
Adequate Light: Monstera plants prefer bright, indirect light. Ensure they receive plenty of filtered sunlight, as too much direct sun can scorch the leaves, while too little light can hinder flowering.
Proper Watering: Water your Monstera when the top inch of soil feels dry. Overwatering can lead to root rot, while underwatering can stress the plant. Maintaining consistent moisture levels is key.
Humidity: Monsteras thrive in high-humidity environments. Increase humidity around the plant by using a humidifier, misting the leaves regularly, or placing the pot on a tray filled with water and pebbles.
Temperature: Keep the temperature between 18-29 °C (65-85 °F). Avoid exposing the plant to sudden temperature changes or drafts, as this can affect its health and blooming potential. Use a thermometer to monitor and record temperatures, adjusting as needed to keep it stable.
Fertilization: Feed your Monstera with a balanced, water-soluble fertilizer every 4–6 weeks during the growing season (spring and summer). This provides essential nutrients that promote healthy growth and flowering.
Pruning: Regularly prune your Monstera to remove dead or yellowing leaves and to encourage new growth. Pruning can also help redirect the plant's energy towards blooming.
Support: Monsteras are natural climbers. Providing a moss pole or trellis for your plant to climb can encourage it to produce larger leaves and, potentially, flowers. We prefer top use homemade self watering moss poles, as we've found that they can help to promote mature growth faster, which can speed up the wait for flowers to develop.
Mature Plant: Flowering is more likely in mature plants. Be patient, as it can take several years for a Monstera to reach flowering age.

10 Unique Monstera Varieties
Monstera Deliciosa
Common Names: Swiss Cheese Plant, Split-Leaf Philodendron
Varieties You May Know: Albo VariegataOrigin: Southern Mexico and Central America
Unique Features: Large, heart-shaped leaves with characteristic fenestrations (holes and splits)
Popularity: Known for its dramatic, tropical appearance and ease of care. Easy Monstera care for beginners.
Care Requirements: Similar to general Monstera care; bright, indirect light, high humidity, and well-draining soil
Monstera Adansonii
Varieties You May Know: All Green, Albo Variegata, Mint European Style, Archipelago
Common Names: Swiss Cheese Vine, Five Holes PlantOrigin: South America, Central America, West Indies
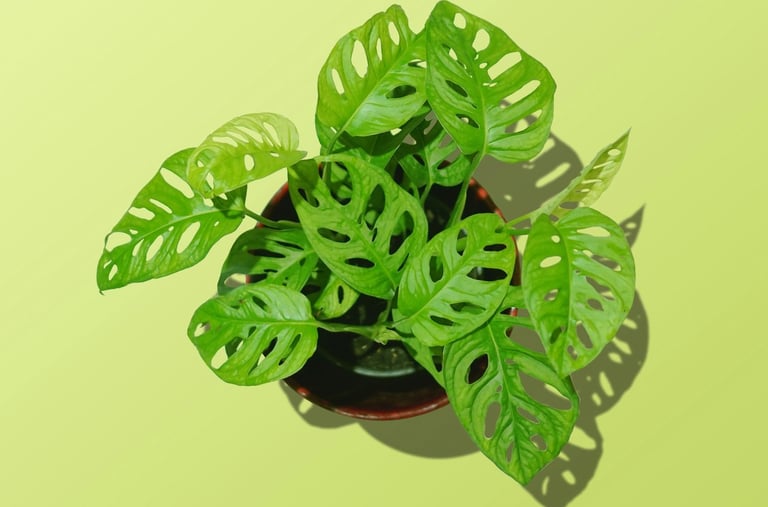
Unique Features: Smaller, more delicate leaves with fenestrations
Popularity: Popular for its smaller size and delicate appearance, making it suitable for smaller spaces. Easy Monstera care for beginners.
Care Requirements: Similar to general Monstera care; bright, indirect light, high humidity, and well-draining soil
Monstera Borsigiana
Varieties You May Know: Albo Variegata, Mint, Archipelago
Common Names: Small Form Monstera, Borsig's Monstera, Mini Monstera (although technically Rhaphidophora tetrasperma is more commonly referred to as Mini Monstera)Origin: Central America
Unique Features: Faster growth rate and larger leaves compared to Monstera Deliciosa. Easy Monstera care for beginners.
Popularity: Appreciated for its rapid growth and larger fenestrations
Care Requirements: Similar to general Monstera care; bright, indirect light, high humidity, and well-draining soil
Monstera Peru
Varieties You May Know: Peru
Common Names: Monstera Peru, Peru FormOrigin: Central and South America
Unique Features: Extremely large fenestrations, almost transparent leaves. Various variegation patterns are available.
Popularity: Rare and highly prized for its unique, almost ethereal appearance
Care Requirements: Similar to general Monstera care; bright, indirect light, high humidity, and well-draining soil
Monstera Dubia
Varieties You May Know: Dubia Monstera, Shingle Plant, Shingle MonsteraOrigin: Central and South America
Unique Features: Smaller leaves with fenestrations, shingle-like growth pattern
Popularity: Popular for its unique growth pattern and smaller size, suitable for terrariums and small spaces
Care Requirements: Similar to general Monstera care; bright, indirect light, high humidity, and well-draining soil
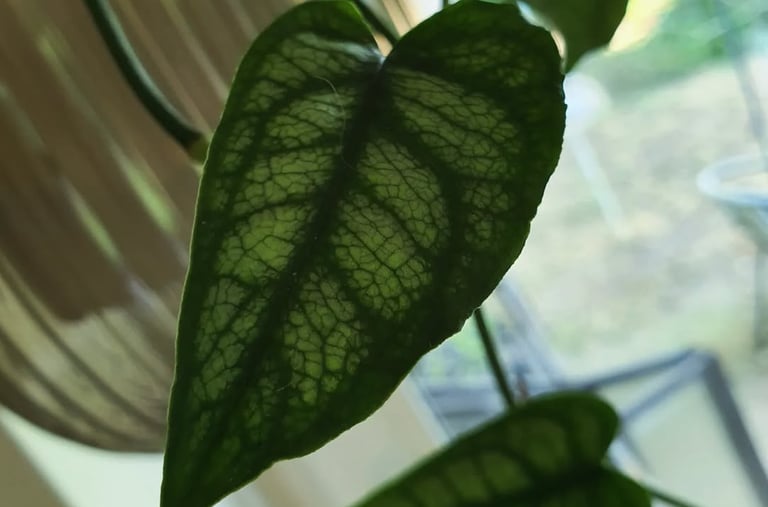
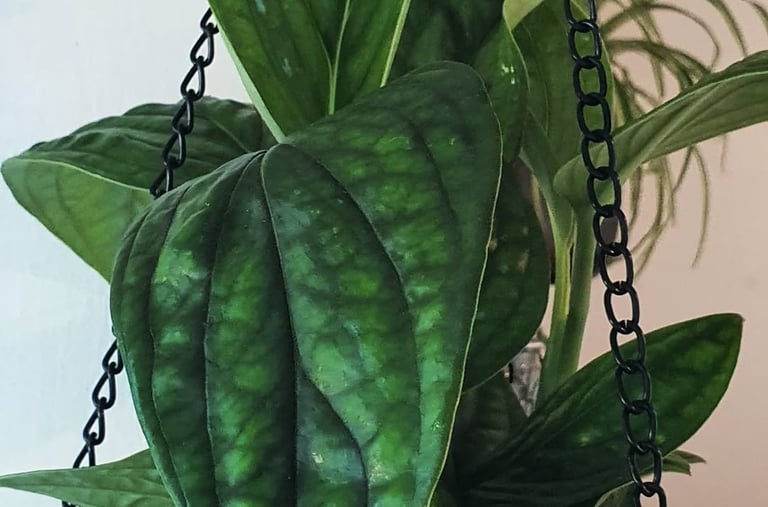
Monstera Siltepecana
Varieties You May Know: Silver Monstera, Silver QueenOrigin: Mexico
Unique Features: Silvery-green leaves with fenestrations
Popularity: Appreciated for its striking variegation and unique leaf colour. Easy Monstera care for beginners.
Care Requirements: Similar to general Monstera care; bright, indirect light, high humidity, and well-draining soil
Monstera Standleyana
Varieties You May Know: Cobra, Aurea, Galaxy
Common Names: Philodendron Cobra, Standley's Monstera, Monstera Albo Variegata, though this is a general term for variegated Monsteras including DeliciosaOrigin: Central America
Unique Features: Glossy green leaves with fenestrations, various variegation patterns available.
Popularity: Known for its glossy leaves and robust growth
Care Requirements: Similar to general Monstera care; bright, indirect light, high humidity, and well-draining soil
Monstera Esquelito
Common Names: Esqueleto Monstera, Skeleton MonsteraOrigin: Central and South America
Unique Features: Smaller leaves with fenestrations, shingle-like growth pattern. Similar to Adansonii.
Popularity: Popular for its unique growth pattern and smaller size, suitable for terrariums and small spaces
Care Requirements: Similar to general Monstera care; bright, indirect light, high humidity, and well-draining soil
Monstera Lechleriana
Varieties You May Know: Lechleriana Albo Variegata
Common Names: Lechler's Monstera, Lechler's PhilodendronOrigin: Central and South America
Unique Features: Glossy green leaves with fenestrations, or variegated if buying the Albo variety.
Popularity: Known for its glossy leaves and robust growth
Care Requirements: Similar to general Monstera care; bright, indirect light, high humidity, and well-draining soil
Monstera Thai Constellation
Varieties You May Know: Legacy, Crème Brulé, White Snow, Medusa, Green Snow, Platinum Mint Variegated
Common Names: Monstera Thai Constellation, Thai Constellation, Thai ConOrigin: Cultivated variety exclusive to Thailand
Unique Features: Striking variegated leaves with cream and white speckles, resembling a constellation. Other types may be all white, yellow or variegated. Mostly cultivated via cloning in a lab.
Popularity: Highly sought after for its unique variegation and eye-catching appearance. Easy Monstera care for beginners.
Care Requirements: Similar to general Monstera care; bright, indirect light, high humidity, and well-draining soil. However, due to its variegation, it may require more light than typical Monsteras to maintain its vibrant colours. Avoid direct sunlight to prevent leaf burn.

10 Monstera Fun Facts:
Nickname: The Monstera Deliciosa is often called the “Swiss Cheese Plant” due to its distinctive, holey leaves. This is one of the reasons that this plant is so well-loved, other than the fact that Monstera is easy to care for. The best part of these fenestrations is that they are a design by nature to allow light to the lower leaves. As a monstera climbs, the leaves get more of these holes in to allow more light through!
Native Habitat: These plants are native to the tropical rainforests of Central and South America. The appearance of this plant wouldn't look out of place on Mars, but Monstera plants are originally native to America! Monstera care in the UK is a little more tricky as they don't naturally love our colder climates, but as long as you keep them away from windows and doors, you shouldn't have any issues. You wouldn't believe that Monstera are easy to care for when you find out that they come from a rainforest, however, after centuries of keeping them indoors as houseplants we've realised that Monstera are extremely easy to care for! That's a win in our book!
Climbing Vines: Monstera plants use aerial roots to climb up trees in their natural habitat, helping them reach sunlight in the dense forest canopy. You may have noticed that your Monstera plant has aerial roots growing from the back — if you give your Monstera a moss pole to climb, the leaves will size up and get those classic holes. These aerial roots are part of what makes Monstera easy to care for, as they help to keep the plant supported to the moss pole or climbing structure.
Edible Fruit: The fruit of Monstera Deliciosa is called “Mexican breadfruit” and is known for its delicious, tropical flavour. It's said to taste like a mix of banana, pineapple, and mango. How to get your Monstera to flower? Follow our Monstera flowering care guide to ensure the plant's care needs are met, and your plant may flower indoors in time as it matures. Whilst Monstera are easy to care for, they still require perfect conditions to flower like most houseplants. When keeping Monstera in the UK, watch your winter temperatures and be careful not to shock the roots with cold tap water in the winter.
Unique Leaves: The fenestrations, or holes, in the leaves are believed to help the plant withstand heavy rain and wind in the wild by allowing these elements to pass through without damaging the leaves. They're also there to allow light through the top of the plant canopy to the lower leaves — smart, eh?!
Air Purifiers: Monstera plants are great for improving indoor air quality, as they can absorb toxins from the air. A 2-year-long study by NASA in 1989 has shown that Monstera plants can effectively remove common indoor pollutants such as formaldehyde, benzene, and trichloroethylene. Your Monstera plant care routine just became a two-way activity — now your plant can help to care for you by cleaning your home's air.
Slow Growers: These plants can take several years to develop their characteristic split leaves, especially when grown indoors. In the wild, with optimal growing conditions, they can reach their full size within 20 years. Whilst Monstera are easy to care for, they do need climbing support like moss poles to mature to their full size.
Symbolism: In some cultures, Monstera plants are seen as symbols of long life and respect due to their impressive size and longevity. Depending on how old you are, your Monstera could outlive you with the right plant care and attention.
Varieties: There are many varieties of Monstera, including Monstera Adansonii, which is known for its smaller, more delicate leaves with numerous holes, and Monstera Peru, which is known for it's scaly textured leaves. There are numerous varieties of Monstera with variegation on the leaves ranging from white to cream, to yellow. There are actually some all white varieties of Monstera, but they can be hard to care for because of this. We love the European Mint variegated Adansonii, as it's such a unique houseplant. For Monstera that are easy to care for, stick to the green varieties, as they are more suitable for a hands-off plant care routine. Monstera varieties in the UK that are readily available from shops usually come in a good range of variegation and colours. You can find some really crazy Monstera varieties in the US and in the warmer countries, where Swiss Cheese Plants survive in their climates better.
Popularity: Monstera plants are incredibly popular in interior design and have become iconic in modern home decor due to their striking appearance and easy care needs. You can find their iconic leaves all over clothing, stationary and crockery for the kitchen. If you ever wanted a pillow with fenestrations to match your plant's leaves, this is the plant for you! Monstera care in the UK is almost like a cult following — you can find whole Instagram accounts dedicated to admiring these beautiful plants. If you're still unsure about buying a Swiss Cheese plant, check out Monstera care for beginners.

Monstera Overview
Monstera plants are arguably the most popular houseplant and have the most recognisable leaves with those iconic splits and holes. There isn't any other plant that we can think of here at The Houseplant Shop that shows itself on quite so many bits of stationary or mugs! There must be barely anyone left on our planet who doesn't instantly recognise those holey, split leaves as a universal symbol of our connection to nature as a species.
Monstera plants are popular houseplants known for their large, heart-shaped leaves with unique fenestrations (the holes and splits). Native to the tropical rainforests of Central and South America, these plants thrive in bright, indirect light and high humidity environments. Monstera plants are relatively easy to care for, requiring well-draining soil and regular watering when the top inch of soil feels dry. Their ability to climb using aerial roots makes them ideal for growing on supports like moss poles.
Monstera care in the UK is not much different to other countries, however, watch your tap water temperatures in the winter and always enjoy moving your Monstera to a window with direct sun. Whilst Monstera do not need direct sunlight, they do love it in the winter in this part of the hemisphere, where it's not strong enough to scorch their leaves.
Monstera plants are prized for their dramatic, tropical appearance and the unique patterns on their leaves, making them a favourite among plant enthusiasts. Whether you're a seasoned plant parent or new to indoor gardening, Monstera plants can add a touch of the tropics to any home with the right care.
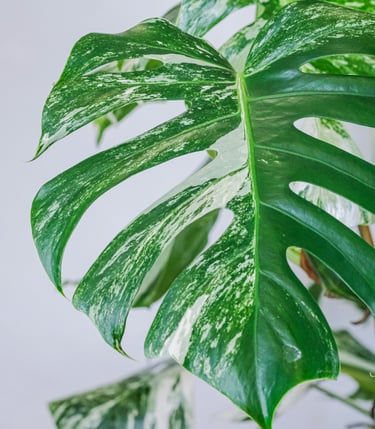

Monstera Albo Variegata split leaf
Edited & Fact Checked By: The Houseplant Shop
Article Published: 12th December 2024

About The Houseplant Shop:
Independent Houseplant Nursery
Horticultural Specialists
Managing Over 250 Houseplant Species Onsite
Over 15 Years Of Experience With Horticulture
As head of horticulture, Sarah manages the care and propagation of over 250 plant species at a commercial houseplant nursery. With over 15 years of experience in horticulture, specializing in houseplants, Sarah has extensive expertise in plant biology, soil science, and integrated pest management. She continually reviews and integrates the latest research into her plant care guides. Dedicated to educating others, Sarah has spent years diagnosing houseplant care issues and sharing her real-world experience. Her commitment to scientific accuracy and helping people diagnose plant health issues has established her as a trusted authority and expert in the field.
The Houseplant Shop is a dedicated houseplant nursery, growing all of their own stock from their botanical library of over 250 houseplant species. The nursery staff are horticultural experts who have dedicated their lives to cultivating and nurturing over 250 different species of houseplants, focusing on Aroids, tropical plants, and NOID collectables. All their plants are grown in house in Britain to be more environmentally friendly. The nursery is proud to have been featured by the Royal Horticultural Society (RHS) as a 100% peat free nursery.
Recommended Further Reading:
People also looked at: How To Get Fenestrated Leaves, Watering, Moss Poles, Self Watering Moss Poles, and A-Z Encyclopedia of Indoor Plants.
How We Reviewed This Article:
Our horticultural experts continually monitor the houseplant space, and we update our articles when new information becomes available. We are committed to providing current and reliable information. If you have some information that you think would be helpful in this article, we'd love to hear from you. Our team works hard to revise articles for factual accuracy, and we regularly update our pages with new information, techniques, tips, images, trade secrets, and real world experience from the team here at the houseplant nursery. You can find a list of the article updates below.
Written By: Sarah Brooks, Head of Horticulture
Article Received: 5th December 2024
Copyright: The Houseplant Shop (https://thehouseplant.shop)
The use, distribution, or reproduction is permitted, provided the original copyright owner is credited and that the original publication on this website is cited with a direct link to the article, only with these terms. Any other use is not permitted.
List of Article Updates:
18th December 2024: Added new images
20th December 2024: Minor UI updates
21st January 2025: Added a new step in the how-to process to include hardening off and rooting hormone in the propagation section
28th January 2025: Added new images of inflorescences, and a new section about Monstera plants flowering indoors
Author Bio:
Author: Sarah Brooks,
Head of Horticulture at The Houseplant Shop

