The Ultimate Guide: Houseplant Watering
Indoor Plant Watering Menu
Quickly navigate this page to find any topic without getting a sore finger
The Importance Of Watering Houseplants
It can be easy to overlook watering when caring for houseplants, as it can seem like a trivial part of plant care. However, water is as vital for your houseplants as food is to humans. When kept indoors, plants get all of their nutrients through the water that you provide. In the wild, they would access their nutrients through the water table and the soil. Because our houseplants don't have access to natural nutrients in the soil, you must feed them to compensate for keeping them in a pot.
If you don't feed potted plants regularly, they will eventually use up all the nutrients within the soil and start slowly starving to death. Unfortunately, tap water doesn't usually contain enough nutrients for them to survive. When thinking about watering houseplants, try to think of it as literally feeding your plant. Just because they survive on a liquid diet doesn't mean that they don't need food at all. Although fertilizers for houseplants are important, the techniques that you use to water your plants can make a huge difference in their growth rates, so we take an in-depth look at them in this guide.
Another significant factor of plant care is how often you water houseplants. Too much water can hurt your plants and cause root rot, while too little water can leave them starving to death and unable to grow. The key to getting great plant growth indoors is to find the balance between overwatering and underwatering. As we explore watering plants, we will cover how you know when to water your houseplants, as this is so critical to plant health, and growth.
Proper watering techniques are essential not only for nutrient delivery, but also for maintaining the overall health, colours, and growth of your indoor plants. In this article, we will guide you through how to water your plants, how frequently to water, and give you tips to ensure that your plants achieve their maximum growth potential indoors. Whether you're a seasoned plant parent or just starting out, understanding the nuances of watering can make all the difference in creating a thriving indoor jungle. Join us on this journey to become a houseplant watering expert and watch your plants thrive, rather than just survive.
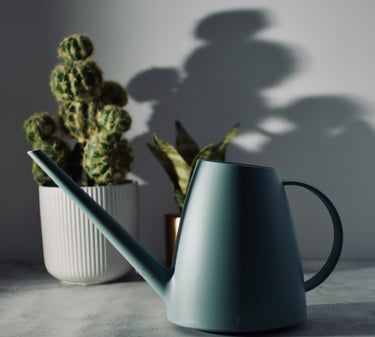
Indoor watering can by Elho
What Happens When Houseplants Are Overwatered
It can be tempting to water our plants too often when we see the visible effects of growth after watering. Unfortunately, this is the most common cause of houseplant death, as too much love is, well, too much love. It can be hard to resist giving your plants a quick little top-up when you feel they haven't grown much recently, we've all done it. However, when we overwater our houseplants, we cause nasty bacteria and fungi to grow in the soil, causing root rot and death! Studies have shown that watering houseplants makes people happier, so it's no surprise that houseplants end up overwatered! Let's look at the symptoms of overwatering, so you can tell when your plants have had too much love:
Root Rot: Excess water can suffocate the roots, causing them to rot. Root rot is a fungal condition that can quickly spread and kill the plant if not addressed. You can check for root rot by removing the plant from its pot and visually inspecting the root ball. If the roots are brown and mushy, they are starting to rot. If they smell bad, it's a big warning sign of overwatering. Leave the plant out of the pot in a warm room and do not water until the plant has dried out. Cut off any mushy roots and repot the plant in fresh houseplant soil.
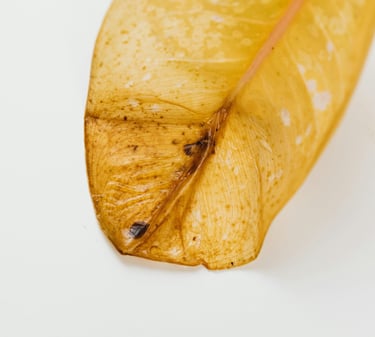
Yellowing Leaves: Overwatered plants often display yellowing leaves, especially the lower ones. This happens because the roots are unable to absorb essential nutrients due to waterlogged soil. Remove any yellow leaves and adjust your watering schedule. Allow the soil to dry between watering. Crunchy, dry soil is good for root health in small doses, as it allows the good bacteria to fight off the bad bacteria.
Wilting: Although it might seem counterintuitive, overwatered plants can wilt. This occurs because the roots are damaged and cannot take up water effectively, causing the plant to get thirsty and hungry. Overwatering can result in a similar wilted appearance as underwatered plants.
Edema: Excess water can cause cells in the leaves to burst, leading to blister-like swellings on the leaves' undersides, known as edema. Some plants are more susceptible to edema than others. We have experienced edema first hand with a certain variety of Aglaonema plants, which are very prone to it. We've included a photo to illustrate how to spot edema on houseplant leaves.
Mold and Mildew: Overly moist conditions can foster the growth of mould and mildew on the soil surface or on the plant itself. You can see it forming on the surface of the soil as a white layer of fuzz.
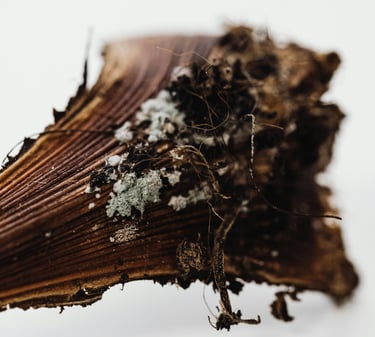


Rot caused by overwatering
Yellow leaf caused by overwatering
Healed up edema from overwatering
What Happens When Houseplants Are Underwatered
Underwatering plants can cause serious issues, just as overwatering can. It may feel overwhelming when you first learn that both overwatering and underwatering cause health issues, but we promise that you will find a balance. This guide will walk you through how to tell when plants actually need water and when they're hydrated enough. First, let's look at the signs of underwatering so you know when your houseplants need a little more love:
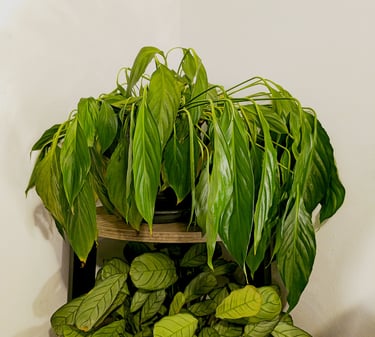
Wilting: One of the most obvious signs of underwatering is wilting. Without sufficient water, plants lose turgor pressure, causing the leaves and stems to droop. We've included a photo to illustrate how a wilted plant looks.
Yellowing and Browning Leaves: Underwatered plants may develop yellow or brown leaves, especially at the edges. This happens because the plant cannot transport nutrients effectively without enough water.
Leaf Drop: Plants may shed their leaves to conserve water. This is a survival mechanism, but it can weaken the plant and hinder its growth. It's normal for plants to shed lower leaves, but if your plant sheds the top leaves or several leaves at once, it's a sign that it's been underwatered and is trying to adapt to the new environment.
Wilting Peace Lily caused by underwatering
Slow Growth: Insufficient water can stunt a plant's growth, since water is essential for photosynthesis and nutrient transport. If your plant has stunted or slowed growth, check moisture levels and adjust as needed.
Crispy Leaves: Leaves can become dry and crispy when the plant doesn't get enough water. This is particularly noticeable in the tips and margins of the leaves. If the aesthetics bother you, remove the crispy leaves, as it will encourage new healthy growth when properly hydrated.
Soil Pulling Away from the Pot: Extremely dry soil can shrink and pull away from the edges of the pot, making it difficult for the roots to absorb water when it is added. Soil can become hydrophobic; use a wetting agent to force the soil to absorb water again.
Root Damage: Prolonged underwatering can lead to root damage or death. The roots require moisture to function properly, and without it, they can dry out and become brittle. Dry soil is good for plants, but if it dries out too much for too long, roots become damaged and die off.
How Often To Water Houseplants
There is no simple answer to this question, other than to check the soil. You'll find that phrase repeated many times about watering because checking the soil is the only true way to know how hydrated your plant is. How often houseplants need watering depends on several factors, including the type of plant, the size of the pot, the type of soil, the environment within your home, and the season. Here are some general guidelines to help you know when to water your houseplants:
Plant Type: Different plants have varying water needs. For example, plants that hold water in their leaves like Agave and Aloe require less frequent watering, whilst tropical plants like Monstera, Ficus and Peace Lilies require more consistent moisture. If your plant is a fast grower, like Ficus, it will need more water than a slow-growing plant like Agave.
Pot Size: Smaller pots tend to dry out faster than larger pots, so plants in smaller pots may need to be watered more frequently. The number of plants in the pot can also influence watering frequency; when there is more than one plant in a pot, the soil will need watering more frequently. Root-bound plants can also need more regular watering. If your plant dries out less than 3 days after watering, it may be pot-bound and need repotting.
Soil Type: Well-draining soil will dry out more quickly than soil that retains moisture. Make sure to choose a soil mix that suits your plant's needs. If your plant dries out less than three days after watering, and it's not pot-bound, the soil may be too well-draining; switch to a more moisture-retaining soil mix.
Indoor Environment: Factors such as humidity, temperature, and light levels can affect how quickly the soil dries out. Higher temperatures and lower humidity will cause the soil to dry out faster. Monitor humidity and temperature to ensure a stable environment. The ideal temperature range for houseplants generally falls between 18 °C to 24 °C (65 °F to 75 °F) during the day and 13 °C to 18 °C (55 °F to 65 °F) at night. The typical humidity level for houseplants typically ranges from 40% to 60%. It's important to note that specific preferences on humidity and temperature can vary depending on the type of plant. Check our species-specific plant care guides for more information.
Season: Plants typically need more water during their growing season, which is spring and summer. On the flip side, plants require less water during their dormant period, which is autumn and winter. During the colder months, reduce the frequency of watering and fertilizer to prevent plant care issues.
How To Monitor Soil Moisture Accurately
The best way to tell when your plants need water, especially for beginners, is to use a moisture meter to accurately display how wet the soil is and if you need to water or not. We think these moisture meters are a great way to take the guesswork out of watering houseplants, which can be really helpful when you can't judge it with other techniques. Let's explore all the different ways to show when your houseplants need watering:
Time: The least reliable way to check when your plants require watering is to wait for certain periods of time. Although it can be a good way to keep a watering schedule, the quickest mistake that most beginners make is to try to water every 7 days exactly. Plants don't always use the exact same amount of water each week, so by trying to stick rigidly to a schedule, it's easy to end up overwatering plants and causing root rot. If you want to water on a schedule, always check the soil moisture levels before watering, and don't be afraid to skip a few days if they need more time to dry out.
Fingering the Soil: One of the oldest methods to test soil moisture is to simply put your finger into the soil to feel how wet it is. Insert your finger into the top 1–2 inches of the soil, feeling for any signs of moisture. After a while, you can quickly tell when plants require water from the feel of the soil. It can be helpful to practice this technique while using other methods to verify if your instincts are right.
Lifting the Pot: This is one of our favourite ways to check soil moisture. We manage over 250 species of plants, and we can accurately monitor the moisture by simply lifting each pot to check the weight. Before long, you learn the correct weights for wet and dry soil, allowing you to quickly check plants without getting soil under your fingernails. It can be helpful to practice this method alongside other techniques to show when your instincts are right.
Checking Soil Colour: For a really simple way to quickly check if your plant needs water, look at the soil colour. When soil is wet, it's very dark brown, but when it dries, it's much lighter. It can be helpful to monitor the colour before and after watering so that you can learn when it looks dry at a quick glance. However, this is the most unreliable method, as soil can dry out on the top but stay waterlogged beneath, so use this method with caution. We advise checking the pot weight to confirm when soil looks dry to verify the soil moisture.
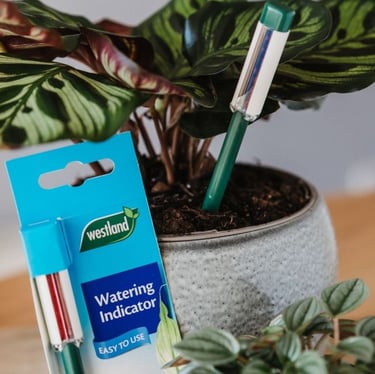
In-Pot Moisture Meter: These modern gadgets live permanently in the plant's pot, giving you a quick glance reading of when your plants require watering. They come in a range of colours and sizes, allowing you to monitor picky species more closely and to easily manage extremely thirsty indoor plants like ficus trees. Moisture meters are the most reliable way of gauging houseplant watering requirements. We like to use these in our Monstera Albo Variegata plants, and our Monstera Thai Constellations, as they're both prone to root rot when overwatered. They enable us to quickly see if we should skip a few days when watering the whole collection. As we manage over 250 species, any gadget to speed up watering is a top performer in our books! We also use these for our Ficus trees, as they can often dry out in-between watering, reducing foliage gain during their active growth season. Adding these in pot watering meters allows us to quickly check moisture levels, and top up as required in-between watering. We're massive fans of these in-pot moisture meters, and we highly recommend them for any houseplant collector.
Portable Moisture Meter: This twin pack of moisture meters is a portable version that you can carry from pot to pot. This allows you to go through a large houseplant collection very quickly without making mistakes, as moisture meters are very accurate compared to other, more unreliable methods of telling when plants require water.
Digital Moisture Meter: These are the top-of-the-range, hi-tech gadgets that allow you to accurately monitor moisture levels in your plant pots. These are also portable, but these slightly more expensive moisture meters have digital screens for an instant reading of your soil moisture levels in a clear, concise format with easy-to-read statistics. We highly recommend these for any plant keepers who struggle to know when to water their plants, as they completely take the guesswork out of it, ensuring your plants remain healthy and grow to their maximum potential.
Is Tap Water Safe For Houseplants?
There's a lot of noise online about chemicals in tap water, and if you can use it to water your plants. Let's dig into the science behind this myth to clear it up. Tap water is generally safe for most houseplants, but there are a few considerations to keep in mind:
Chlorine and Chloramine: Most water treatment plants add chemicals to tap water to disinfect it. Traditionally, chlorine was used to treat drinking water, but recently, many companies have switched to chloramine. Whilst most houseplants can tolerate low levels of these chemicals, some sensitive plants may show signs of stress, such as brown crispy leaf tips. Allowing tap water to sit out for 24 hours can help dissipate chlorine, but chloramine will not evaporate as easily. If your water is treated with chloramine, it can't be evaporated overnight. To remove chloramine and chlorine, you can use a plant safe dechlorinator to treat the water before use. We always use dechlorinated water for our houseplants as an abundance of caution, and we recommend that you do the same.
Temperature: The cold temperature of tap water during the colder seasons can shock plant roots and cause health issues. To prevent shock, allow the water to sit out until it has reached room temperature. This may take several hours in the winter, so we advise preparing your water overnight.
Hard Water: Tap water in some areas is hard, meaning it contains high levels of minerals like calcium and magnesium. This can lead to mineral build-up in the soil, which might harm your plants over time. This appears as a fine white layer of dust over soil, or moss poles. Use a water softener or filter to reduce mineral content.
pH Levels: The pH of tap water can vary. Most houseplants prefer slightly acidic to neutral pH levels (around 6 to 7). If your tap water is too alkaline (pH above 7), it might affect nutrient absorption. You can monitor pH with a pH meter or soil testing strips, and you can use pH down or pH up to get the correct levels for your plant species.
Fluoride: Some tap water contains fluoride, which can be harmful to certain plants like Dracaenas and Spider Plants. This is typically seen as brown leaf tips. Using filtered or distilled water can help avoid fluoride-related issues.
Quality: If you're concerned about the quality of your tap water, consider using filtered water, rainwater, or distilled water for your houseplants. Always monitor your plants for signs of distress and adjust your watering practices as needed.
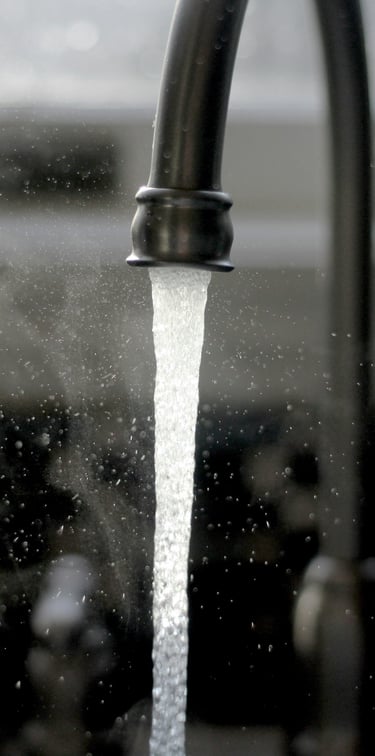

Tap water
Dechlorinator For Houseplants
It's vital to use dechlorinator to remove chlorine, chloramine, and heavy metals. We manage over 250 species of houseplants here at the nursery, and we always use dechlorinated water on our plants. We find that it helps to prevent burnt leaf tips and brown crispy edges, especially in more delicate species. You can frequently see chlorine sensitivity in sensitive species like Spider Plants, Alocasia, or Prayer Plants. We highly recommend that you use dechlorinator for your houseplants, as we've found that it really helps our plants to thrive, rather than just survive.
At our nursery, we use the product called Ecothrive Neutralise. As we have so many plant species to look after, we buy ours in bulk by the litre. Although it is a little expensive, it's so incredibly concentrated that one litre should last the average household years. You only use one drop to treat 20 litres of tap water. You can also buy smaller bottles which are a lot more affordable, however, the price per 100ml is much higher. If you have a large houseplant collection, it can be worth stumping out for the big bottle. This is the exact brand and product that we use here at the houseplant nursery: Ecothrive Neutralise: 1L/£50, 250ml/£20, and 50ml/£10.
If you're struggling to find it in your local garden centre, you can use aquarium dechlorinator for houseplants. Aquarium dechlorinator is designed to neutralise chlorine and chloramine in tap water, making it safe for fish. This can also benefit houseplants by removing harmful chemicals that can build up in the soil and cause root damage. Follow the instructions on the dechlorinator product to ensure you're using the correct amount for the volume of water you're treating. Aquarium dechlorinator is a great way to make tap water plant safe. Here are some brands that people have reported success with for indoor plants: Seachem Prime, API Stress Coat, Interpet Tapsafe, or Envii Aquarium Klear.
Dechlorinators primarily work by neutralizing chlorine and chloramine in tap water, making it safe for fish and plants. However, some dechlorinators may also remove beneficial minerals from the water. When using dechlorinators that aren't specifically designed for houseplants, you can contact the manufacturer to find out how it will affect them. It's a good idea to check the product label to see if it mentions removing minerals. If it does, you might want to consider using filtered or distilled water instead, or look for a dechlorinator that doesn't strip away essential nutrients. Minerals are essential for houseplants as they support critical physiological processes. Here’s why the minerals that might be locked out by dechlorinators are important:
Calcium (Ca): Strengthens cell walls and contributes to root and leaf development.
Magnesium (Mg): Integral to chlorophyll production, aiding in photosynthesis.
Iron (Fe): Necessary for chlorophyll synthesis and overall plant metabolism.
Sulphur (S): Supports protein synthesis and enzyme function.
These minerals ensure your plants grow strong, healthy, and vibrant. When dechlorinators remove these minerals, it can lead to deficiencies impacting plant health. If in doubt, and the label gives no information, contact the company who make the product to find out more information about how it will interact with minerals in tap water.
The Importance Of Using Room Temperature Water For Tropical Houseplants
You may have heard that you shouldn't use cold water for plants, and that's correct. Houseplants thrive in environments that mimic the wild, let's dive into the science:
Avoiding Shock: Cold water can shock the plant's roots, causing stress and potentially damaging the plant. Tropical plants are sensitive to sudden temperature changes. Cold water disrupts their root systems, causing poor nutrient absorption and stunted growth. Use a thermometer to check water is around 20 °C-22 °C (68 °F-72 °F).
Nutrient Absorption: Room temperature water allows for better nutrient uptake. When water is too cold, it can slow down the plant's metabolic processes, including nutrient absorption. By using water at a temperature similar to the plant's natural environment, you ensure that the roots can efficiently absorb the nutrients they need.
Maintaining Soil Temperature: Using room temperature water helps maintain a consistent soil temperature, which is important for tropical plants. Sudden changes in soil temperature can affect root health and overall plant stability. Consistent soil temperature supports healthy root growth and overall plant vigor.
Encouraging Healthy Growth & Preventing Root Rot: Using room temperature water aligns with tropical plant's natural wild habitat, and promotes growth. Cold water can contribute to root rot by causing the soil to remain cold and wet for extended periods, this creates an environment conducive to fungal growth and root decay.
Ficus Audrey being watered
Can I Use Rainwater On Houseplants?
Rainwater is safe to use on houseplants and is often considered one of the best options for watering plants because it is naturally soft and free of many chemicals found in tap water. Here are some benefits of using rainwater for your houseplants:
Chemical-Free: Rainwater is free of chlorine, chloramine, and fluoride, which are commonly found in tap water and can be harmful to sensitive plants. This is why many indoor gardeners prefer to use it for houseplants.
Ideal pH Level: Rainwater typically has a neutral to slightly acidic pH, which is ideal for most indoor plants.
Mineral Content: Unlike hard tap water, rainwater does not contain high levels of minerals such as calcium and magnesium, which can lead to build-up in the soil over time. This helps prevent the white build-up on the soil surface, which, although totally natural and harmless, can be unsightly to some people.
Nutrient-Rich: Rainwater can contain small amounts of nitrogen and other nutrients absorbed from the atmosphere, using a tiny bit of nature to benefit your plant growth indoors.

Does Rainwater Contain Pesticides?
It's important to discuss how rainwater can potentially contain pesticides, especially if it runs off from areas where pesticides have been used, such as agricultural fields, gardens, or urban landscapes. When rainwater flows over these surfaces, it can pick up pesticides and carry them into the water supply. However, the concentration of pesticides in rainwater is usually quite low, and many of the harmful chemicals can be removed through natural processes or simple filtration methods. If you're concerned about pesticide contamination, you can take steps to minimize it. You can use a rainwater collection system with a filter to remove particles or contaminants., and you can use a water testing kit to ensure the rainwater is safe before use. Observe your plants for any signs of stress or changes when switching to rainwater. Most plants will thrive with rainwater, but it's always good to monitor their health.
How to Collect Rainwater Safely For Houseplants
To collect rainwater, you can set up a rain barrel or any clean container to catch run-off from your roof, shed, or outbuilding. Ensure the container is clean and free of contaminants. Using rainwater can help your houseplants thrive and is an environmentally friendly option for watering your plants.
Choose a Collection Method: Place rain barrels under down spouts to collect run-off from your roof. Use clean containers like buckets or tubs to catch rain directly.
Use a Clean Collection Surface: Ensure the surface where the rainwater is collected (e.g., roof, container) is free from contaminants like bird droppings, dust, or chemicals.
Install a Filtration System: Install a first flush diverter to discard the initial flow of rainwater, which may contain more contaminants. Use mesh screens or filters to remove debris and particulate matter from the rainwater.
Cover the Collection Container: To prevent debris, insects, or algae growth, cover your collection container with a lid or fine mesh.
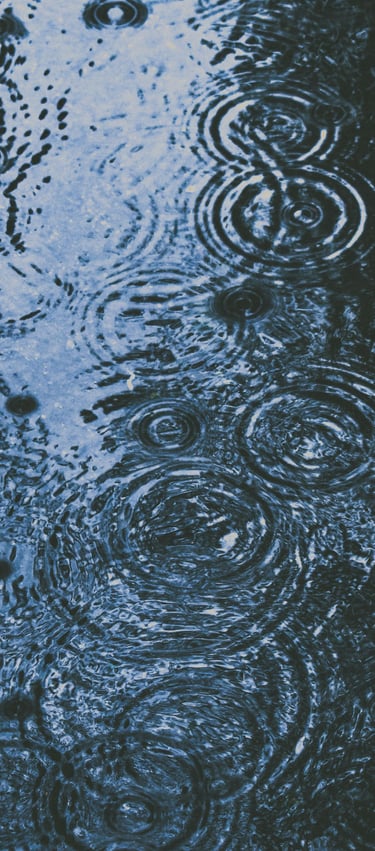
Rain ripples in a puddle
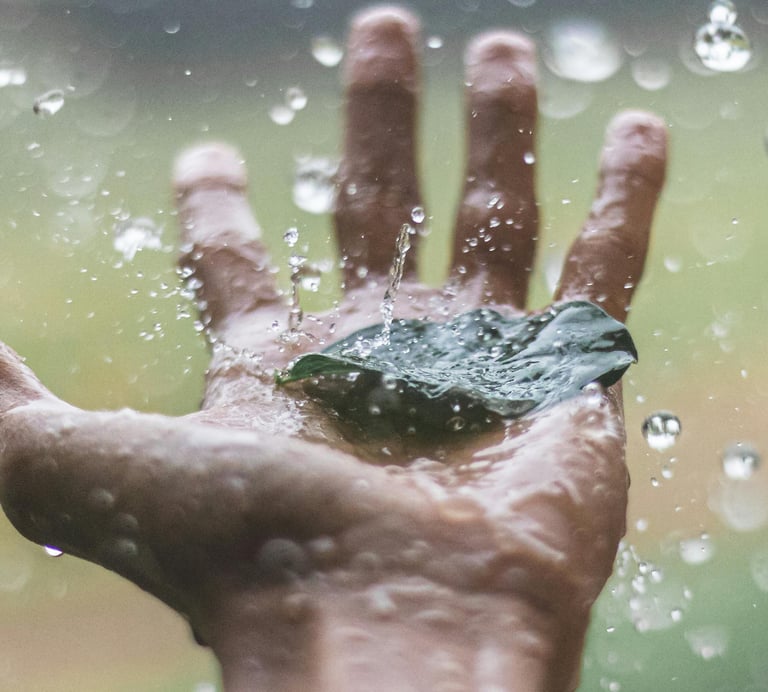

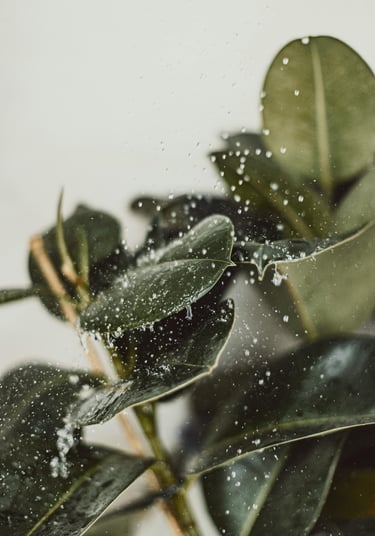
Rainwater hitting a leaf
Correct Seasonal Watering Schedules For Houseplants
Seasonal changes can greatly affect how often you need to water your houseplants. Different times of the year bring varying light levels, temperatures, and humidity, all of which impact a plant's water requirements. Rather than tell you, “You should water your plants every 7 days,” we're going to teach you how to make informed watering choices, to avoid the plant care issues we discussed in what happens when you overwater or underwater plants. Because plants needs change throughout the year, it's best to learn how to tailor your plant care to your home's individual conditions. Here’s a guide to help you adjust your watering schedule according to the season, and environment:
Spring Watering Schedule:
Increased Growth: Plants start to wake up from their winter dormancy and enter a growth phase.
Watering Frequency: Gradually increase watering as the days get longer and temperatures rise. Most houseplants will require more frequent watering during this time.
Tips: Check the soil moisture regularly and ensure that the top inch of soil is dry before watering again. This is when you should start feeding your plant's fertilizer.
Summer Watering Schedule:
Peak Growth: This is the period of maximum growth for most houseplants.
Watering Frequency: Water more frequently, as higher temperatures and increased light cause the soil to dry out faster.
Tips: Pay close attention to your plant's needs. Some plants may require daily watering, while others may need it every few days. Ensure good drainage to prevent waterlogging. Fertilize regularly, following the instructions on the manufacturer's packaging, or roughly every 7–10 days. Flush soil out if you see signs of nutrient burn.
Autumn Watering Schedule:
Transition Period: As the days get shorter and temperatures drop, plants begin to slow down their growth.
Watering Frequency: Gradually reduce watering frequency. Plants will require less water as their growth rate slows.
Tips: Be cautious not to overwater. Allow topsoil to dry out more between watering sessions. Skip every other feed, or dilute the concentration of fertilizer by 50%.
Winter Watering Schedule:
Dormancy: Many houseplants go into a dormant phase or slow down significantly during winter.
Watering Frequency: Water sparingly. Most houseplants require significantly less water during this time.
Tips: Check the soil moisture before watering. Overwatering is common in winter as plants require less water. Ensure your plants are not sitting in cold drafts or near heating vents, which can dry out the soil quickly. Indoor heating during winter can lower humidity, so monitor humidity levels, and adjust using a humidifier, or trays of water placed near the plant. Adjust watering based on the amount of light your plants receive. Reduce feeding by 50%, or stop entirely while plants aren't actively growing.
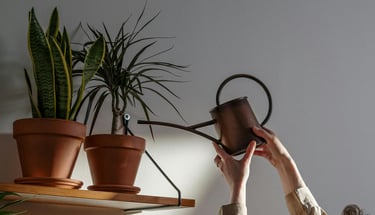

Dracaena houseplant being watered
Bottom Watering Method
Bottom watering involves placing the plant pot in a container filled with water to allow the plant to absorb water from the bottom up, through the drainage holes.
Technique: Fill a tray or basin with water and place the pot in it. Let it sit for about 10–20 minutes until the soil is moist. Remove the pot and let any excess water drain out.
Benefits: Ensures even moisture distribution and reduces the risk of overwatering. Prevents fungal issues due to wet leaves. Reduces the chances of fungus gnats.
Tips: Ideal for sensitive plants or those that suffer from root rot when overwatered. Avoids activating dormant fungus gnat eggs laid in the top layer of the soil.
Flood and Drain Watering Method
This involves watering the plant until it drains out the bottom, then disposing of the excess water. It may feel like it's too much water, but it's an effective watering technique.
Technique: Water the plant thoroughly until water runs out of the bottom of the pot. Drain until there's no more water coming out of it at all, then dispose of excess water.
Benefits: Helps flush out excess salts and nutrients, preventing build-up that can cause nutrient burn.
Tips: This method ensures the entire soil profile is moistened without causing root rot. Ensure good drainage to avoid waterlogging, only use this method on plants with good drainage holes in the pot. Flood and drain watering helps to flush out accumulated salts and ensures deep watering and nutrient penetration.
Foliar Feeding Or Misting Method
Foliar feeding, also known as misting, involves spraying water onto the plant’s foliage. This method doesn't hydrate the roots, so you still need to water your plant's soil when foliar feeding. Misting is a supplement used to provide nutrients directly to the leaves where they're actively growing and to increase localized humidity. You can use plain tap water for gentle hydration, or you can use diluted liquid fertilizer to boost nutrient levels without causing a build-up of mineral salts in the soil. This technique is commonly used to give plants an additional feed via foliar application in between normal fertilization through the roots.
Technique: Use a pressurized spray bottle to mist the leaves evenly, and lightly. Focus on the undersides of the leaves, where stomata are located.
Benefits: Foliar feeding increases humidity for plants, prevents a dust build-up on their leaves, and feeds them.
Tips: Don't rely on misting as the sole method, as it doesn't hydrate roots. Spray in the morning or evening, as water drop on leaves act as lenses, causing burns.
Self-Watering Pots & Sub-Irrigation Planter Method
Self-watering pots and planters have built-in reservoirs that allow plants to draw water as needed. We're massive fans of self-watering pots (and moss poles!) as they provide extra hydration for thirsty plants. When used properly, self watering pots do not cause root rot. Elho or Lechuza make the most popular pots, there's also hanging planters. We personally love these smoky self watering pots as they're both affordable, and stylish, and they come in larger sizes for bigger hanging plants.
Technique: Fill the reservoir with water. The roots will wick moisture up from the reservoir as needed. Don't forget to feed your plants as normal when filling the reservoir.
Benefits: Reduces the frequency of watering and ensures plants receive consistent moisture.
Tips: Check the reservoir regularly to refill it and prevent it from running dry. This method is especially good for busy plant parents or for use during holidays. Ensure the wick is properly placed and clean the reservoir periodically to prevent algae or mineral build-up. Allow the soil to dry out between watering to prevent root rot.
DIY Method: Wicking involves using a wick (e.g., a piece of string or rope) to draw water from a reservoir. Place one end of the wick in a container of water and the other end into the soil of the plant pot. The wick will draw water up to the soil as needed. Ensure the wick is made of a material that can absorb and transport water effectively.
Self Watering Spike Method
Self watering spikes or funnels are devices you fill with water and insert into soil. Water slowly seeps out, keeping soil consistently moist. The larger ones are great for holidays.
Technique: Fill the spike with water and insert it into the soil near the plant’s roots. Ensure the soil around the spike is loose enough to allow water to disperse.
Benefits: Provides a slow, steady water supply and is easy to use. Provides clear visuals of when to water.
Tips: Monitor the water level in the spike and refill as required. You can get clay spikes, plastic spikes, funnels, Hydrospikes, or DIY bottle conversion kits.
Capillary Matting Method
Capillary matting involves placing your plant on a special mat that stays moist and allows plants to draw water up through their drainage holes.
Technique: Lay the capillary mat on a flat surface and keep it moist. Place the plants, ensuring they have drainage holes that come into contact with the mat.
Benefits: Provides consistent moisture and is useful for keeping multiple plants watered simultaneously.
Tips: Ensure the mat stays moist, and lift pots to check for overwatering or mould. Capillary matting is usually used for seedlings or young plants at professional nurseries.
The Best Houseplant Watering Techniques For Beginners
When you're new to houseplants, it can be hard to know how to water your plants, and some methods cause issues, whilst others promote healthy root growth. Because different techniques can influence houseplant health, it's important to learn how to properly hydrate your plants. Watering our houseplants have been proven in studies to improve our wellbeing, and to reduce stress. However, too much water can definitely cause plants stress! To demystify this so that you can de-stress whilst watering without stressing your houseplants, we've written a guide on how to water indoor plants. If you've been around the houseplant community for a while, feel free to skip to the next section. Let's explore the different techniques to give your plants water:
Top Watering Method
Top watering is the most common method of watering plants. It involves pouring water directly onto the soil from a watering can, or container. Here’s how to do it effectively:
Technique: Pour the water over the soil until it’s evenly moist. Avoid splashing water on leaves, as this can lead to fungal diseases.
Benefits: This watering technique is simple and quick. It allows you to control the amount of water being added.
Tips: Water slowly to avoid disrupting soil. Ensure excess water can drain from the bottom of the pot. If soil stays waterlogged, fungus gnats can breed in the top of the soil.
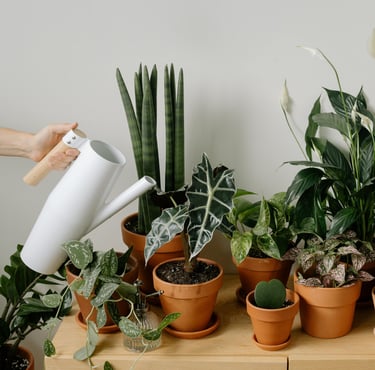

Houseplants being top watered with a watering can
Stylish & Modern Watering Cans For Houseplants
Choosing a watering can is a vital part of your plant care routine, after all, who doesn't want to be stylish whilst watering houseplants? We've listed some of our personal favourites that we use here at the nursery, some bestsellers, and some beautiful ones on our wish lists. Let's explore the different aesthetics of watering cans for houseplants:
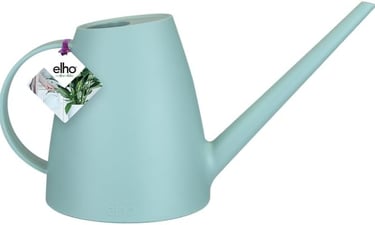
Elho Brussels Watering Can In Mint Green
Water Capacity: 1.8 litres
Size: 13.5D × 33W × 17H centimetres
Average Price: £14.00
Matching Items: Sprayer and plant pots in 14cm, 16cm, and 18cm
Colour Variations: Black, green, and white
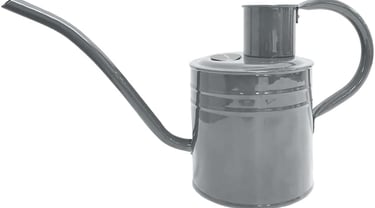
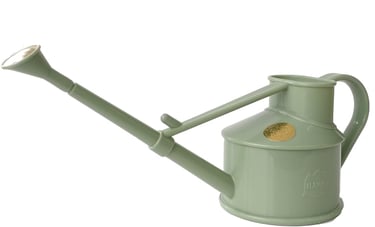
Kent & Stowe Warm Grey Watering Can
Water Capacity: 1 litre
Size: 35D × 11.5W × 17H centimetres
Average Price: £15.00
Colour Variations: Cream, blue, pink, sage green and dark green
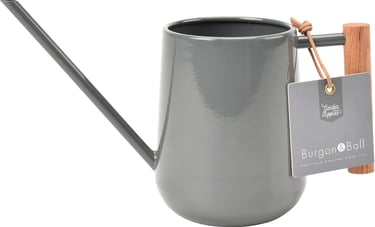
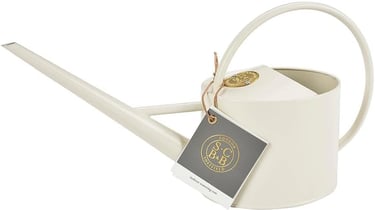
Burgon & Ball Indoor Watering Can
Water Capacity: 0.7 litre
Size: 25D × 25W × 25H centimetres
Average Price: £16.00
Colour Variations: Blue and green
Burgon & Ball Flora and Fauna Can
Water Capacity: 1 litre
Size: 20D × 37.5W × 12.5H centimetres
Average Price: £21.00
Matching Items: Gloves, twine, & tools
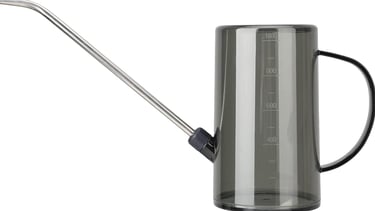
Glass Watering Can & Accessories
Water Capacity: 1 litre
Size: 35D × 9.5W × 16.7H centimetres
Average Price: £21
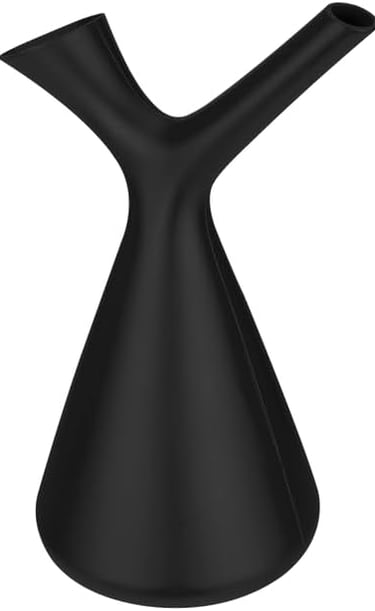
Water Capacity: 1.7 litre
Size: 14.8 × 19.6 × 30.2 centimetres
Average Price: £5.99
Colour Variations: Available in yellow, blue, and white
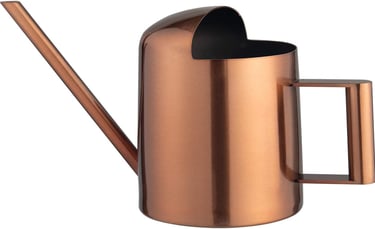
Copper Coloured 40oz. Watering Can
Water Capacity: 1 litre
Size: 12.7D × 38.1W × 20.3H centimetres
Average Price: £28.99
Water Capacity: 0.3 litre
Size: 7.5D × 18W × 10H centimetres
Average Price: £14.99
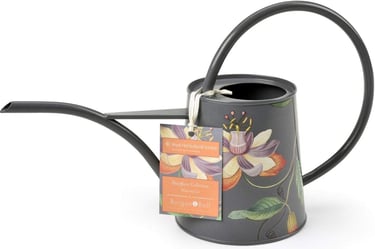
Burgon & Ball Passiflora Watering Can
Water Capacity: 1 litre
Size: 42D × 16W × 48H centimetres
Average Price: £20.00
Matching Items: Gloves, RHS trowel set, pruners, wooden plant labels, and more.
Burgon & Ball Indoor Long Reach Watering Can
Water Capacity: 1.7 litre
Size: 20.6D × 38.5W × 12.7H centimetres
Average Price: £26.00
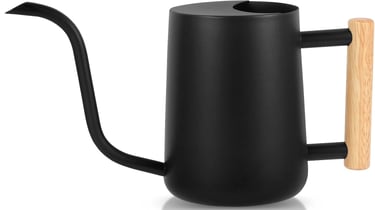
Modern Watering Can With Long Spout
Water Capacity: 1 litre
Size: 14.9D × 25W × 11.2H centimetres
Average Price: £21.99
An Overview Of Houseplant Watering
Let's summarise the best tips from this article to guide us how to water houseplants. When watering, ensure water penetrates the soil deeply and reaches the roots. To fully saturate dried up soil, use a flood and drain watering method. Water until it runs out of the bottom of the pot, then let it drain out and dispose of the excess water. Allow the soil to dry out between watering for most houseplants, especially cacti and succulents, which require less water than tropical plants.
Avoid using cold or hot water, as it can shock the plant's roots. Allow water to reach room temperature before watering plants. Check soil moisture levels before watering by sticking your finger into the soil, or use a moisture meter. Water based on plants needs, rather than on a set schedule, as different plants have different water requirements. Avoid soil sitting wet for too long, as overwatering can lead to root rot. Ensure good drainage holes in pots.
Try to water houseplants from the bottom to prevent issues with fungus and fungus gnats. Place the pot in a tray of water to allow the plant to absorb water from the bottom up. Check your plants regularly and adjust watering frequency based on the season, temperature, and humidity levels in your home. If using tap water, use a good quality dechlorinator to prevent damage to leaf tips. For delicate plants, consider setting up a rainwater collection system, and use rainwater to nourish your houseplants. To increase local humidity whilst hydrating your plant at the same time, use a spray bottle to foliar feed plants. Never forget to water the roots as well, as spraying doesn't hydrate the soil. Although watering can seem overwhelming at first, we promise that as you continue along your plant journey, it will get much easier as you gain experience keeping plants.
The Science Behind Houseplant Watering
Water's Role in Plant Health: Water is essential for plants as it serves multiple functions, including nutrient transport, photosynthesis, and maintaining turgor pressure. Proper watering ensures that plants receive the necessary nutrients dissolved in water, which are then transported to various parts of the plant. Photosynthesis, the process by which plants convert light energy into chemical energy, also relies heavily on the availability of water.
Factors Influencing Watering Needs: Several factors influence a plant's watering needs, including the species of the plant, the size of the pot, the type of soil, and environmental conditions such as temperature and humidity. Different plants have varying requirements; for example, succulents require less frequent watering compared to ferns. Understanding these factors helps in determining the right amount of water needed to keep plants healthy.
Signs of Overwatering and Underwatering: Recognizing the signs of overwatering and underwatering is crucial for proper plant care. Overwatering can lead to root rot, characterized by yellowing leaves and wilting despite wet soil. Underwatering, on the other hand, can cause leaves to become dry, brittle, and brown at the edges. Identifying these signs early allows for timely corrective measures, ensuring the plant's health and vitality.
Seasonal Adjustments: Watering needs change with the seasons. During the winter months, many houseplants enter a period of dormancy and require less water. Conversely, in the growing season (spring and summer), plants may need more frequent watering. Adjusting the watering schedule according to seasonal changes helps in maintaining optimal plant health.
Best Practices for Watering: The guide recommends several best practices for effective watering:
Using room temperature water to avoid shocking the plant.
Watering thoroughly until water drains out of the bottom of the pot, ensuring even distribution.
Allowing the soil to dry out between watering for plants that prefer drier conditions.
Regularly checking the moisture level of the soil to avoid over or underwatering.
By integrating these scientific principles and practical tips into your plant care routine, you can ensure that your houseplants receive the right amount of water, promoting their overall health and growth.
Trade Secrets From Our Houseplant Nursery
The biggest trade secret we can give you as a houseplant nursery is to err on the side of caution when watering. Underwatering is much easier to manage than overwatering, which causes root rot. Always let your plants dry out between watering, and when you do water, ensure that you fully hydrate the root ball. It's okay to overwater your houseplants as long as you drain the excess water out from the bottom.
The Houseplant Shop's Approach: In our experience, you can't physically drown a plant unless you leave it sitting in standing water for extended periods of time. We highly recommend checking plant pots 24-hours after watering to ensure there is no standing water. The exception to this is with self-watering pots, although you still need to allow the soil to dry out between watering when using pots with water reservoirs. Never be afraid to give your houseplants too much water; as long as you let it drain and empty out any excess, your houseplants will appreciate a thorough watering. Never let houseplants sit with “wet feet”—much like how we can catch a cold when we're wet, plants aren't much different and can also get ill if their roots aren't able to breathe.
Edited & Fact Checked By: The Houseplant Shop
Article Published: 18th December 2024

About The Houseplant Shop:
Independent Houseplant Nursery
Horticultural Specialists
Managing Over 250 Houseplant Species Onsite
Over 15 Years Of Experience With Horticulture
As head of horticulture, Sarah manages the care and propagation of over 250 plant species at a commercial houseplant nursery. With over 15 years of experience in horticulture, specializing in houseplants, Sarah has extensive expertise in plant biology, soil science, and integrated pest management. She continually reviews and integrates the latest research into her plant care guides. Dedicated to educating others, Sarah has spent years diagnosing houseplant care issues and sharing her real-world experience. Her commitment to scientific accuracy and helping people diagnose plant health issues has established her as a trusted authority and expert in the field.
The Houseplant Shop is a dedicated houseplant nursery, growing all of their own stock from their botanical library of over 250 houseplant species. The nursery staff are horticultural experts who have dedicated their lives to cultivating and nurturing over 250 different species of houseplants, focusing on Aroids, tropical plants, and NOID collectables. All their plants are grown in house in Britain to be more environmentally friendly. The nursery is proud to have been featured by the Royal Horticultural Society (RHS) as a 100% peat free nursery.
Recommended Further Reading:
People also looked at: Fertilizer, Self Watering Moss Pole Guide, Houseplant Humidity, and A-Z Houseplant Encyclopedia.
How We Reviewed This Article:
Our horticultural experts continually monitor the houseplant space, and we update our articles when new information becomes available. We are committed to providing current and reliable information. If you have some information that you think would be helpful in this article, we'd love to hear from you. Our team works hard to revise articles for factual accuracy, and we regularly update our pages with new information, techniques, tips, images, trade secrets, and real world experience from the team here at the houseplant nursery. You can find a list of the article updates below.
Written By: Sarah Brooks, Head of Horticulture
Article Received: 16th December 2024
Copyright: The Houseplant Shop (https://thehouseplant.shop)
The use, distribution, or reproduction is permitted, provided the original copyright owner is credited and that the original publication on this website is cited with a direct link to the article, only with these terms. Any other use is not permitted.
List of Article Updates:
20th December 2024: Minor UI updates
Author Bio:
Author: Sarah Brooks
Head of Horticulture at The Houseplant Shop

