Scindapsus Plant Care Guide
Scindapsus — Noun
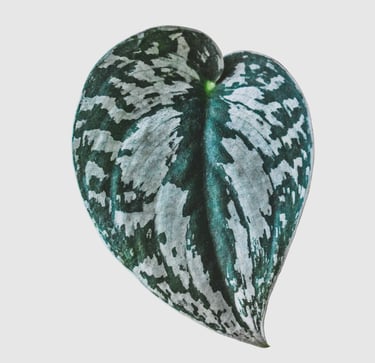
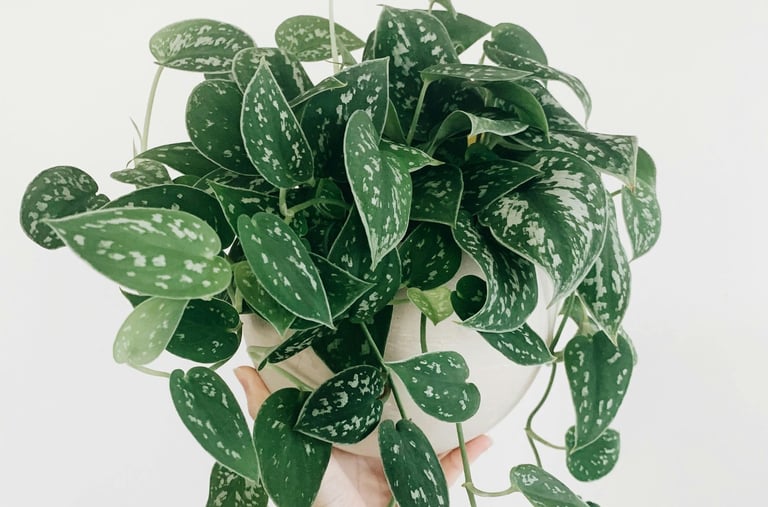
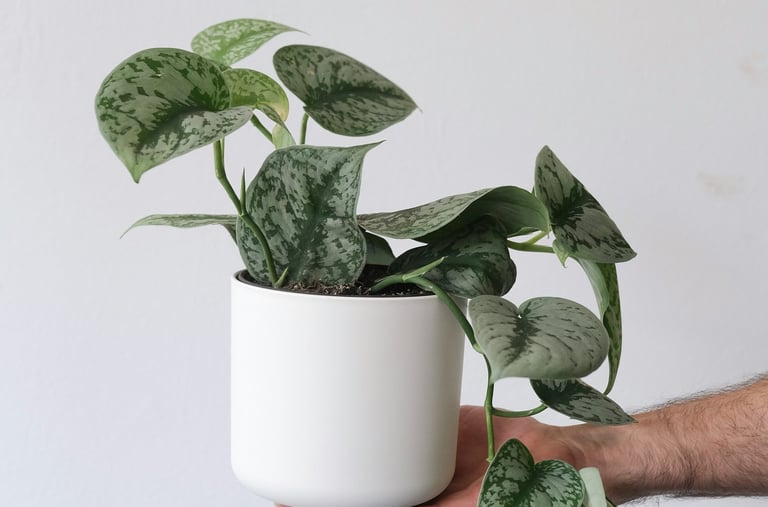
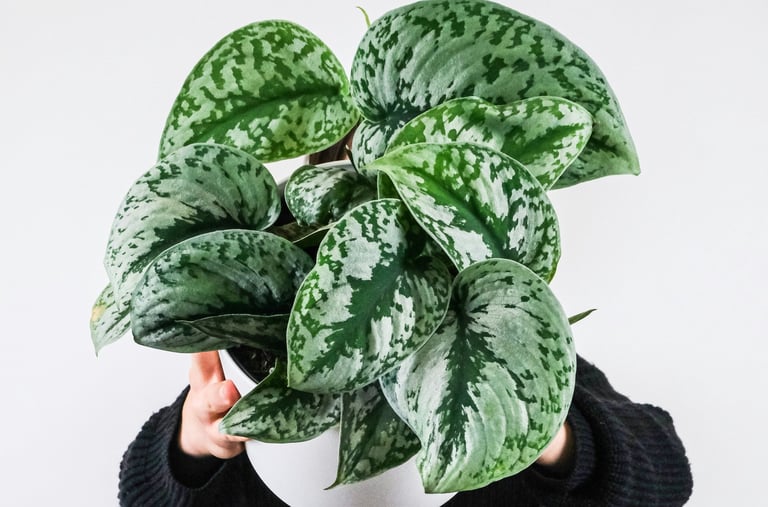
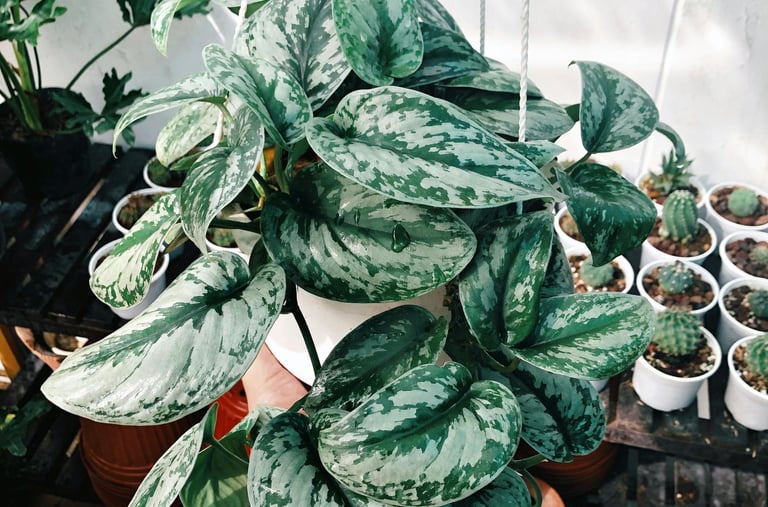
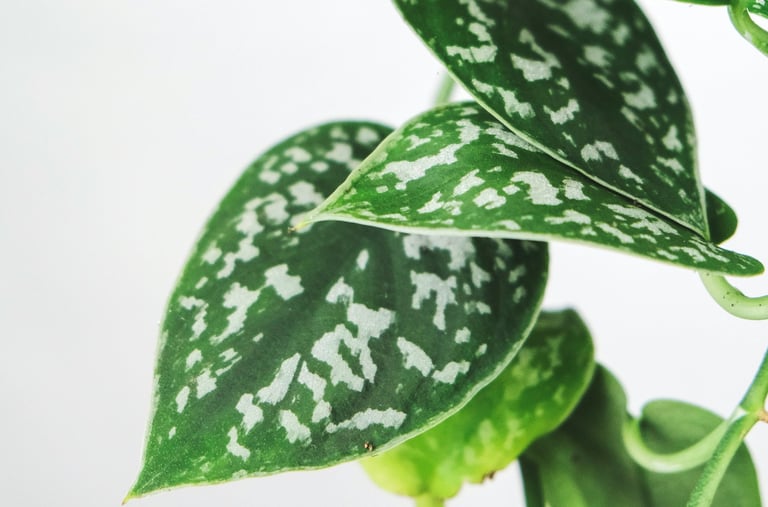
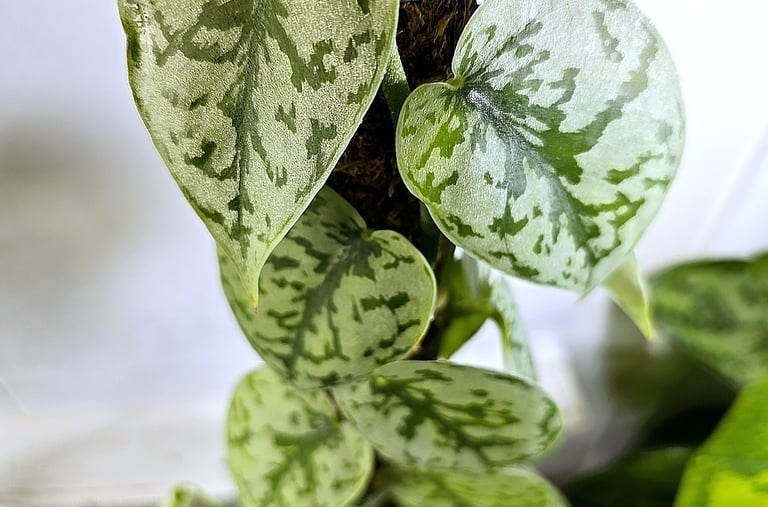
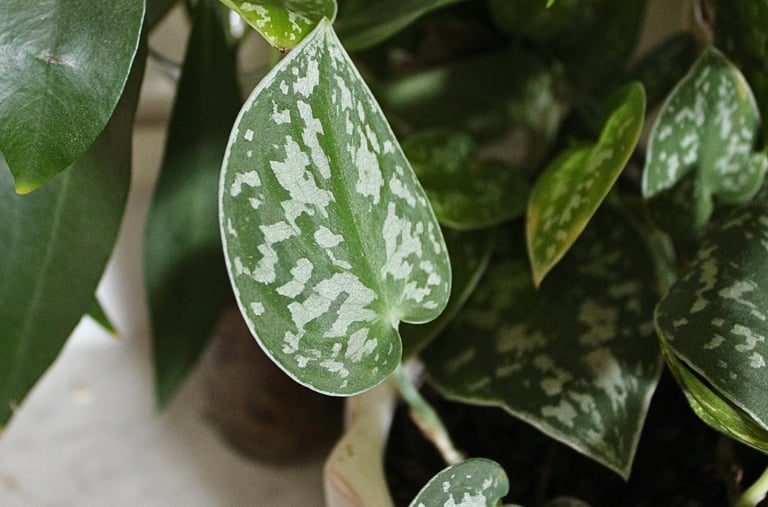
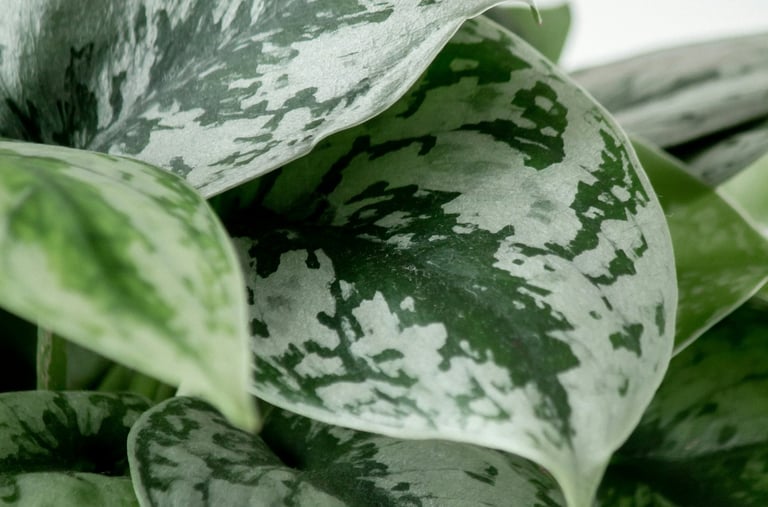
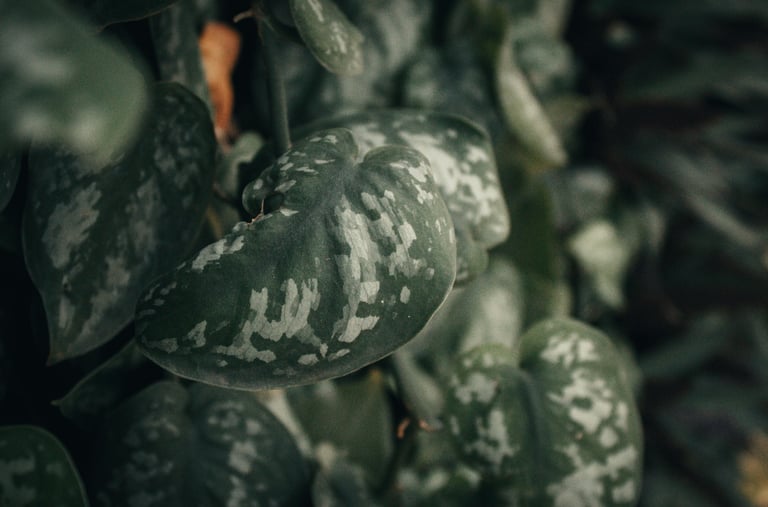
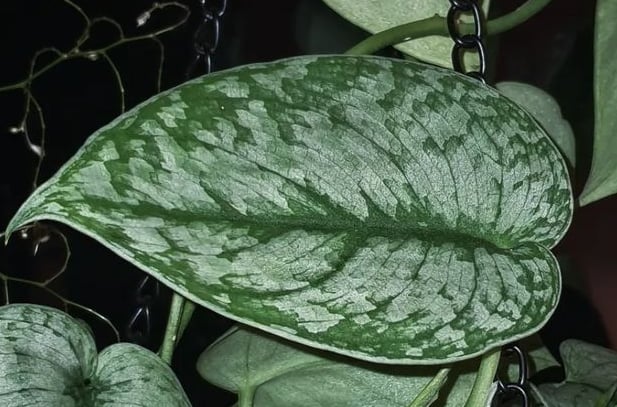
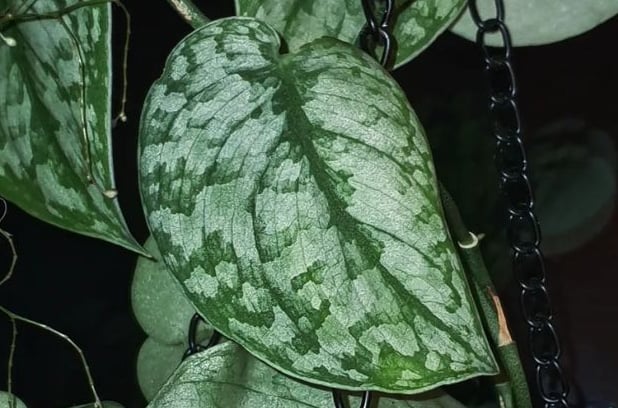
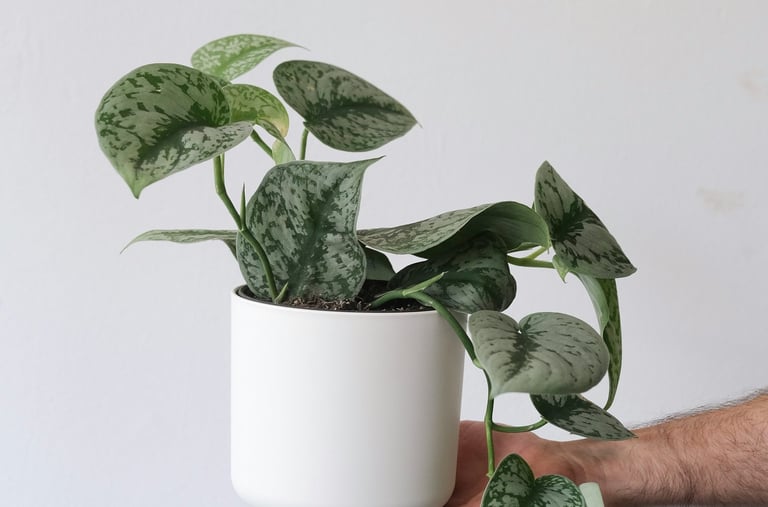
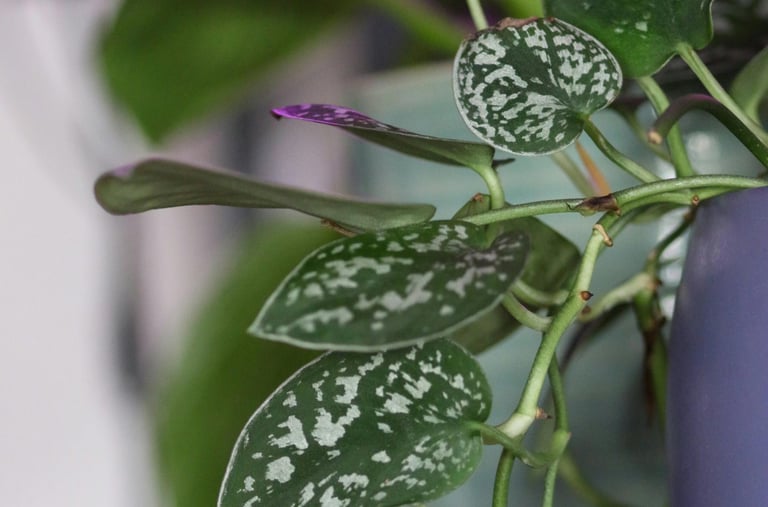
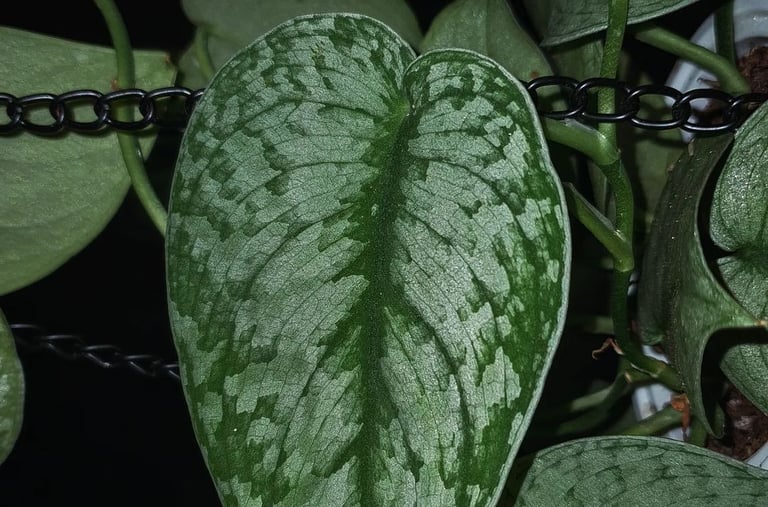
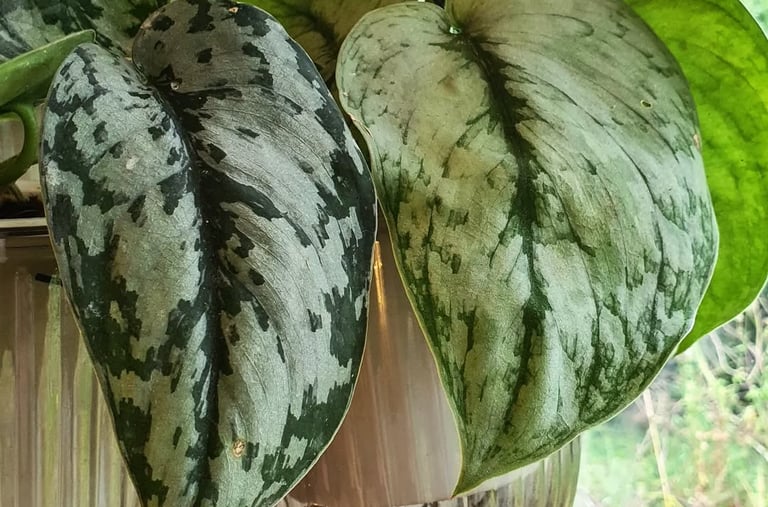
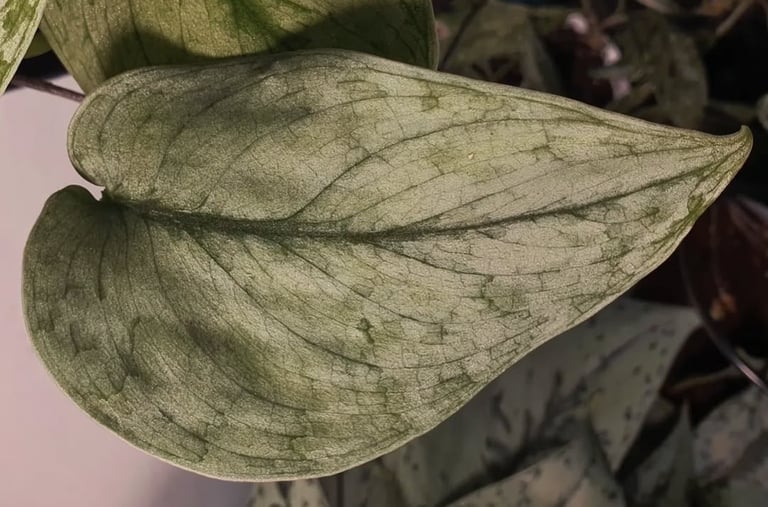
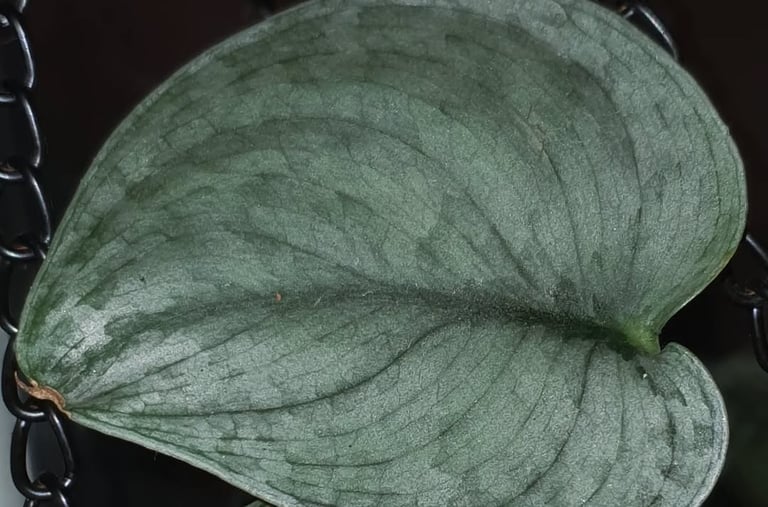
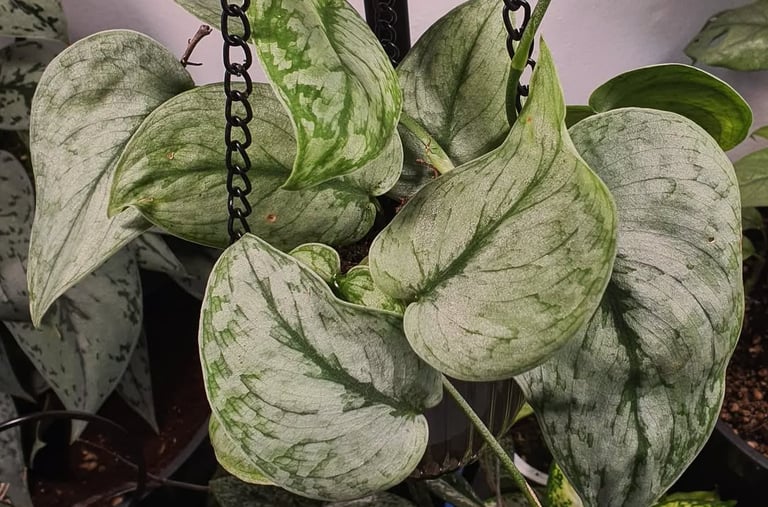
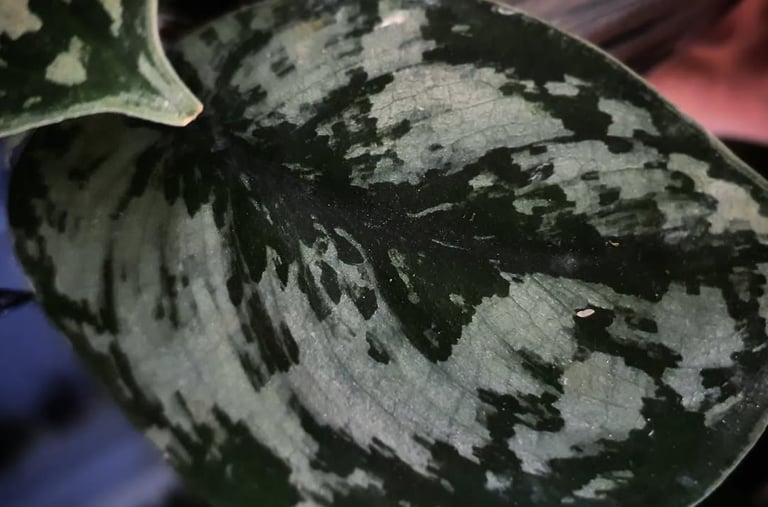
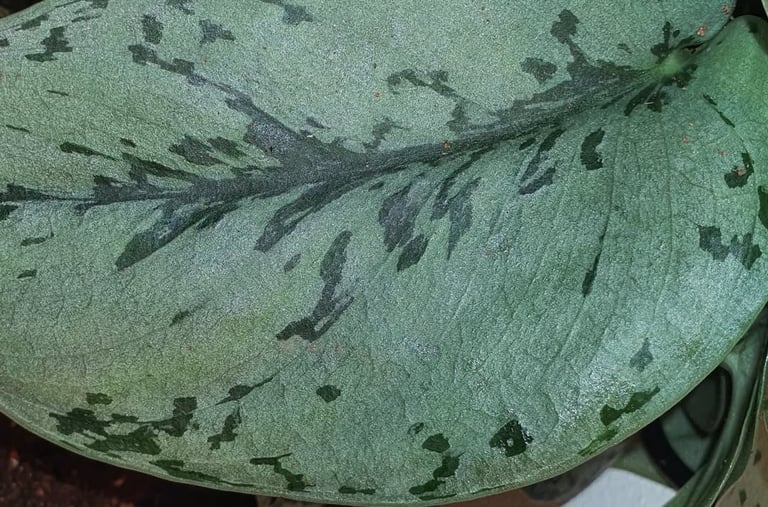
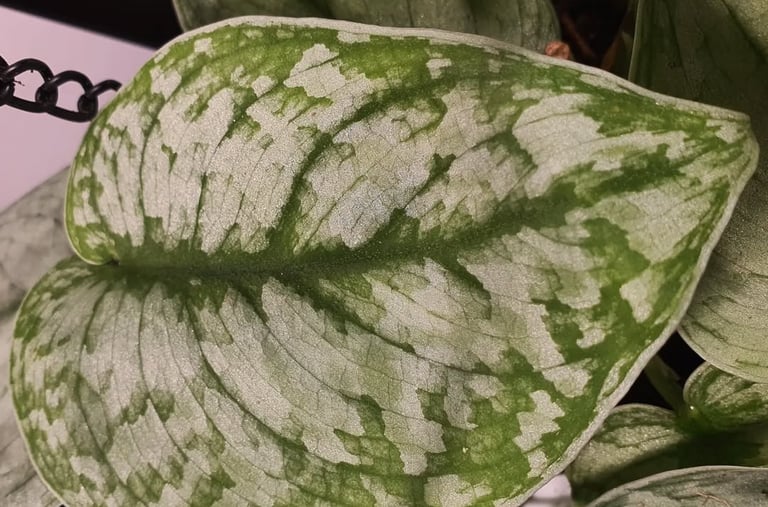
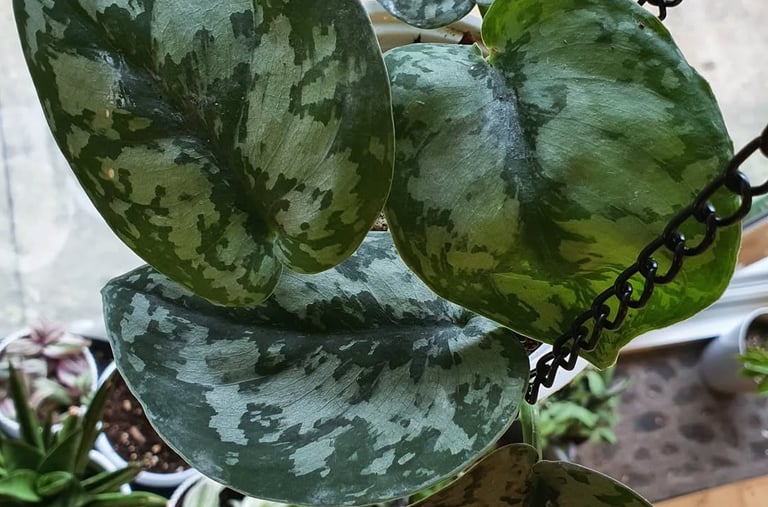
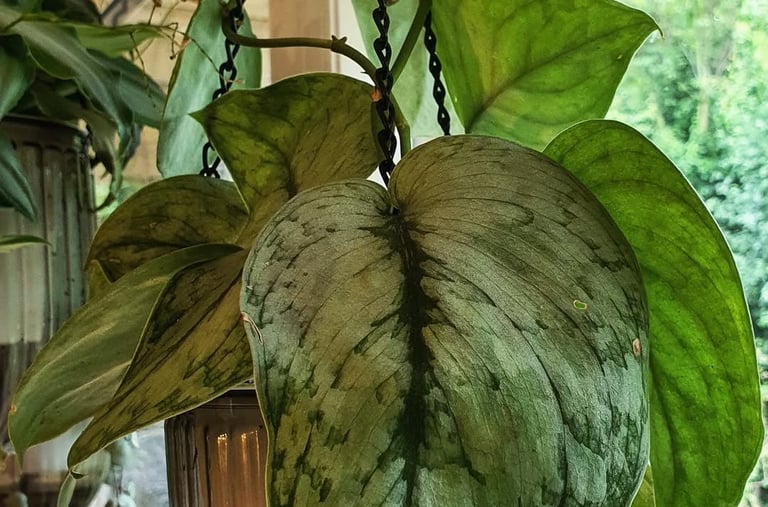
Scindapsus is a genus of climbing vines in the family Araceae with origins from eastern Asia and Australasia. Satin Pothos have ovate, often silver variegated leaves. The variegation is actually air pockets to protect the leaf from the sun and not true variegation, hence why they can get more silver in higher lighting.
Pronounced: Sin — Dap — Sus
Genus: The Scindapsus genus has 35 recognized species and several 'NOID' varieties, which means 'no official identification'. This term is used for species that haven't yet been accepted as a species within the cultivar by the International Cultivar Registration Authority (ICRA).
First Use: The first known use of the word Scindapsus was in 1848 by G. B. Speede.
Otherwise known as:
Satin Pothos
Silk Pothos
Silver Vine
Overview: Sometimes misnamed as Pothos, the main difference between Scindapsus and Epipremnum is the number of seeds they produce. Scindapsus make far fewer seeds than Epipremnum. Scindapsus is an easy-to-care-for houseplant with huge potential to become an architectural statement with their mature size and majestic large leaves. We have almost every Scindapsus here at The Houseplant Shop, as we're massive fans of their exotic beauty and whimsical charm.


Figures
Ultimate height
0.1-1.5 metres
Ultimate spread
0.1–1 metres
Time to ultimate height
5–10 years
Scindapsus lifespan
10–15 years
Scindapsus Facts & Figures
In The Pot
Soil
Sand
Loam
Moisture
Well–draining chunky but moist soil
pH
Acid, Neutral, Alkaline
Out Of The Pot
Windows
West–facing or South–facing. Avoid direct sunlight or it can bleach the leaves.
Exposure
Sheltered
Hardiness
Can be grown outside in the summer, but Scindapsus do not tolerate frosts.
Temperature Tolerance: 15 °C (59 °F) – 30 °C (86 °F)
Facts
Family
Araceae
Native to GB / Ireland
No — Native from China, the Himalayas, Asia & Australia
Foliage & Habit
Evergreen / Climber
Safety
Harmful to humans and pets. Causes skin & eye irritation.

Scindapsus Lighting
Scindapsus plants are cherished houseplants due to their striking foliage and adaptability. Providing the correct lighting is crucial for maintaining the health and vibrancy of your Scindapsus. Here’s a comprehensive guide to ensuring your Scindapsus receives optimal lighting:
Scindapsus Lighting Requirements
Scindapsus thrives in low to moderate light conditions, making them ideal for spaces that do not receive direct sunlight. Commercial growers often cultivate them under 60% shade cloths. These plants adapt well to areas with less sunlight, making them perfect for offices and rooms with fewer windows. If their colour or pattern changes, it might indicate insufficient lighting.
Ideal Light Conditions for Scindapsus
Indirect Light: Scindapsus prefers bright, indirect light. Place them near a north or east-facing window where they can receive ample natural light without exposure to harsh sun rays. Direct sunlight can scorch their leaves and cause them to lose their vibrant colours and patterns. If uncertain, move your plant 1–2 feet away from the window and monitor it for any further issues.
Low Light Tolerance: Scindapsus plants are beloved for their ability to tolerate low light conditions. While they may not grow as quickly or develop as vivid foliage in lower light, they will still survive and enhance your space.
Artificial Light: If your home lacks natural light, Scindapsus can also thrive under fluorescent lighting or LED grow lights. This makes them suitable for office environments or spaces with limited window access. Ensure they receive about 12–14 hours of artificial light daily to mimic their natural growing conditions. Watch for loss of colour or patterns — if this occurs, move your plant closer to the light source or increase the lighting.
Signs of Improper Lighting for Scindapsus
Yellowing Leaves: If your Scindapsus leaves start to yellow, it may indicate too much direct sunlight. Move the plant to a location with less intense light or add supplemental LED lighting.
Leggy Growth: If the stems are stretching and the plant appears sparse, it might not be receiving enough light. Relocate the plant to a brighter spot or add supplemental lighting. This could also mean your Scindapsus needs a good hard prune to prevent the stem from becoming too much like a cane without leaves. Please refer to our care guide before pruning, as the sap can be harmful.
Faded Colours & Patterns: When Scindapsus does not receive enough light, its vibrant leaf colours and patterns may fade. Increasing light exposure can help restore their striking appearance. This happens because the plant is trying to produce more chlorophyll, the cells that make food from light, allowing the plant to photosynthesize more effectively. You can see this when the coloured areas of the leaves start to turn green.
Adjusting Scindapsus Lighting for Seasonal Changes
As seasons change, so do the intensity and duration of natural light. During winter, when light levels are lower, you may need to move your Scindapsus closer to a light source. In summer, ensure it is protected from direct sunlight to prevent leaf burn.

Scindapsus Watering Needs
If you're wondering how much water to give Scindapsus Plants, then you've come to the right place. Scindapsus are quite forgiving when it comes to watering, but they do appreciate a bit of attention. It's best to water them when the top inch of soil feels dry to the touch. Always let them dry out so that the soil doesn't grow bad bacteria that starts to smell and causes root rot. You can buy a houseplant moisture meter to take the guesswork out of watering your plant.
When you water, be sure to water thoroughly, allowing the excess to drain out completely—these plants dislike sitting in soggy soil and can be prone to root rot if over-watered. If you have a saucer or a self watering pot, don't let the excess water sit there, empty it out to prevent causing damage to the roots. If they become cooked ramen noodle like, they're toasted and only good for the bin. Roots should look like raw ramen. We prefer to use a plant spray bottle over a watering can as it allows us to easily wet moss poles, there are fewer drips, and it's easier to add fertilizer to a clear container.
During the growing season (spring and summer), you might need to water more frequently, while in the fall and winter, you can cut back a bit. Remember, it's always better to underwater than overwater when it comes to Scindapsus. Keep an eye on the soil moisture, and your plant will thank you with lush, healthy growth. If you're wondering when to fertilize your Scindapsus, check this plant feeding guide here.

Scindapsus Humidity Requirements
Scindapsus plants thrive in moderate to high humidity environments. They prefer a humidity level of around 40-60% which is achievable in most houses, but as a whole they're quite adaptable and can tolerate lower humidity levels as well. If the air in your home is on the drier side, especially during the winter months, consider increasing humidity.
Tips To Increase Humidity For Scindapsus Plants
Misting: Lightly mist your Scindapsus leaves with water occasionally right after sundown. This gives time for the water to dry without the leaves getting burned in the morning in the light. This helps to mimic their natural tropical habitat, but arguably has little positive effect and can cause fungal issues, so use with caution.
Humidity Tray: Place a shallow tray filled with water and pebbles near your plant. As the water evaporates, it will increase the humidity around the plant. This is much more effective than spraying or misting the plant itself.
Group Plants Together: Placing multiple plants close to each other creates a microenvironment with higher humidity. This is highly effective and is one of the methods we use to pamper our shop plants here at The Houseplant Shop.
Humidifier: Using a room humidifier is an effective way to maintain consistent humidity levels, but be careful that you don't cause pockets of damp. Use with caution. Highly effective for the plants, but it can cause issues with black mould in your home.
Humidity Meter — Know Your Facts & Figures: We would always recommend purchasing a digital humidity meter to monitor high or low zones over the day. Make sure you buy one with a '24-hour average' function to allow you to see where things are going right or wrong. As a bonus, it measures your temperatures too.

The Right Temperature For Scindapsus Plants
Scindapsus plants thrive in temperatures ranging from 15 °C (59 °F) to 29 °C (84.2 °F). These hardy plants mirror their natural tropical habitat, ensuring robust growth and vibrant foliage. However, extreme temperature fluctuations should be avoided to maintain their health. Here's how to create the perfect temperature environment for your Scindapsus:
Avoiding Temperature Extremes For Scindapsus Plants
Cold Temperatures: Scindapsus plants are sensitive to cold and can suffer significant damage if exposed to temperatures below 15 °C (59 °F). Low temperatures can cause leaves to drop and develop brown, crispy edges. Protect your plant from cold drafts, especially during winter, by placing it away from windows or doors.
Hot Temperatures: While Scindapsus can tolerate higher temperatures, prolonged exposure to temperatures above 30 °C (86 °F) can stress the plant. Keep your plant away from heat sources like radiators or heaters, which can dry out the air and overheat it. Even brief exposure to high heat can damage foliage and stunt growth.
Providing a Stable Environment For Scindapsus
Consistency is crucial for Scindapsus plants. Maintain stable temperatures to prevent stress, which can lead to issues like leaf drop or yellowing leaves. Use a digital meter that records a 24-hour average to monitor temperature fluctuations, even when you're not there.
Seasonal Adjustments for Scindapsus Plants
Winter: During colder months, place your Scindapsus in a warm spot away from drafts and cold windows.
Summer: Ensure your plant is protected from excessive heat and direct sunlight, which can cause leaf scorch. If you've moved your Scindapsus to a south-facing window over winter, reposition it before the sun heats up in spring.
Signs of Temperature Stress in Scindapsus
Yellowing Leaves: Cold stress or exposure to drafts can cause yellowing leaves. Keep your plant in a warm, stable environment.
Dropping Leaves: Sudden temperature changes can lead to leaf drop. Check for drafts or rapid temperature fluctuations.
Brown, Crispy Leaves: Heat stress often causes brown, crispy leaves. Move your plant to a cooler location and keep it away from heat sources.
Wilting: Scindapsus plants can wilt and die if exposed to cold temperatures, even briefly. Ensure they are kept in a warm, consistent environment.

The Best Soil For Scindapsus & How To Pot Pothos Up
To ensure your Scindapsus thrives, providing the right soil is crucial. At The Houseplant Shop, we avoid peat due to environmental concerns, and instead recommend soilless mixes.
DIY Soil Mix Recipe for Scindapsus Plants
Soil vs. Soilless Mix: It's often easier to maintain plants in a soilless mix, as compost can harbour pests. We prefer coco coir for its antifungal properties and inert nature. While we add bark and sterilized worm castings, we ensure all substrates are sterilized to be pest-free.
Choosing a Well-Draining Mix: Scindapsus plants love chunky, airy soil that mimic its natural habitat of tree trunks. If you can't find a suitable pre-mixed soil, here are two DIY recipes:
DIY Soil Mix Recipe: Combine 1 litre each of coco coir, compost, perlite, and orchid bark. Scale up as needed until you have enough for your Scindapsus pot.
Advanced DIY Soil Mix: Our DIY recipe includes 4 litres each of coco coir, perlite, and orchid bark, 2 litres of Lecca balls, 1 litre of worm castings, and optionally 1 litre each of pumice, activated charcoal, and unscented zeolite.
Soil Mix Components: If you can't find these ingredients locally or if you are the online shopping type, you can buy the soil mix components online here: Small Coco Coir Pack — Bulk Coco Coir Pack, Orchid Bark, Pumice, Horticultural Sand, Horticultural Grit, Worm Castings, Perlite, Lecca Balls, Activated Charcoal, Zeolite
Soil vs Soilless Mix For Scindapsus Plants: If you've ever had a pest infestation, then you may be tempted to grow plants hydroponically without any soil at all so that pests cannot survive in it. Coco Coir is the bridge between hydro and soil, giving you the best of both worlds. Coir has natural antifungal properties that help prevent root rot, furthermore it's completely inert which means that pests cannot survive in it unless you keep it really wet until it rots. You can even pasteurise the coir before use to ensure no hitch-hikers have jumped in during transport. You can add perlite or vermiculite to make it more chunky, but avoid adding any organic material that could decompose and attract pests. Be sure to stick to a good houseplant fertilizer, as coco coir has no natural nutrients to feed your plant.
Organic Matter: A rich soil mix with organic matter like worm castings or compost supports healthy growth. If avoiding organic matter to reduce pests, use a complete all in one plant fertilizer like Ionic 'Formulex' weekly.
Neutral pH: Aim for a pH between 6.0 and 6.5. Our soil mix recipes should naturally provide this, but always check pre-mixed soil bags for pH.
Preparing to Repot Your Scindapsus
Choose the Right Pot: Select a pot with drainage holes. Only pot up when you see raw, noodle-like roots. Cut off mushy roots if needed, and avoid pots more than 1 inch (2.54 cm) larger than the root ball.
Prepare the Soil Mix: Mix your DIY soil or open pre-mixed commercial soil.
How To Pot Up Scindapsus Plants
Prepare the Pot: Add a small handful of soil to the bottom.
Prepare the Plant: Gently remove your Scindapsus from its current pot and place it in the new pot on top of the soil layer.
Fill Around the Roots: Add soil around the roots, leaving about 1 inch (2.54 cm) of space. Press gently to remove air pockets.
Water: Water thoroughly, allowing excess to drain. After 10 minutes, dispose of any remaining water.

Scindapsus Fertilizer & How Often To Feed
Even the easiest of plants need a bit of love now and then. For your Scindapsus, that means some plant food to keep those leaves glossy and green. Think of fertilizer as a vitamin boost—it’s what takes your Scindapsus from “meh” to “wow!”.
How To Fertilize Scindapsus Plants
Balanced Liquid Fertilizer: A well-balanced, water-soluble fertilizer with an equal ratio of nitrogen, phosphorus, and potassium, such as 20-20-20 or 10-10-10, is a solid choice. It provides a good mix of nutrients for overall plant health. We always recommend Ionic Formulex plant food as a total all in one feed.
Slow-Release Fertilizer: If you prefer a low-maintenance option, a slow-release granular fertilizer can be a great choice. Just mix it into the soil, and it will release nutrients gradually over time.
Biofertilizers: A more natural solution to feed your Scindapsus is to use substances that contain microorganisms, which when added to the soil increase its fertility and promote plant growth, like seaweed extract or biochar. At The Houseplant Shop, we use seaweed frequently as we believe it lessens the stress when repotting, moving, or pruning plants.
How Often to Feed Scindapsus Plants
Spring and Summer: These are your plant’s party seasons. Feed it every 4–6 weeks with a balanced, water-soluble fertilizer. We promise, it’ll thank you with a burst of new growth.
Autumn and Winter: Your plant needs a bit of a chill pill during these months. Cut back to feeding every 8–10 weeks, cut the feed strength in half so that it's more diluted with water, or even pause completely. It’s all about keeping things balanced.

How To Prune Scindapsus
Are your Scindapsus vines turning your living room into a jungle gym? Time for a pruning session! Not only will it keep your space looking stylish, but it’ll also make your plant happier than a sunbeam at dawn.
Scindapsus Pruning Method
Scissors at the Ready: Get yourself a pair of sharp, clean pruning shears. Think of them as your plant’s barber scissors—no one likes a bad haircut, especially not your Scindapsus plant!
Find the Offenders: Spot those yellowing or overgrown stems. Wild is only fun when Rihanna sings it, not as a decor theme. It’s time to show them who’s boss.
Snip with Style: Make your cuts just above a leaf node (where the leaf meets the stem). Your plant will reward you by sprouting new growth like confetti at a parade.
Channel Your Inner Stylist: Don’t be afraid to go big! Your Scindapsus loves a good trim and will come back bushier and bolder. Trimming encourages plants to bush out at the base and activate new growth nodes.
Alternative Pruning Method:
Instead of pruning your Scindapsus plant, why not wrap and fold stems back into the old growth, weaving new leaves into old. This way you can use the plant's stems as a climbing frame for new leaves. This helps to encourage leaves to size up, as they latch onto other stems. We use Orchid clips to secure the stems together, as we find that they grip firmly enough to trigger the plants to produce more mature leaves, without damaging the plants stems. We've found that our Scindapsus plants also grow a little quicker when offered a support to climb.
Pruning isn’t just about keeping your Scindapsus looking fabulous; it’s also about promoting healthy growth and keeping your indoor jungle thriving. Think of it as a spa day for your plant—who doesn’t love a bit of pampering?
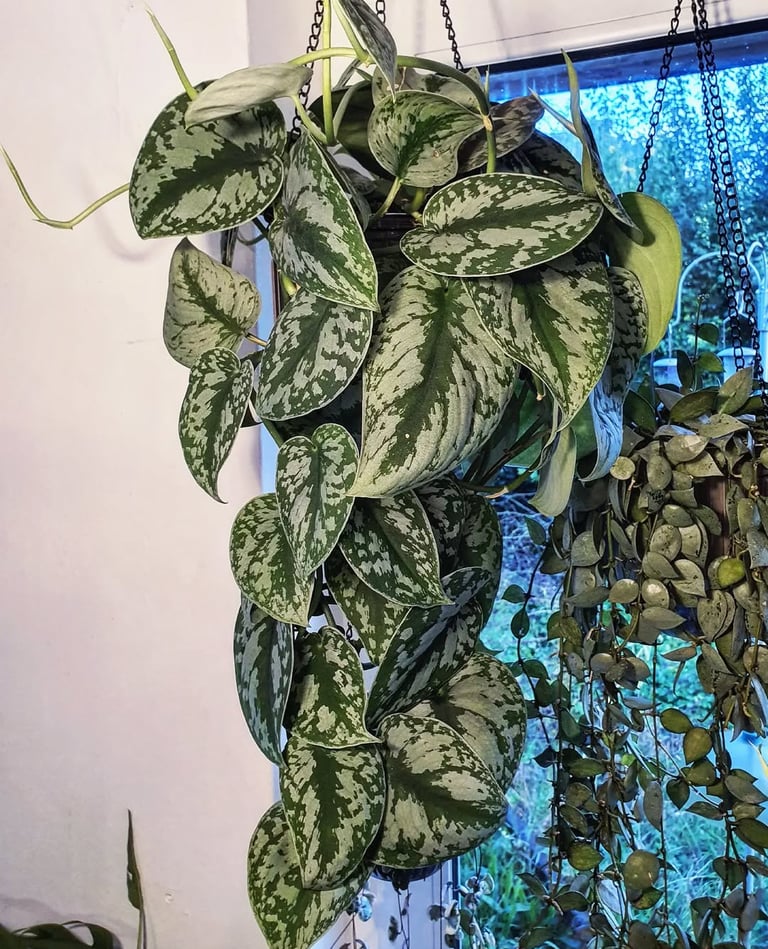
Mature Scindapsus pictus Exotica that hasn't been pruned for over a year. Instead of pruning, we've attached the stems to each other to allow it to wrap around itself, creating a more dense and full plant.

Propagating Scindapsus
Got a Scindapsus plant that's so fabulous you wish you had nine more of them? Propagating your Scindapsus plant is simpler than you'd think, and will make the plant more full and dense. Propagating gives you cuttings to plant back into the original pot to help create that dense tropical jungle vibe we're all striving for. One of our best trade secrets here at The Houseplant Shop is filling out pots by taking cuttings and then planting them back into the mother's pot. Here's how to propagate your Scindapsus like a professional:
Scindapsus Propagation Step By Step
Propagating Scindapsus plants differs slightly from many other houseplants. Instead of leaf or node cuttings, Scindapsus is best propagated through division or stem cuttings. Though these methods may seem daunting at first, they offer high success rates for propagating Scindapsus. Here’s a detailed guide to help you successfully propagate your Scindapsus:
Propagating Scindapsus via Division
Division is the easiest and most common method for propagating Scindapsus. This technique involves splitting the plant's root clump to create new plants. Be cautious not to snap stems, which can cause the stem to die off.
Division Propagation Method
Prepare Your Tools: Gather a clean, sharp set of pruning shears, or a knife, and several small pots with well-draining soil.
Remove the Plant: Carefully remove the Scindapsus from its pot, being mindful not to damage the roots.
Divide the Plant: Identify natural divisions in the root clump. Using your shears or knife, carefully separate these sections, ensuring each division has a few leaves and a healthy root system.
Pot the Divisions: Place each division in a small pot with well-draining soil. Thoroughly water the newly potted plants. We dip our cuttings roots into a combination of rooting hormone mixed with Mycorrhizal Fungi, which encourages faster root growth by promoting good soil health.
Care for the New Plants: Position the new pots in a location with bright, indirect light. Keep the soil moist but not waterlogged until the plants are well-established. Always use dechlorinated water that has been allowed to rise to room temperature to avoid shocking the roots.
Propagating Scindapsus via Stem Cuttings
Stem cuttings are another effective method for propagating Scindapsus, though it requires more patience. The benefit is that the mother plant becomes bushier and denser over time.
Stem Cutting Propagation Method
Select a Healthy Stem: Choose a healthy stem with at least two to three leaves.
Cut the Stem: Using clean, sharp pruning, cut the stem just below a node (the point where a leaf joins the stem).
Prepare the Cutting: Remove the lower leaves, leaving one or two leaves at the top.
Optional Rooting Hormone: Dip the cut end in rooting hormone to encourage root development. We mix our rooting hormone with Mycorrhizal Fungi, which encourages faster root growth by promoting good soil health.
Plant the Cutting: Place the stem cutting in a pot with well-draining soil. Alternatively, place the cutting in water until roots develop, then transfer it to soil.
Provide the Right Conditions: Ensure the cutting receives bright, indirect light and maintain high humidity. Cover the pot with a clear plastic bag to create a humid environment.
Watering: Keep the soil moist but not waterlogged. If rooting in water, change half the water weekly to maintain natural rooting hormones. Always use dechlorinated water that has been allowed to rise to room temperature to avoid shocking the roots.
Tips for Successful Propagation
Clean Tools: Always use clean, sharp tools to prevent disease and ensure clean cuts.
Humidity: High humidity levels aid in the rooting process. Use a humidity tray or mist the cuttings regularly.
Patience: Allow time for the roots to develop. Some cuttings may take longer to root than others.
Dechlorinator: Ensure that you use dechlorinated water that has been allowed to rise to room temperature to avoid shocking the roots.

Scindapsus Pests & Problems
Even the most carefree of houseplants can run into a few issues. Here's how to tackle common pests, unwanted guests and frequent problems that may affect your Scindapsus plant. Let's take a comprehensive look into pests, problems, and treatments for Scindapsus plants:
Common Scindapsus Pest Species
Spider Mites: These tiny pests can spin small, discrete webs towards the base of a plant, and they suck the life out of it until it dies. They have a 2-4 week life cycle, making them one of the shorter living pests that invade our houseplants. Spider mites can often be found by spotting small, discrete webs in the lower parts of your plants that look like a spider may have moved in. We're afraid it's likely to be bad news — 9/10 times it's not a spider, but you'll wish it was.
Aphids: Often unwanted guests brought in from our gardens or intruders who fly through our windows, aphids can be tricky to get rid of once established due to the life cycle of an adult aphid. Eggs are typically laid within the plant itself and are impossible to remove. Always be vigilant for eggs hatching after 30 days, and continue treatment for several full adult life cycles. Consider using a systemic pesticide to provide a 4-week window of treatment.
Mealy Bugs: These fluffy white bugs love hiding in leaf joints. They look kind of like large fluffy lice. They have very visible legs and antennae, and are visibly hairy, ranging from the size of a pin head to the size of a small woodlouse. Mealy bugs can be very difficult to get rid of due to laying eggs inside the stems, in the folds of leaves and within the soil where you can't see them. It can be helpful to change your Epipremnum's substrate if you have a bad mealy bug infestation. The life cycle is 4–7 weeks from egg to adult, so you need to be vigilant for eggs hatching out after the first treatment, and you must keep reapplying pesticides. Consider using a systemic treatment to give you a 4-week window of assistance with your pest infestation. If you can't re-apply the systemic, resort to other listed methods until you can re-apply.
Scale Insects: These hard-shelled pests can be tricky. Solution: Scrape them off gently with a soft brush and spray the plant down with our DIY pesticide listed below.
Scindapsus Safe Pest Treatments
Natural Leaf Wipe: As a preventative and spot treatment, you can wipe leaves with undiluted pure neem oil to give them a gentle shine whilst deterring any pests.
Instant Death: Dab visible plant pests with a cotton swab dipped in rubbing alcohol to send them packing. This is a tried and tested classic method. If the pests don't die instantly when they're drenched in the liquid, or they are large like scale insects, pick them off the plant and put them into a glass with enough alcohol to completely cover them. Few creatures can survive being submerged in pure alcohol.
Natural Homemade Pesticide: If you’re having issues, we would always recommend an insecticidal soap based approach as a first line of defence, as it's much more gentle on your plants. To be effective, the pests must come into contact with the liquid. To make a simple DIY neem oil and soap recipe, mix 1 teaspoon of neem oil with 1/2 teaspoon of insecticidal soap and 1 litre of water. Apply with a spray bottle, ensuring all parts of the plant are covered in the pest spray. You can re-apply this solution every few days without upsetting your plants until there's no more signs of pests.
Natural Pesticide: If you prefer a premixed solution, you can purchase concentrated neem and soap solutions like SB Plant Invigorator that you dilute and apply with a spray bottle. Make sure you follow the directions on the back of the bottle. This premixed natural pesticide is a concentrated formula of horticultural soap and neem oil to help remove pests from your plants naturally and without the use of harsh chemicals. Sprays like this often have added nutrients, so you cannot reapply it every few days as it could burn the plant leaves.
Chemical Pesticide: For a tougher approach, we recommend a systemic pesticide to give the plants a 4-week window of protection to kill all stages of the pest's life cycle without repeated treatments. The only systemic pesticide available in the UK currently is Acetamiprid concentrate. This is known to cause some distortion in new growth immediately after application. To fix Acetamiprid distorted leaves, simply cut the new growth off back to the last healthy point, and your plant should grow back with normal leaves.
Common Problems: Diagnosing and Fixing Scindapsus Plant Woes
Scindapsus Has Yellow Leaves: If your plant has yellowing leaves, it might be overwatered. Solution: Check the soil—if it's soggy, let it dry out and reduce watering. Consider purchasing a digital water meter to take the guesswork out of watering. Also, make sure your pot has good drainage and that your soil recipe is chunky and airy.
Scindapsus Has Brown Leaf Tips: This could be a sign of low humidity or under watering. Monitor your humidity, and if needed, increase your humidity. We don't recommend regularly misting your plant as this can lead to fungal issues. If you proceed, do so with caution and only spray the leaves at night to allow them time to dry before light hits them in the morning.
Scindapsus Has Leggy Growth: If your plant looks more vine than leaves, it might need more light. Most plant species start to look bad when they're not getting their needs met — it's one of the first signs of lighting issues. Try moving your plant to a brighter spot or adding supplemental LED lighting.
Scindapsus Has Root Rot: If the roots are black and mushy, your plant might be suffering from root rot due to overwatering. Cut off the affected roots and repot the plant in fresh soil.
Scindapsus Is Loosing Leaves: If your houseplant is loosing leaves, it could be nothing to worry about and simply a part of the ageing process. As plants make new leaves, they naturally shed the lower leaves that don't get as much light. It doesn't make sense economically for the plant to put all of that energy into a leaf that can't photosynthesise as well as newer ones. Plants love efficiency. The dead leaves go yellow as the plant pulls all the nutrients out of it to recycle for newer leaves. It can be beneficial to leave the dying leaves on the plant until they have gone fully yellow to allow maximum nutrient recycling. If your plant is throwing off more than one or two leaves at a time, then you may need to have a look at your plant care or your plant's environment. One of the biggest causes of premature yellowing of leaves is overwatering or soil that's too dense and stays too wet. It could also be a nutrient deficiency causing the plant to pull the nutrients that it needs from older leaves, causing them to die off. If you don't have a feeding schedule for your plants, it may be worth adding a good quality fertilizer to your plant care routine.

15 Scindapsus Varieties We Love
Scindapsus pictus 'Silver Splash': This variety has a highly pixelated silver pattern on green leaves, creating a stunning visual effect.
Scindapsus pictus 'Silver Hero': Known for its solid silver sheen with minimal green variegation, this variety adds a touch of elegance to any space.
Scindapsus pictus 'Platinum': Featuring silver variegation with green accents, the 'Platinum' variety boasts a refined appearance.
Scindapsus treubii 'Moonlight': This variety showcases silvery leaves with a bold sheen, making it stand out.
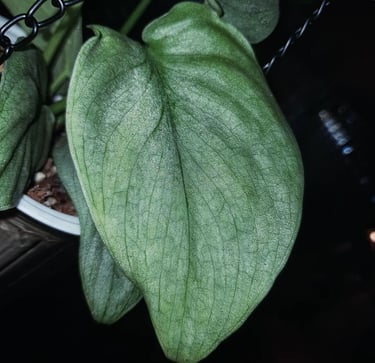
Scindapsus treubii 'Dark Form': With dark-green, nearly black leaves and no silver splash, the 'Dark Form' creates a striking look.
Scindapsus pictus 'Moonlight Mint Variegata': Featuring silvery leaves with green and white variegation, this variety is rare and visually stunning.
Scindapsus pictus 'Silver Cloud': Known for its silver variegation with green accents, the 'Silver Cloud' adds a shimmering effect to your space.
Scindapsus pictus 'Golden Dust': This variety has green leaves with golden speckles, creating a unique and eye-catching look.
Scindapsus pictus 'Exotica': With show-stopping foliage featuring silvery-white splotches, 'Exotica' is a favourite for its striking appearance.
Scindapsus pictus 'Argyraeus': Featuring heart-shaped leaves with white splotches on green foliage, this variety is both classic and beautiful.
Scindapsus pictus 'Silver Sierra': Known for its elongated leaves with reflective silver opalescence, the 'Silver Sierra' is rare and highly sought after.
Scindapsus pictus 'Silver Lady': Known to grow almost like a shingling plant, this unique variety has almost all silver leaves.
Scindapsus pictus 'Silvery Ann': This variety has larger silver patches, creating a striking contrast against the green background.
Scindapsus pictus 'Jade Satin Variegata': Featuring solid green leaves with a matte finish and silver and cream to yellow splashes, this variety is elegant and unique.
Scindapsus pictus 'Gold Dust': Featuring green leaves with golden speckles, 'Gold Dust' is unique and visually striking.

10 Scindapsus Fun Facts
Silver Linings: The beautiful silvery markings on Scindapsus leaves aren't just for show—they help the plant reflect light away from the leaf to protect it from harsh sunlight. This is why certain types of Scindapsus get more silver when you put them in high lighting. Scindapsus however does not like sunlight and the green parts of the leaf will go yellow as the chlorophyll dies off, leaving you with a yellow leaf with perfect silver variegation left on it as it won't be scorched due to the air pocket protecting it.
Cat's Eye: Scindapsus leaves can actually change their orientation slightly to maximize light exposure, like a cat finding the perfect sunbeam. For a fun experiment here, try taking a quick photo of your Scindapsus plant and then turning it around and checking it the same time the next day. We guarantee that those leaves have adjusted to the sun like a satellite!
Airborne Avengers: Just like their Epipremnum cousins, Scindapsus plants are great at purifying the air. They're the silent heroes of your indoor jungle! As they get very big as they mature, they're great houseplants to buy for air purification, and they can be put away on a top shelf and (mostly) forgotten about as they're so low maintenance. Read low, not no. Water ladies and gentlemen, water.
Slow and Steady: While some plants grow like they're in a race, Scindapsus prefers the slow and steady approach, making it perfect for patient plant parents. Although these tree climbers naturally live in the shade, the lower light you give them, the slower they grow, so if yours is at more of a snails pace, try giving it more light — but never full sunlight!
Low-Light Lover: Unlike your sunbathing friend, Scindapsus is quite content in lower light conditions. It’s like the introvert of the plant world—thriving in the cosy corners. It may not grow at a rate which can compete with Usain Bolt, but Pothos is a great plant for darker areas in your home. We do always say that low light will let a plant survive, but not to thrive — and that still applies. We have a great solution with an old trick we learned back at the start of our own houseplant journey here at The Houseplant Shop is to let our Scindapsus get to the size we want before then moving it to a darker spot. Boom. Instant wow factor and no worries about slow growth — best of both worlds.
Water Wisely: Over-watering is a big no-no. Scindapsus would rather dry out a bit between watering. Think of it as the plant equivalent of preferring a brisk walk over a swim. You can buy a digital moisture reader to take the guesswork out of watering your plant. Roots should look like raw ramen noodles. If your roots look more like old soggy cooked ramen, you've got some root rot, most likely caused by overwatering. Chop them off back to some healthy looking raw ramen and let that baby start again. Give it some seaweed extract to help it recover, and let it sit somewhere bright so it can grow those roots back as quickly as possible.
Toxic Twosomes: While Scindapsus plants are beautiful, they can be toxic to pets or humans if ingested. Keep an eye on your furry friends and little ones around these stunning plants.
Heartfelt Leaves: The heart-shaped leaves of Scindapsus make them perfect for adding a touch of love to any space. Who needs heart emojis when you’ve got this plant? Some varieties like Platinum or Argyraeus have even shorter, more traditional heart shaped leaves.
Propagate and Celebrate: Like the other 'Pothos', Epipremnum, Scindapsus is also super easy to propagate. Cut a stem, pop it in water, and voilà—new plant babies! You can also use sphagnum moss, perlite, lecca balls, clay balls or even good old-fashioned soil — although we wouldn't recommend this as it is possibly definitively the slowest method for roots to form!
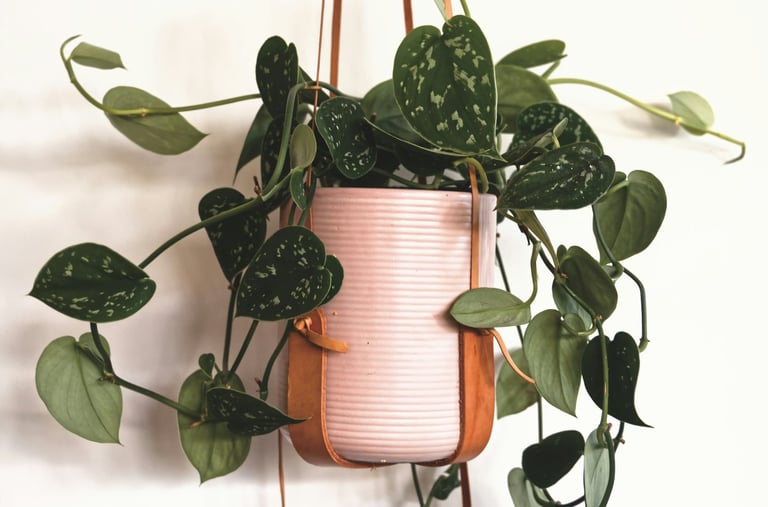
Adaptable Art: Whether you let it trail from a hanging basket or climb up a moss pole, Scindapsus is versatile and can adapt to different display styles. It can get truly majestically, magically big. We have a 8ft x 1.5 ft moss pole with a Pothos on it here. Truly massive. Some varieties get leaves which can grow impressively large, we're talking larger than dinner plates.


Blister Variegation in Scindapsus Plants
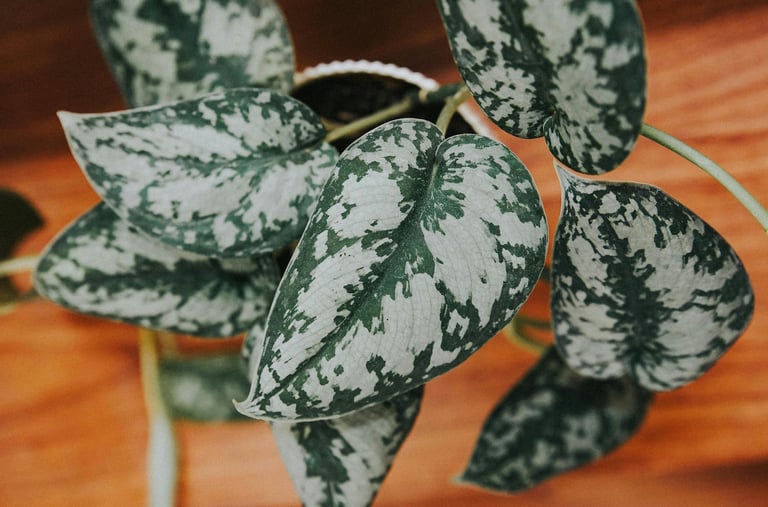
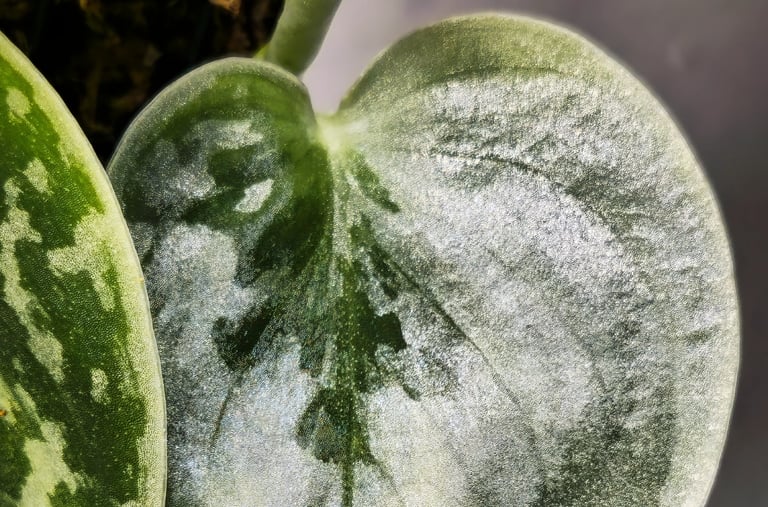
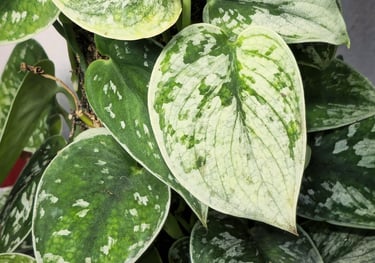
Blister variegation, also known as reflective variegation, is a fascinating phenomenon observed in some Scindapsus plants. This type of variegation occurs when air pockets form between the epidermal layer and the underlying pigmented cells of the leaf as a natural defence mechanism. The trapped air reflects light, creating a silvery or white appearance on the leaf surface. In Scindapsus plants, this variegation is not just visually striking, but also serves an important ecological function.
Mechanism of Blister Variegation
In Scindapsus plants, blister variegation results from the formation of small, reflective air pockets within the leaf tissues. These air pockets disrupt the uniform green colouration of the leaf, leading to patches of silvery or white areas. The reflective quality of these air pockets helps to bounce off excess light, reducing the amount of solar radiation that penetrates the leaf, along with a few other benefits.
Blister variegation acts as a natural sunscreen for Scindapsus plants, with several other benefits. Let's explore why blister variegation is important for Scindapsus to survive:
Blister Variegation Protects The Plant's Chlorophyll: Excessive sunlight can damage chlorophyll molecules, impairing the plant's photosynthetic efficiency. You can see this happening in your Pothos leaves when the green starts to bleach to a sickly yellow colour — this is the chlorophyll dying off. The reflective silver variegation patches help shield the chlorophyll from intense light, ensuring the plant can continue to photosynthesize effectively, even in bright lighting. Intense sunlight would hurt the Scindapsus plant if it didn't have blister variegation to use as a defence mechanism.
Blister Variegation Reduces Heat Absorption: By reflecting a significant portion of incoming sunlight, the leaves stay cooler, preventing overheating and potential cellular damage. Excessive heat on the leaves can damage cells and cause eventual leaf drop.
Blister Variegation Minimizes Water Loss: Lower leaf temperatures reduce the rate of transpiration, conserving water and helping the plant maintain hydration in bright, sunny environments. This allows Scindapsus to thrive in an environment with less than ideal watering conditions, by allowing the plant to conserve the water that would have normally evaporated during transpiration.
Enhanced Light Scattering With Blister Variegated Plants: The reflective surfaces scatter light more evenly across the leaf, optimizing the use of available light for photosynthesis while preventing hotspots that could lead to photodamage. Think of them like light reflectors for plants — great efficiency.
Ecological and Aesthetic Benefits of Blister Variegation
In addition to their protective role, blister-variegated plants add unique visual appeal to interiors and are one of the most popular houseplants worldwide. Blister variegated plants develops more intense variegation in bright lighting, providing a visual guide to help find the right lighting conditions for the plant. Here at The Houseplant Shop, we found that sweet spot with our Scindapsus Silver Ann, and now she gives us almost all silver leaves. The shimmering, silver-speckled foliage of a Scindapsus is not only attractive, but also indicative of the plant's ability to adapt to and thrive in varying light conditions.
Overall, blister variegation in Scindapsus plants represents a remarkable adaptation, enabling them to balance the benefits of sunlight for photosynthesis with the need to protect themselves from excessive light and heat. If you only take away one thing from reading this, remember that Scindapsus plants get more variegated when the light is more intense, as it's a natural defence mechanism to bright light.


Scindapsus Overview
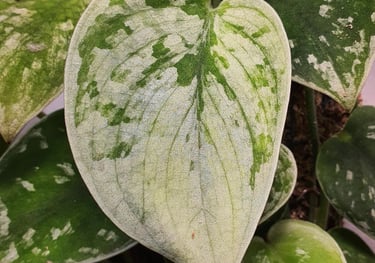
Scindapsus, also known as Satin Pothos or Silver Vine, is a popular houseplant cherished for its stunning foliage and ease of care. This plant boasts heart-shaped leaves adorned with striking variegation patterns, ranging from silvery splashes to bold green and even rare pink variegation.
Key Features Of Scindapsus Plants
Low Maintenance: Scindapsus thrives in a variety of light conditions, from low to bright indirect light, making it an adaptable choice for any indoor space — remember what we discussed regarding lighting needs for variegation.
Air Purifying: Known for its proven air-purifying properties, Scindapsus helps remove toxins from the air, contributing to a healthier living environment.
Versatile Growth: It can be grown as a trailing vine, climbing plant, up a moss pole or even in a hanging basket, providing endless display possibilities.
Easy Propagation: Scindapsus is easy to propagate, allowing plant enthusiasts to multiply their greenery with minimal effort.
Whether you're a seasoned plant parent or a beginner, Scindapsus makes a delightful and rewarding addition to your indoor garden. With its unique beauty and resilience, this plant is sure to bring a touch of nature's charm to any home
Edited & Fact Checked By: The Houseplant Shop
Article Published: 12th November 2024

About The Houseplant Shop:
Independent Houseplant Nursery
Horticultural Specialists
Managing Over 250 Houseplant Species Onsite
Over 15 Years Of Experience With Horticulture
As head of horticulture, Sarah manages the care and propagation of over 250 plant species at a commercial houseplant nursery. With over 15 years of experience in horticulture, specializing in houseplants, Sarah has extensive expertise in plant biology, soil science, and integrated pest management. She continually reviews and integrates the latest research into her plant care guides. Dedicated to educating others, Sarah has spent years diagnosing houseplant care issues and sharing her real-world experience. Her commitment to scientific accuracy and helping people diagnose plant health issues has established her as a trusted authority and expert in the field.
The Houseplant Shop is a dedicated houseplant nursery, growing all of their own stock from their botanical library of over 250 houseplant species. The nursery staff are horticultural experts who have dedicated their lives to cultivating and nurturing over 250 different species of houseplants, focusing on Aroids, tropical plants, and NOID collectables. All their plants are grown in house in Britain to be more environmentally friendly. The nursery is proud to have been featured by the Royal Horticultural Society (RHS) as a 100% peat free nursery.
Recommended Further Reading:
People also looked at: Houseplant Watering, Guide To Moss Poles For Indoor Plants, Self Watering Moss Poles, and A-Z Houseplant Encyclopedia.
How We Reviewed This Article:
Our horticultural experts continually monitor the houseplant space, and we update our articles when new information becomes available. We are committed to providing current and reliable information. If you have some information that you think would be helpful in this article, we'd love to hear from you. Our team works hard to revise articles for factual accuracy, and we regularly update our pages with new information, techniques, tips, images, trade secrets, and real world experience from the team here at the houseplant nursery. You can find a list of the article updates below.
Written By: Sarah Brooks, Head of Horticulture
Article Received: 7th November 2024
Copyright: The Houseplant Shop (https://thehouseplant.shop)
The use, distribution, or reproduction is permitted, provided the original copyright owner is credited and that the original publication on this website is cited with a direct link to the article, only with these terms. Any other use is not permitted.
List of Article Updates:
20th December 2024: Minor UI updates
14th January 2025: Added new images
Author Bio:
Author: Sarah Brooks,
Head of Horticulture at The Houseplant Shop


