The Ultimate Guide: How To Sterilize Soil
Sterilizing Soil Menu
Quickly navigate this page to find any topic in the article
Skip Straight To How To Sterilize Soil
What's Wrong With Potting Soil?
Unfortunately, when soil is transported to the shops, it is often infected with contaminants which can harm your plant or cause pest infestations. Sterilizing your soil is vital for maintaining a healthy growing environment. This process explains how to eliminate harmful pathogens, pests, and weed seeds from your soil, ensuring that your plants thrive.
In this guide, we’ll cover how to sterilize various components, including soil, soil ingredients, sphagnum moss, and commercial potting soil. Each of these elements can harbour contaminants that threaten plant health, however, not all soil can be sterilized. We will cover this in more detail later on.
By properly sterilizing soil, you'll provide your plants with the clean, nurturing environment they need to flourish. Stay with us as we delve into the specifics of each component, offering detailed methods to help you safely sterilize your soil.
Pests, Eggs & Weed Seeds Contaminate Soil
When purchasing soil it is frequently contaminated with live pests, pest eggs, weed seeds, pathogens, bacteria, and fungi. The dreaded fungus gnat often comes in with soil mixes! This is not normally due to the manufacturer's actions or a lack of care, although some less reputable suppliers are well known to use contaminated soil, so be careful when choosing a soil brand.
Even if soil manufacturers make every effort to sterilize their soil before dispatch, pests, eggs, and seeds can still make their way into the soil during the transport of the soil bags along the supply chain. They can also become contaminated when stored outdoors or in warehouses with old windows that allow in bugs. Contamination usually happens because the manufacturers put holes in the bags to allow the soil mixes to breathe, which allow in pests, bacteria, and fungi. The benefit of the holes is that the soil doesn't get mouldy before it arrives with you, however, the downside to this is that pests can infest the soil before it arrives with you.
Sometimes, no matter how much you spend on your potting soil, you can still run into issues with pests and unwanted guests. Even when making your own DIY houseplant soil mix, if even one of the soil ingredients is contaminated, the whole mix can become infected. For this reason, it is recommended to sterilize your soil before potting your plants.
How To Store Soil To Avoid Contamination With Pests
Properly storing soil is essential to prevent contamination from pests, pest eggs, weed seeds, fungus, mould, and pathogens. Here are some best practices to ensure your soil remains clean and ready for use:
Clean and Dry Containers: Choose containers that are clean, dry, and sealable. Plastic bins with tight-fitting lids or heavy-duty plastic bags are ideal. Before filling them with soil, ensure they are free from any residual dirt or organic matter that could harbour contaminants. This helps create a barrier against pests and environmental factors.
Store In Cool, Dry Places: Moisture is a breeding ground for fungi, mould, and pests. Store your soil in a cool, dry location such as a shed, garage, or basement. Avoid areas with high humidity or temperature fluctuations. If possible, elevate the containers off the ground to prevent contact with damp surfaces.
Use Desiccants: Adding desiccant packets to your storage containers can help keep the soil dry. Desiccants absorb excess moisture, reducing the risk of mould and fungal growth. Silica gel packets are a common and effective choice.
Regular Inspection: Periodically check your stored soil for any signs of contamination. Look for mould growth, foul odours, or the presence of pests. If you find any issues, address them immediately by removing the affected soil and treating the storage area.
Sterilize Tools & Containers: Ensure that any tools or containers you use with your soil are clean and sterilized. Dirty tools can introduce contaminants even to previously sterile soil. Regularly cleaning and sterilizing your tools will help maintain the soil’s purity.
Separate Old & New Soil: If you have different batches of soil, keep them separate to avoid cross-contamination. Label your containers with the date of storage to ensure you use the oldest soil first.

Why Sterilize Potting Soil?
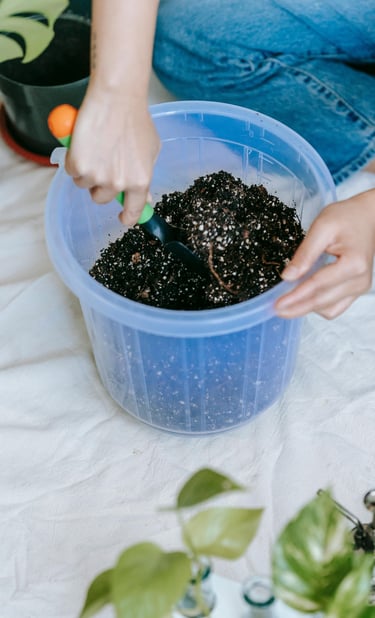
Sterilizing soil removes the contaminants we covered above, including pathogens, bacteria, fungi, live pests, pest eggs and weed seeds. By sterilizing your soil mix, you're ensuring that you don't have unwanted weeds sprouting in your plant pot, or pests crawling across your houseplant's leaves.
Sterilizing houseplant soil ensures that you don't get any nasty surprises after repotting your plant. When disturbing our plant's roots, we're already creating high stress levels for our plants. For this reason, it's always best to avoid adding contaminants that could cause the plant to get go into shock. When plants are stressed, they have a weakened immune system, and it's much easier for pests, bacterial or fungal infections to take a hold. When plants are already stressed, they may not be able to deal with these issues very well, and they're more likely to die.
If you're reading this because your plant is already in distress due to contaminated soil, we recommend using a seaweed extract biofertilizer to enhance soil microbiology and to give your plant a fighting chance against the infection or infestation.
Why Sterilize Propagation Materials?
Propagating plants is a delicate act of providing the right environment and maintaining good health of the cutting before new roots develop. When using unsterilised soil, it can be difficult to get propagation right because of bacteria, fungus, and pests infesting your propagation medium and killing your cutting. To give cuttings the best chance of survival, it's important to offer them a sterile soil to avoid root rot, mould, and fungus preventing your cutting from developing roots, and ultimately causing propagation to fail. Make sure to check which soil ingredients can't be sterilized before treating your propagation medium, as not all components are suitable for sterilization.

The Benefits Of Sterilizing Soil
Although it may seem trivial to some, any plant keeper that has had a full scale home invasion of pests will understand why sterilizing potting soil is a crucial step in some plant care routines. Sterilizing soil allows you to be confident that the soil doesn't contain any pathogens, seeds, pests or eggs, which allows you to use the potting mix without fear of an infestation.
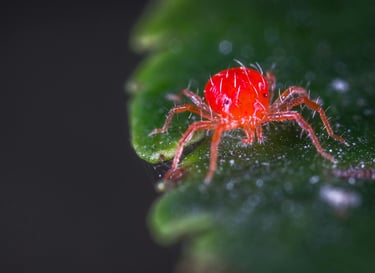
Some pests can be very easy to deal with, however, pests like Spider Mites or Mealy Bugs can be seriously exhausting to eradicate, costing both time and money to fix. When a plant keeper has a large collection of houseplants, it can be very upsetting to find pests on your plants. Another thing worth mentioning is repotting expensive or rare plants — when dealing with expensive collections there's even more reason to be cautious as plants can be irreplaceable or extremely cost prohibitive to replace.
Brands That Sterilize Their Soil During The Manufacturing Process
Some brands of soil that offer pre-sterilized or sterile options include:
Miracle-Gro Potting Mix: Known for its consistent makeup, Miracle-Gro offers sterilized potting mixes that are free from weed seeds, pests, and diseases when bagged.
FoxFarm Ocean Forest Potting Soil: This brand provides a sterilized soil mix that is rich in nutrients and beneficial for plant growth.
Black Gold All-Purpose Potting Soil: Black Gold offers a sterilized potting soil that is suitable for a variety of plants, ensuring a healthy growing environment.
Pro-Mix BX: Pro-Mix offers a range of sterilized potting soils that are designed to promote strong root development and overall plant health.
These brands ensure that their soil products are free from harmful pathogens and weed seeds, providing a clean and safe medium for your plants to thrive. If you're looking for pre-sterilized soil, these options are a great place to start, however, always remember that these unwanted guests can contaminate the soil between leaving the warehouse and arriving at your door.
Most contaminated soil is infected along the supply chain through improper transport, storage, exposure to pests as well as the elements. Mould and fungus can enter the soil mixes at any time throughout storage due to the holes the manufacturers make in the soil bag. Ironically, the holes they use to try to stop the soil getting mouldy or overrun with fungus are the same way that the soil bags get infected with contaminants — through the aeration holes in the bag.

The Best Way To Sterilize Soil For Plants
The most effective way to kill pests in soil is heat treatment, specifically steaming. This method is highly efficient at eliminating a wide range of soil-borne pests, pathogens, and weed seeds. By exposing the soil to high temperatures, you can effectively sterilize it without the use of chemicals.
Steaming ensures that the soil is free from harmful organisms by heating the soil to a temperature that is lethal to these unwanted organisms without causing harm to the soil's structure or beneficial organisms when done properly. Additionally, weed seeds are unable to survive these high temperatures, preventing future weed growth. We will explore the best ways to treat each type of soil mix, and individual soil ingredients later on in this how-to guide.
The advantage of steaming is that when done properly, it targets harmful organisms while preserving the soil's physical and chemical properties. This method is generally preferred over chemical treatments, which can leave residues that might be harmful to plants and the environment. Furthermore, steam sterilization is quick and effective, making it a practical choice for both home gardeners and commercial growers.


The Issues With Sterilizing Soil
Sterilizing soil can be vital for plant health, however, it comes with certain challenges. One major issue is that sterilization can kill beneficial microorganisms, which are crucial for soil health and plant growth. Another concern is the alteration of soil structure and nutrient balance; high temperatures can compact the soil and degrade essential nutrients.
Chemical sterilization, although effective, can leave harmful residues and pose environmental risks. Additionally, the practicality of soil sterilization can be a challenge, especially for large-scale operations, due to the cost and labour involved.
Overall, while soil sterilization is a powerful tool, it's important to weigh these potential drawbacks and choose the method that best suits your needs. Check which soil components cannot be sterilized before treating any of your soil.
What Soil Components Can't Be Sterilized Safely
When it comes to houseplant soil mixes, most components can be sterilized, but a few are challenging or not recommended for sterilization due to their nature. Here are some of the houseplant soil mix components that can't be effectively sterilized:
Perlite — Heat treatment isn't suitable for perlite, but you can use chemical sterilization safely instead.
Orchid Bark or Wood Chips: High temperatures can cause the bark to lose its beneficial structure and nutrients, diminishing its effectiveness.
Coco Coir: While it's generally safe to use, it may dry out excessively when heated and lose some of its moisture-retaining properties.
Compost: Sterilizing organic matter such as compost is largely okay, but always ensure any soil component that shouldn't be heated, like perlite, is kept separate during the sterilization process.
Worm Castings: You can sterilize castings if you want, but heat will kill the beneficial organisms within the worm castings, which plants love. Part of why we use worm casting sis because of the high microbial activity, sterilizing it kills the organisms and prevents the castings from providing those additional benefits to the plant.
Fish Meal: The proteins and nutrients in fish meal can break down and lose their effectiveness when exposed to heat.
Blood Meal: Similar to fish meal, the high temperatures can degrade the proteins and nutrients in blood meal.
Manure: The beneficial bacteria and organic matter in manure can be negatively affected by heat or chemicals.
For these components, it’s best to source them from reputable suppliers and ensure they are free from contaminants to begin with, rather than attempting to sterilize them.
List Of Every Type Of Soil Sterilization Methods
Heat-Based Methods
Steaming: Using a pressure cooker or steam sterilizer to heat the soil thoroughly.
Oven Sterilization: Baking soil in an oven works well to eliminate contaminants.
Microwave Sterilization: Heating moistened soil is highly effective.
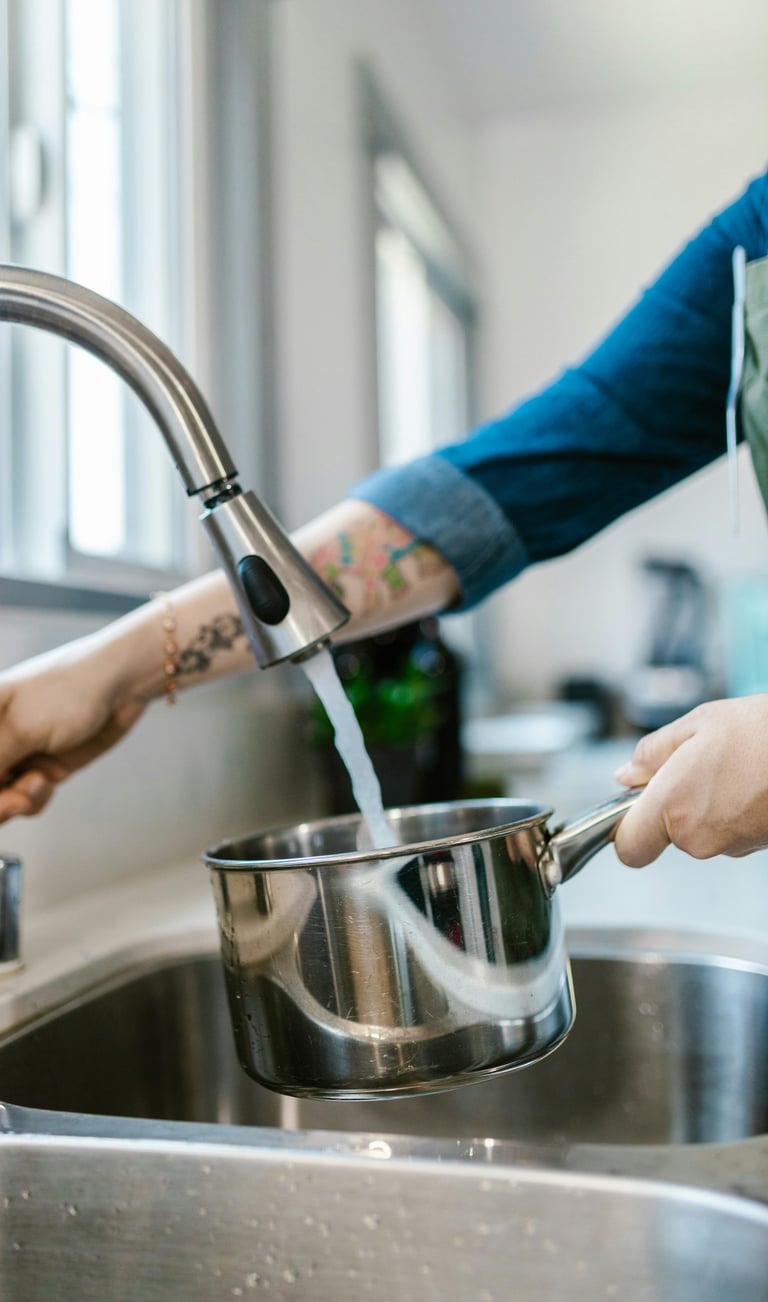
Boiling: Boiling soil is the most effective sterilization method.
Solarization
Solarization: Covering moist soil with clear plastic sheets and leaving it in direct sunlight helps to kill pathogens and weed seeds. This method is highly effective in sunny, warm climates.
Chemical Methods
Hydrogen Peroxide: Great chemical sterilization action, but requires rest before use.
Potassium Permanganate: Similar to peroxide, still requires rest before use.
Vinegar: Suitable for minor sterilization, not as effective as previous methods
Baking Soda: Suitable for minor sterilization, not as effective as previous methods
Isopropyl Alcohol: Suitable for minor sterilization, not as effective as previous methods
Professional Methods
Gamma Radiation: Used in industrial settings to sterilize soil using high-energy radiation. Not suitable for most household applications.
Autoclaving: Using an autoclave to apply heat and pressure to sterilize soil. This method is common in laboratory settings and is not suitable for home use.
Each of these methods has its advantages and disadvantages, and the choice of method depends on your specific needs, resources, and the scale of your gardening project. For a complete step by step how to guide, keep reading or follow the links.

Soil Sterilization Method Quick Links
How to sterilize soil by using steam
How to sterilize soil by using an oven
How to sterilize soil by using a microwave
How to sterilize soil by using boiling
How to sterilize soil by using solarization
How to sterilize soil by using hydrogen peroxide
How to sterilize soil by using potassium permanganate
How to sterilize soil by using vinegar
How to sterilize soil by using baking soda
How to sterilize soil by using alcohol
How to sterilize soil by using gamma radiation
How to sterilize soil by autoclaving
How To Sterilize Soil With Microwave Sterilization: A Detailed Guide
Microwave sterilization is a quick and efficient method for sterilizing small batches of soil, making it an excellent choice for home gardeners. Here’s a step-by-step guide to help you sterilize soil using a microwave:
Materials Needed:
Soil to be sterilized
Microwave-safe containers (e.g., glass or plastic containers)
Plastic wrap or a microwave-safe lid
Water
Step-by-Step Instructions:
Sort Through the Soil and Check Moisture
Remove Debris: Begin by removing any gravel, bark, rocks, sticks, and roots from the soil. This ensures even heat distribution during sterilization.
Moisten the Soil: Lightly moisten the soil. It should be lightly damp but not soaking wet. Moisture helps conduct heat more effectively during the sterilization process.
Fill the Microwave-Safe Containers
Containers: Place the soil in microwave-safe containers. Ensure the containers are not more than two-thirds full to allow for expansion and even heating.
Cover with Plastic Wrap: Cover the containers loosely with plastic wrap or use a microwave-safe lid. Poke a few small holes in the plastic wrap to allow steam to escape.
Set Up the Microwave
Microwave Settings: Place the container in the microwave. Set the microwave to high power.
Sterilize the Soil in the Microwave
Heating Time: Microwave the soil on high for about 90 seconds per kilogram (2 pounds) of soil. This should be sufficient to kill most pathogens and pests.
Monitoring: Keep an eye on the soil to ensure it doesn’t dry out or overheat. Adjust the time as needed based on your microwave's power.
Cooling the Soil Whilst Covered
Let It Cool: After microwaving, carefully remove the container from the microwave. Let the soil cool down completely whilst keeping it covered. This prevents re-contamination by airborne pathogens.
Storage and Using the Soil
Storage: If you’re not using the soil on the day of treatment, store it in a covered container to keep it free from pests.
Use: When ready to use, ensure your pots and tools are also clean to prevent infection.
By following this guide, you’ll effectively sterilize your houseplant soil, providing a safe and healthy environment for your plants to thrive. Microwave sterilization is a convenient method for small batches and ensures thorough sterilization without the need for specialized equipment.

How To Sterilize Soil With Boiling: A Detailed Guide
Boiling soil is a simple yet effective method for sterilizing small batches, eliminating harmful pathogens, pests, and weed seeds. Here’s a step-by-step guide to help you sterilize soil using the boiling method:
Materials Needed:
Soil to be sterilized
Large pot or boiling container
Heat source (e.g., hob or camping stove)
Water
Fine mesh strainer or colander
Step-by-Step Instructions:
Remove Debris and Moisten
Remove Debris: Start by removing debris, such as roots, stones, and twigs. This ensures evenly distributed heat when boiling and more efficient sterilization.
Moisten Your Soil: Lightly moisten soil until damp but never wet. The damp soil helps conduct heat more effectively, aiding the sterilization process.
Boil the Water
Fill the Pot: Fill a large pot or boiling container with water. The amount of water should be sufficient to submerge the soil completely.
Bring to Boil: Place the pot on a heat source and bring the water to a rolling boil.
Sterilize the Soil Mix
Add Soil to Boiling Water: Carefully add the soil to the boiling water. Ensure that the soil is entirely submerged.
Boil the Soil: Boil the soil for about 10–15 minutes. This duration is sufficient to kill most pathogens, pests, and seeds in the soil.
Drain the Soil Mix
Remove from the Heat: After boiling, carefully remove the pot from the heat source.
Strain the Soil: Use a strainer or colander to drain the water from the soil. Be cautious as the soil and water will be hot.
Allow to Cool: Spread the strained soil on a clean, heat-proof surface to cool down fully. This prevents re-contamination by airborne pathogens.
Long Term Storage and Soil Use
Storage: If you’re not using the soil on the day of sterilization, store it in a container with a lid to keep it safe for plants.
Use: When ready to use, check your tools and plant pots are clean to maintain the sterility.
By following these steps, you’ll effectively sterilize your soil using the boiling method, providing a safe and healthy environment for your plants to flourish. This method is convenient for small batches and ensures thorough sterilization without the need for expensive specialized equipment.


How To Sterilize Soil With Solarization: A Detailed Guide
Sterilizing soil with the sun is an environmentally friendly method for sterilizing soil using the natural solar heat. It's particularly effective in warm, sunny climates and can help eliminate pests, pathogens, and weed seeds. Here’s a step-by-step guide to help you sterilize soil using solarization:
Materials Needed:
Soil to be sterilized
Clear plastic sheets (preferably 2-4 mm thick)
Garden hose or watering can
Weights or soil staples
Step-by-Step Instructions:
Prepare the Soil & Clear The Area
Clear the Area: Remove any plants, chunks, and large clumps from the soil surface. Remove all debris. The area should be flat and free of obstructions.
Till the Soil: Use a garden trowel or tiller to loosen the soil to a depth of about 30 cm (12 inches). This ensures better heat penetration and distribution.
Moisten the Soil
Water the Soil: Thoroughly water the soil to ensure it’s moist. Wet soil conducts heat better and enhances the effectiveness of solarization.
Cover with Plastic Sheets
Lay the Plastic: Spread clear plastic sheets over the moist soil. Clear plastic is more effective than black plastic because it allows sunlight to penetrate and heat the soil.
Secure the Edges: Use soil staples, rocks, or weights to secure the edges of the plastic sheets. Ensure that the plastic is in direct contact with the soil and that there are no gaps where air can escape.
Solarization Process
Duration: Leave the plastic in place for 4–6 weeks during the hottest part of the year. The sun sterilization process relies on solar heat to raise soil temperatures high enough (about 60 °C or 140 °F) to kill harmful organisms.
Monitoring: Regularly check the plastic for any damage or displacement and repair if necessary.
Remove the Plastic
End of Process: After 4–6 weeks, carefully remove the plastic sheets. The soil underneath should be dry and free of pests, pathogens, and weed seeds.
Use the Sterilized Soil as Usual
Planting: You can now use the sterilized soil for planting. Be sure to handle the soil with clean tools and containers to keep it sterile.
Solarization is a cost-effective and eco-friendly method that uses the sun’s natural energy to sterilize soil. This method not only eliminates harmful organisms but also helps improve soil structure and health over time, whilst getting you out in the sunshine if even for only a little while!


How To Sterilize Soil With Hydrogen Peroxide: A Detailed Guide
Hydrogen peroxide is an effective and safe chemical method for sterilizing soil. It helps kill pathogens, pests, and weed seeds without leaving harmful residues. Here’s a step-by-step guide to help you sterilize soil using hydrogen peroxide:
Materials Needed:
Soil to be sterilized
3% hydrogen peroxide solution
Water
Gloves (optional)
Step-by-Step Instructions:
Prepare the Houseplant Soil & Remove Debris
Remove Debris: Start by removing any large debris, such as rocks, sticks, and roots, from the soil. This helps ensure even distribution of the hydrogen peroxide solution.
Prepare the Hydrogen Peroxide Solution
Mix the Solution: In a large container or bucket, mix one part 3% hydrogen peroxide with one part water. For example, if you are using 1 litre (about 4 cups) of hydrogen peroxide, mix it with 1 litre of water.
Ensure Proper Dilution: This dilution is important to ensure that the hydrogen peroxide effectively sterilizes the soil without causing harm to beneficial soil properties.
Apply the Peroxide Solution to the Soil
Pour the Solution: Slowly pour the hydrogen peroxide solution over the soil, ensuring even coverage. You can use a watering can for more controlled application.
Mix the Soil: Use a garden spade or hands (with gloves) to mix the soil thoroughly, ensuring that the solution reaches all parts of the soil.
Allow the Soil Mix to Sit Overnight
Rest Period: Let the soil sit for 24 hours. During this time, the hydrogen peroxide will break down into water and oxygen, which helps to kill pathogens and pests.
Aerate: After 24 hours, aerate the soil by spreading it out in a thin layer and allowing it to dry. This helps to dissipate any remaining hydrogen peroxide and ensures the soil is ready for planting.
Storage and Use
Storage: If you’re not using all the sterilized soil all at once, store it in a lidded container.
Use: When ready to use, check tools and pots are also clean.
Hydrogen peroxide is an effective and environmentally friendly method for sterilizing soil, providing a safe and healthy growing environment for your plants. By following these steps, you can ensure your soil is free from harmful pathogens and pests, promoting better plant growth.


How To Use Vinegar For Soil Sterilization
Using vinegar to sterilize soil can be a natural and straightforward method, particularly for spot-treating weeds and surface-level pathogens. However, it is important to note that vinegar is not as effective as other sterilization methods for deeply embedded pathogens, pests, and weed seeds. Here’s a step-by-step guide on how to use vinegar to sterilize soil, along with an explanation of its limitations.
Materials Needed:
White vinegar (5% acetic acid concentration)
Water
Step-by-Step Instructions:
Prepare the Vinegar Solution
Mix the Solution: In a spray bottle, mix one part white vinegar with one part water. This dilution ensures the vinegar is strong enough to kill surface-level organisms without being too harsh on the soil.
Prepare the Soil Mix
Clear the Area: Remove any large debris, such as rocks, sticks, and roots, from the soil surface. This helps the vinegar solution to penetrate more effectively.
Till the Soil: Use a garden trowel or tiller to loosen the top layer of soil. This increases the contact area for the vinegar solution.
Apply the Vinegar Solution
Spray the Soil: Evenly spray the vinegar solution over the soil surface, ensuring thorough coverage. Focus on areas with visible weeds or suspected contamination.
Repeat as Necessary: For best results, reapply the vinegar solution every few days for about a week. This helps ensure that any newly sprouted weeds or pathogens are also treated.
Allow the Soil to Sit to Rest
Rest Period: Let the soil sit for several days after the final application. This allows the vinegar to break down and kill surface-level organisms.
Rinse the Soil Mix (Optional)
Rinse the Soil with Water: If you plan to plant immediately after treatment, lightly rinse the soil with water to neutralize any remaining vinegar. This helps reduce the acidity that could affect plant growth.
Limitations of Vinegar Sterilization
While vinegar can be effective at killing surface-level weeds and some pathogens, it has several limitations:
Surface Treatment Only: Vinegar does not penetrate deeply into the soil, so it is less effective at killing deeply embedded pathogens, pests, and weed seeds.
Not Comprehensive: It may not kill all types of soil-borne pathogens and pests, particularly those that are resilient or located deeper in the soil.
Acidity: Vinegar increases soil acidity, which can impact plant growth. This requires careful management and possible soil pH adjustment after treatment.
For more comprehensive soil sterilization, methods like steaming, solarization, chemical treatments (hydrogen peroxide or potassium permanganate), and autoclaving are generally more effective. These methods provide thorough sterilization by reaching deeper layers of soil and eliminating a broader range of pathogens, pests, and weed seeds. By understanding the strengths and limitations of vinegar sterilization, you can make informed decisions about the best method to use for your specific gardening needs.


How To Sterilize Soil With Baking Soda: A Detailed Guide
Using baking soda as a soil treatment can help manage fungal infections and certain pests. While it isn't a comprehensive soil sterilization method, it can be a helpful supplementary treatment. Here's a step-by-step guide on how to use baking soda to treat your soil:
Materials Needed:
Baking soda (sodium bicarbonate)
Water
Step-by-Step Instructions:
Prepare the Potting Soil
Remove Debris: Begin by removing debris like rocks, sticks, and roots. This helps ensure even application of the baking soda solution.
Till the Soil: Use a garden trowel or tiller to loosen the top layer of soil. This increases the contact area for the baking soda solution.
Prepare the Baking Soda Solution
Mix the Solution: In a spray bottle, mix 1 tablespoon of baking soda with 4 litres (1 gallon) of water. Shake the bottle well to ensure the baking soda is fully dissolved.
Optional Additives: For enhanced effectiveness, you can add a few drops of mild liquid soap. This helps the solution adhere better to soil particles and plant surfaces.
Apply the Baking Soda Solution to the Soil
Spray the Soil: Evenly spray the baking soda solution over the soil surface, ensuring thorough coverage. Focus on areas where you have observed fungal infections or pest problems.
Mix the Soil: Use a trowel or tiller to mix the solution into the soil. This ensures better contact with soil-borne pathogens and pests.
Allow the Soil to Absorb
Rest Period: Let the soil sit for a few hours to absorb the baking soda solution. This gives it time to act on fungal spores and pests.
Reapply as Needed: Depending on the severity of the issue, you may need to reapply the solution once a week for several weeks to achieve the desired effect.
Monitor the Soil and Plants
Observation: Regularly check your soil and plants for signs of improvement. Baking soda can help control fungal growth and deter certain pests, but it won't eliminate all soil-borne issues.
Limitations of Baking Soda Treatment
While baking soda can help manage specific fungal infections and pests, it has its limitations:
Limited Depth: Baking soda primarily affects the top layer of soil and may not reach deeply embedded pathogens or pests.
Non-Sterilizing: It does not provide comprehensive sterilization and is best used in combination with other methods.
Potential Plant Sensitivity: Some plants may be sensitive to baking soda, so it's important to test a small area first to ensure there are no adverse effects.
For thorough soil sterilization, methods like steaming, solarization, chemical treatments, and autoclaving are more effective. Baking soda can be a useful supplementary treatment for managing specific issues in your garden.


How To Sterilize Soil With Gamma Rays: A Detailed Guide
This method uses high-energy gamma radiation to achieve sterilization, which requires special machines not usually available to the public. Gamma radiation machines are typically accessible to hospitals, medical facilities, research institutions, and certain industrial facilities. If you're lucky enough to access one of these specialist machines, always check with your senior staff before using any work equipment to sterilize your soil. These machines, often using Cobalt-60 or Cesium-137 as radiation sources, are primarily used for sterilizing medical equipment, pharmaceuticals, and certain food products. Gamma ray sterilization is a highly effective method for eliminating pathogens, pests, and weed seeds from soil. Gamma radiation doesn't impact soil density or soil moisture retention levels. Here’s a step-by-step guide to help you sterilize soil using gamma rays:
Materials Needed:
Soil to be sterilized
Gamma radiation source (e.g., Cobalt-60 or Cesium-137)
Radiation shielding and safety equipment
Radiation dosimeter
Clean containers for storing sterilized soil
Step-by-Step Instructions:
Prepare the Soil
Remove Debris: Start by removing any large debris, such as rocks, sticks, and roots, from the soil. This ensures even distribution of the gamma radiation.
Moisten the Soil: Lightly moisten the soil. It should be damp but not soaking wet. Moist soil conducts heat better and enhances the effectiveness of gamma radiation.
Set Up the Gamma Radiation Source
Safety Precautions: Ensure that you have proper radiation shielding and safety equipment in place. Gamma radiation is highly penetrating and can be dangerous, so it’s crucial to follow all safety protocols.
Calibrate the Dosimeter: Use a radiation dosimeter to measure the dose of gamma radiation. The typical dose for soil sterilization ranges from 10 to 20 kGy (kilograys).
Sterilize the Soil
Place the Soil in Containers: Place the soil in clean containers that are suitable for gamma irradiation. Ensure the containers are not too thick to allow proper penetration of the gamma rays.
Expose to Gamma Radiation: Expose the soil to gamma radiation for the required dose. The exposure time will depend on the dose rate of the gamma source and the amount of soil being sterilized. For example, a dose of 10 kGy might require several hours of exposure.
Allow the Soil to Cool
Cooling Period: After exposure, allow the soil to cool down completely. This prevents re-contamination by airborne pathogens.
Storage and Use
Storage: Store the sterilized soil in clean, covered containers to maintain its sterility.
Use: When ready to use, ensure your tools and planting containers are also clean to maintain the soil’s sterility.
By following these steps, you can effectively sterilize your soil using gamma rays, providing a safe and healthy environment for your plants to grow. Gamma ray sterilization is a reliable method that ensures thorough sterilization without the use of chemicals.


How To Sterilize Soil With Autoclaving: A Detailed Guide
Autoclaves are typically accessible to hospitals, medical facilities, dental clinics, research laboratories, and some industrial settings. These facilities use autoclaves to sterilize medical instruments, laboratory equipment, and other items that require high-level disinfection. If you're lucky enough to have access to one of these machines, always check with your senior staff before using it to sterilize soil. Access to autoclaves is usually restricted to trained personnel who follow strict safety protocols to ensure proper operation and maintenance. Autoclaving is a highly effective method for sterilizing soil, using high pressure and steam to kill pathogens, pests, and weed seeds. This method is commonly used in laboratory settings due to its precision and reliability. Here’s a step-by-step guide to help you sterilize soil using an autoclave:
Materials Needed:
Soil to be sterilized
Autoclave machine
Autoclave-safe containers (e.g., metal or heat-resistant plastic containers)
Aluminium foil
Water
Step-by-Step Instructions:
Prepare and Moisten the Soil
Remove Debris: Start by removing any large debris, such as rocks, sticks, and roots, from the soil. This ensures even distribution of heat during the autoclaving process.
Moisten the Soil: Lightly moisten the soil. It should be damp but not soaking wet. Moist soil helps conduct heat more effectively, aiding the sterilization process.
Fill the Autoclave-Safe Containers
Containers: Place the soil in autoclave-safe containers. Ensure the containers are not more than two-thirds full to allow for proper steam circulation.
Cover with Foil: Cover the containers loosely with aluminium foil to prevent contamination while allowing steam to penetrate the soil.
Set Up the Autoclave
Load the Autoclave: Place the containers of soil into the autoclave. Make sure the containers are spaced apart to allow steam to circulate freely.
Add Water: Ensure the autoclave has enough water to generate steam. Follow the manufacturer’s instructions for adding water and preparing the autoclave.
Start the Machine to Sterilize the Soil
Program the Autoclave: Set the autoclave to 121 °C (250 °F) and 15 psi (pounds per square inch) of pressure. The typical duration for soil sterilization is 30 minutes at this setting.
Run the Autoclave: Start the autoclave and let it run for the programmed time. The high temperature and pressure will effectively kill any pathogens, pests, and weed seeds in the soil.
Cooling the Potting Soil
Allow to Cool: After the autoclave cycle is complete, allow the autoclave to cool down before opening it. This prevents sudden temperature changes that could affect the soil or containers.
Remove and Cool: Carefully remove the containers from the autoclave and let the soil cool down completely while still covered with foil to prevent re-contamination.
Soil Storage and Use
Storage: If you’re not using the soil immediately, store it in a clean, covered container to keep it sterile.
Use: When ready to use, ensure your tools and planting containers are also clean to maintain the soil’s sterility.
Autoclaving is a reliable method that ensures thorough sterilization of soil, making it ideal for laboratory use and precise applications. By following these steps, you can effectively sterilize your soil, providing a safe and healthy environment for your plants to grow.
Summary Of Sterilizing Potting Soil At Home
Sterilizing soil is essential for creating a healthy growing environment for plants by eliminating harmful pathogens, pests, and weed seeds, and it offers several benefits. We've explored a variety of soil sterilization methods, each with its unique advantages, disadvantages, and practical applications. Heat-based treatments such as steaming, oven sterilization, microwave heating, and boiling effectively use high temperatures to purify the soil. Solarization, which leverages the sun's natural heat, is an eco-friendly method ideal for warm climates. Chemical treatments, including hydrogen peroxide and potassium permanganate, offer efficient alternatives, although they require careful handling.
For more specialized needs, gamma radiation and autoclaving provide precise and thorough sterilization, commonly used in professional and certified facilities due to the need for specialized equipment and strict safety protocols. Additionally, we've discussed best practices for storing soil to prevent contamination, emphasizing the importance of clean, dry containers and regular inspections.
Overall, understanding and applying these sterilization techniques ensures a pest-free, pathogen-free medium, promoting robust plant health and growth. With careful consideration and the right approach to sterilizing soil, you can effectively maintain the sterility of your soil, fostering a thriving environment for your gardening projects.

The Science Behind Sterilizing Houseplant Soil
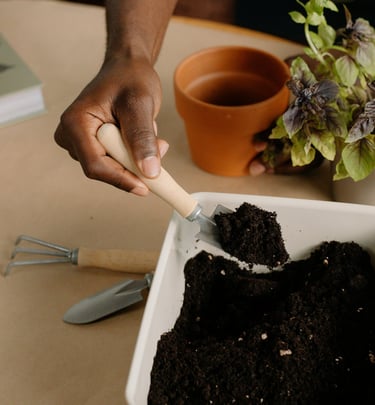
Sterilizing soil is a scientific process aimed at eliminating harmful microorganisms, pests, and weed seeds to create a healthy growing environment for houseplants. The effectiveness of soil sterilization is rooted in understanding the biology and ecology of these unwanted organisms and applying appropriate treatments to disrupt their life cycles.
Microorganisms & Pathogens
Bacteria: Soil contains various bacteria, some of which are beneficial, while others can cause diseases. Pathogenic bacteria, such as Pseudomonas and Erwinia, can lead to root rot, wilting, and other plant diseases. Sterilization methods target these harmful bacteria by disrupting their cell walls and denaturing their proteins, rendering them inactive.
Fungi: Fungal pathogens like Fusarium, Pythium, and Rhizoctonia are common in houseplant soils. These fungi can cause damping-off, root rot, and other diseases. Sterilization processes eliminate fungal spores and hyphae by applying heat or chemical treatments that disrupt their cellular structures and reproductive abilities.
Viruses: While less common in soil, certain plant viruses can persist in organic matter and infect plants through their roots. Soil sterilization helps to eliminate these viruses by breaking down their genetic material, preventing them from replicating and spreading.
Pests & Insects
Nematodes: Parasitic nematodes, such as root-knot nematodes, can cause significant damage to houseplants by feeding on their roots. Sterilization methods kill these nematodes by exposing them to high temperatures or chemical treatments that disrupt their physiological processes.
Insect Larvae: Soil can harbour insect larvae, such as fungus gnat larvae, which feed on organic matter and plant roots. By sterilizing the soil, these larvae are eliminated, reducing the risk of pest infestations and subsequent plant damage.
Weed Seeds
Weed seeds can be present in soil and compete with houseplants for nutrients, water, and light. Soil sterilization destroys these seeds by applying heat or chemical treatments that disrupt their germination processes. This ensures that the growing medium remains free of unwanted plants that could affect houseplant health.
Thermal Sterilization
Heat: Thermal sterilization methods, such as steam and oven treatments, rely on applying high temperatures to the soil. Heat denatures proteins and nucleic acids within pathogenic organisms, leading to cell death. This process also disrupts the structural integrity of insect larvae and weed seeds, rendering them non-viable.
Pasteurization: Pasteurization involves heating soil to lower temperatures than traditional sterilization but for longer periods. This method effectively kills pathogens and pests while preserving beneficial microorganisms that contribute to soil health. Pasteurization strikes a balance between eliminating harmful organisms and maintaining a biologically active growing medium.
Chemical Sterilization
Oxidizing Agents: Chemical sterilization uses oxidizing agents, such as hydrogen peroxide or bleach, to kill pathogens and pests. These agents work by breaking down cell membranes and denaturing proteins, leading to cell death. Chemical sterilization is effective, but must be used carefully to avoid harming beneficial soil organisms and plants.
Ecological Considerations
While sterilizing soil is beneficial for creating a clean growing environment, it also disrupts the natural balance of soil microorganisms. Beneficial bacteria, fungi, and other microorganisms contribute to soil health by decomposing organic matter, cycling nutrients, and promoting plant growth. After sterilization, it's important to reintroduce beneficial microorganisms through compost, biofertilizers, or other amendments to restore soil health and support plant growth.
By understanding the science behind soil sterilization, indoor gardeners can appreciate the importance of creating a pathogen-free growing environment while also considering the ecological impact on beneficial soil organisms. This knowledge helps in making informed decisions about soil management and plant care.
Edited & Fact Checked By: The Houseplant Shop
Article Published: 3rd December 2024


About The Houseplant Shop:
Independent Houseplant Nursery
Horticultural Specialists
Managing Over 250 Houseplant Species Onsite
Over 15 Years Of Experience With Horticulture
As head of horticulture, Sarah manages the care and propagation of over 250 plant species at a commercial houseplant nursery. With over 15 years of experience in horticulture, specializing in houseplants, Sarah has extensive expertise in plant biology, soil science, and integrated pest management. She continually reviews and integrates the latest research into her plant care guides. Dedicated to educating others, Sarah has spent years diagnosing houseplant care issues and sharing her real-world experience. Her commitment to scientific accuracy and helping people diagnose plant health issues has established her as a trusted authority and expert in the field.
The Houseplant Shop is a dedicated houseplant nursery, growing all of their own stock from their botanical library of over 250 houseplant species. The nursery staff are horticultural experts who have dedicated their lives to cultivating and nurturing over 250 different species of houseplants, focusing on Aroids, tropical plants, and NOID collectables. All their plants are grown in house in Britain to be more environmentally friendly. The nursery is proud to have been featured by the Royal Horticultural Society (RHS) as a 100% peat free nursery.
Recommended Further Reading:
People also looked at: Soil Recipes For Different Species, Cactus Soil Recipe, Houseplant Soil Recipe, Watering, and Fertilizer.
How We Reviewed This Article:
Our horticultural experts continually monitor the houseplant space, and we update our articles when new information becomes available. We are committed to providing current and reliable information. If you have some information that you think would be helpful in this article, we'd love to hear from you. Our team works hard to revise articles for factual accuracy, and we regularly update our pages with new information, techniques, tips, images, trade secrets, and real world experience from the team here at the houseplant nursery. You can find a list of the article updates below.
Written By: Sarah Brooks, Head of Horticulture
Article Received: 24th November 2024
Copyright: The Houseplant Shop (https://thehouseplant.shop)
The use, distribution, or reproduction is permitted, provided the original copyright owner is credited and that the original publication on this website is cited with a direct link to the article, only with these terms. Any other use is not permitted.
List of Article Updates:
20th December 2024: Minor UI updates
22nd December 2024: Formatting
4th January 2025: Major UI menu update
Author Bio:
Author: Sarah Brooks
Head of Horticulture at The Houseplant Shop


